GitLab integration method - Fast
Gives Jit maintainer-level access to your GitLab projects
Step-by-step guide for the 'Fast' integration method
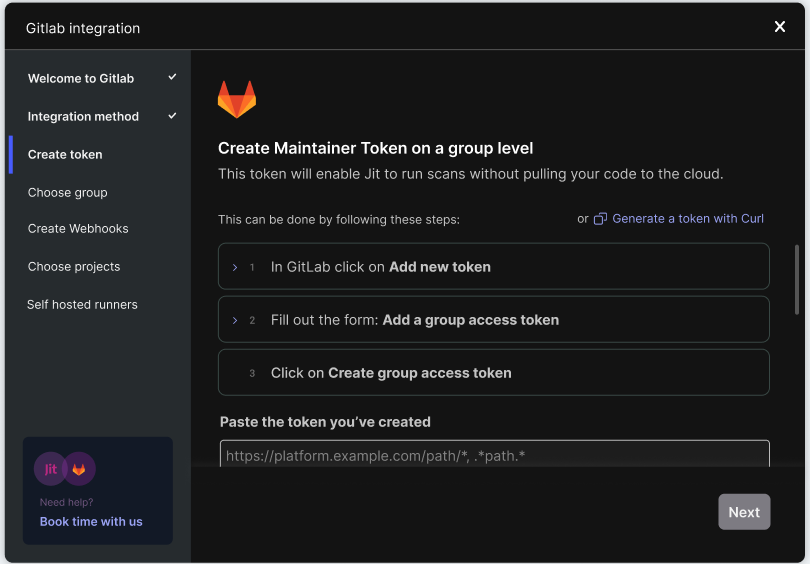
Create Token
The "Fast" method requires a token to grant Jit access to your GitLab projects with maintainer-level permissions. This token is essential for automating security scans and ensuring Jit can monitor your repositories. By using a token, you maintain control over the permissions granted, aligning with your security preferences.
Follow these steps to create a group access token:
- In GitLab, navigate to 'Group → Settings → Access tokens.’
& click 'Add new token.' - Fill out the form for 'Add a group access token' with the following data:
| Field | Value |
|---|---|
| Token name | Any name of your choice |
| Expiration date | 1 year |
| Role | Maintainer |
| Scope | api |
- Click on Create group access token.
- Paste the token you’ve created to the designated place.
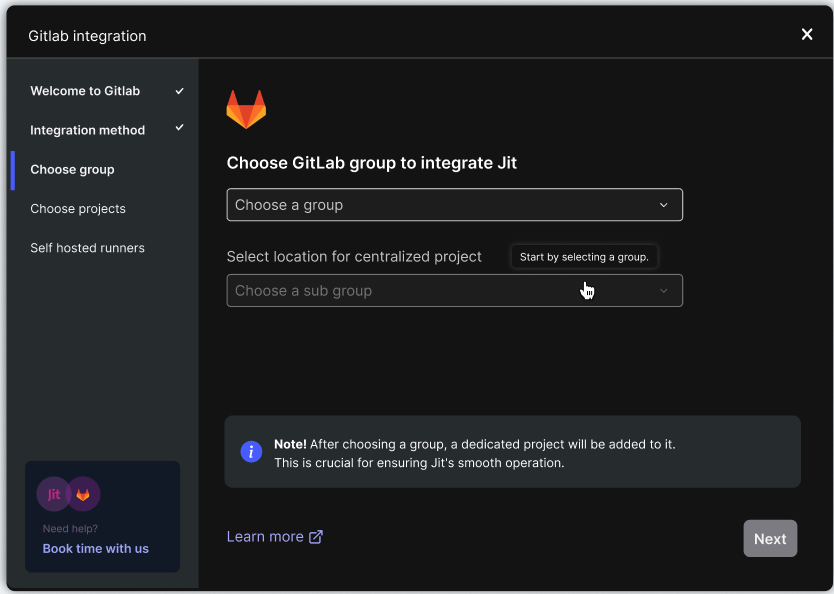
Choose a Group
First, select the group you want Jit to integrate with from the first dropdown menu. Note that Jit integrates with only one group to simplify setup and ensure a streamlined security process. In the next step, Jit will create a dedicated project within the selected group to ensure smooth operation. This dedicated project allows Jit to run scans locally without ever pulling your code to the cloud.
By default, the project is created in the group's root folder. Using the second dropdown menu, you can select a specific subgroup for the dedicated project if you prefer a different location.
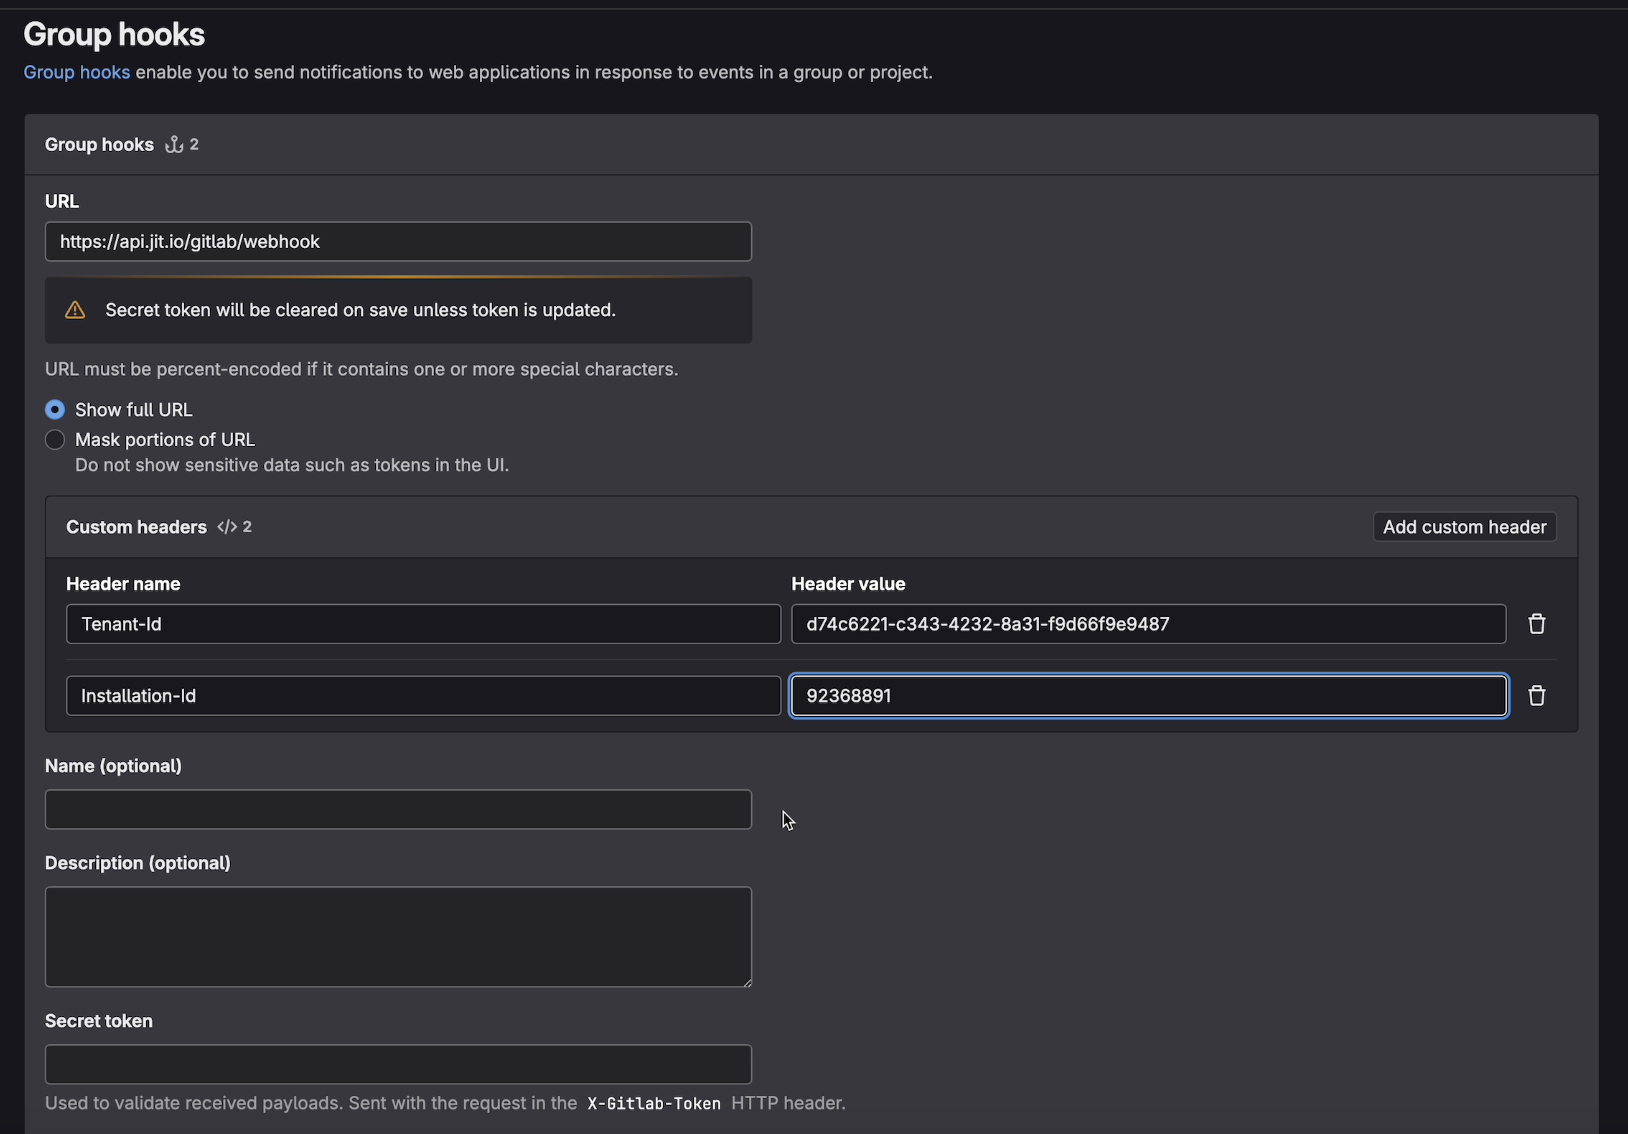
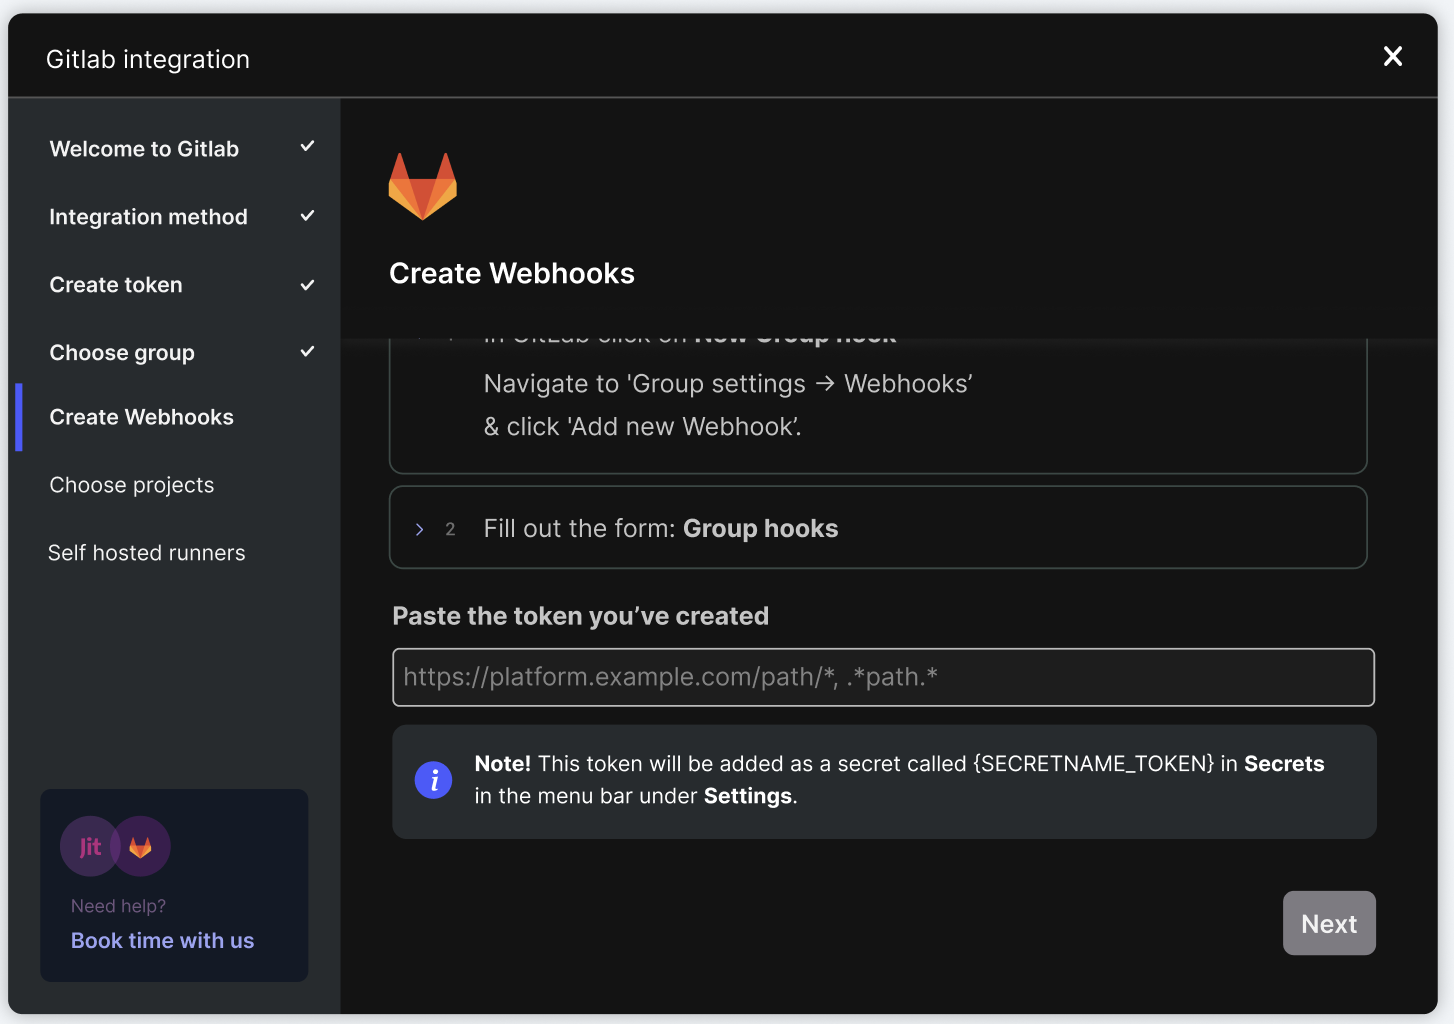
Create Webhooks
The "Fast" method requires you to manually create webhooks to enable Jit to trigger security scans for new merge requests, code changes, and new repository creation. Webhooks ensure that Jit receives the necessary notifications to initiate scans, providing real-time monitoring without requiring elevated permissions and scanning new repositories without the user having to add them to coverage manually. Follow these steps to set up webhooks in GitLab:
- In GitLab, Navigate to Group Settings > Webhooks and click add a new webhook
- Fill out the form using the following data:
| Field | Value |
|---|---|
| URL | https://api.jit.io/gitlab/webhook |
| Header Name | Tenant-Id |
| Header Value | Will be provided by Jit (the internal ID of your Jit Tenant) |
| Header Name | Installation-Id |
| Header Value | the group ID you plan to integrate with |
| Secret Token | choose a password |
| Trigger | Choose: - Push events (Wildcard pattern) - Comments - Subgroup events - Merge request events - Deployment events |
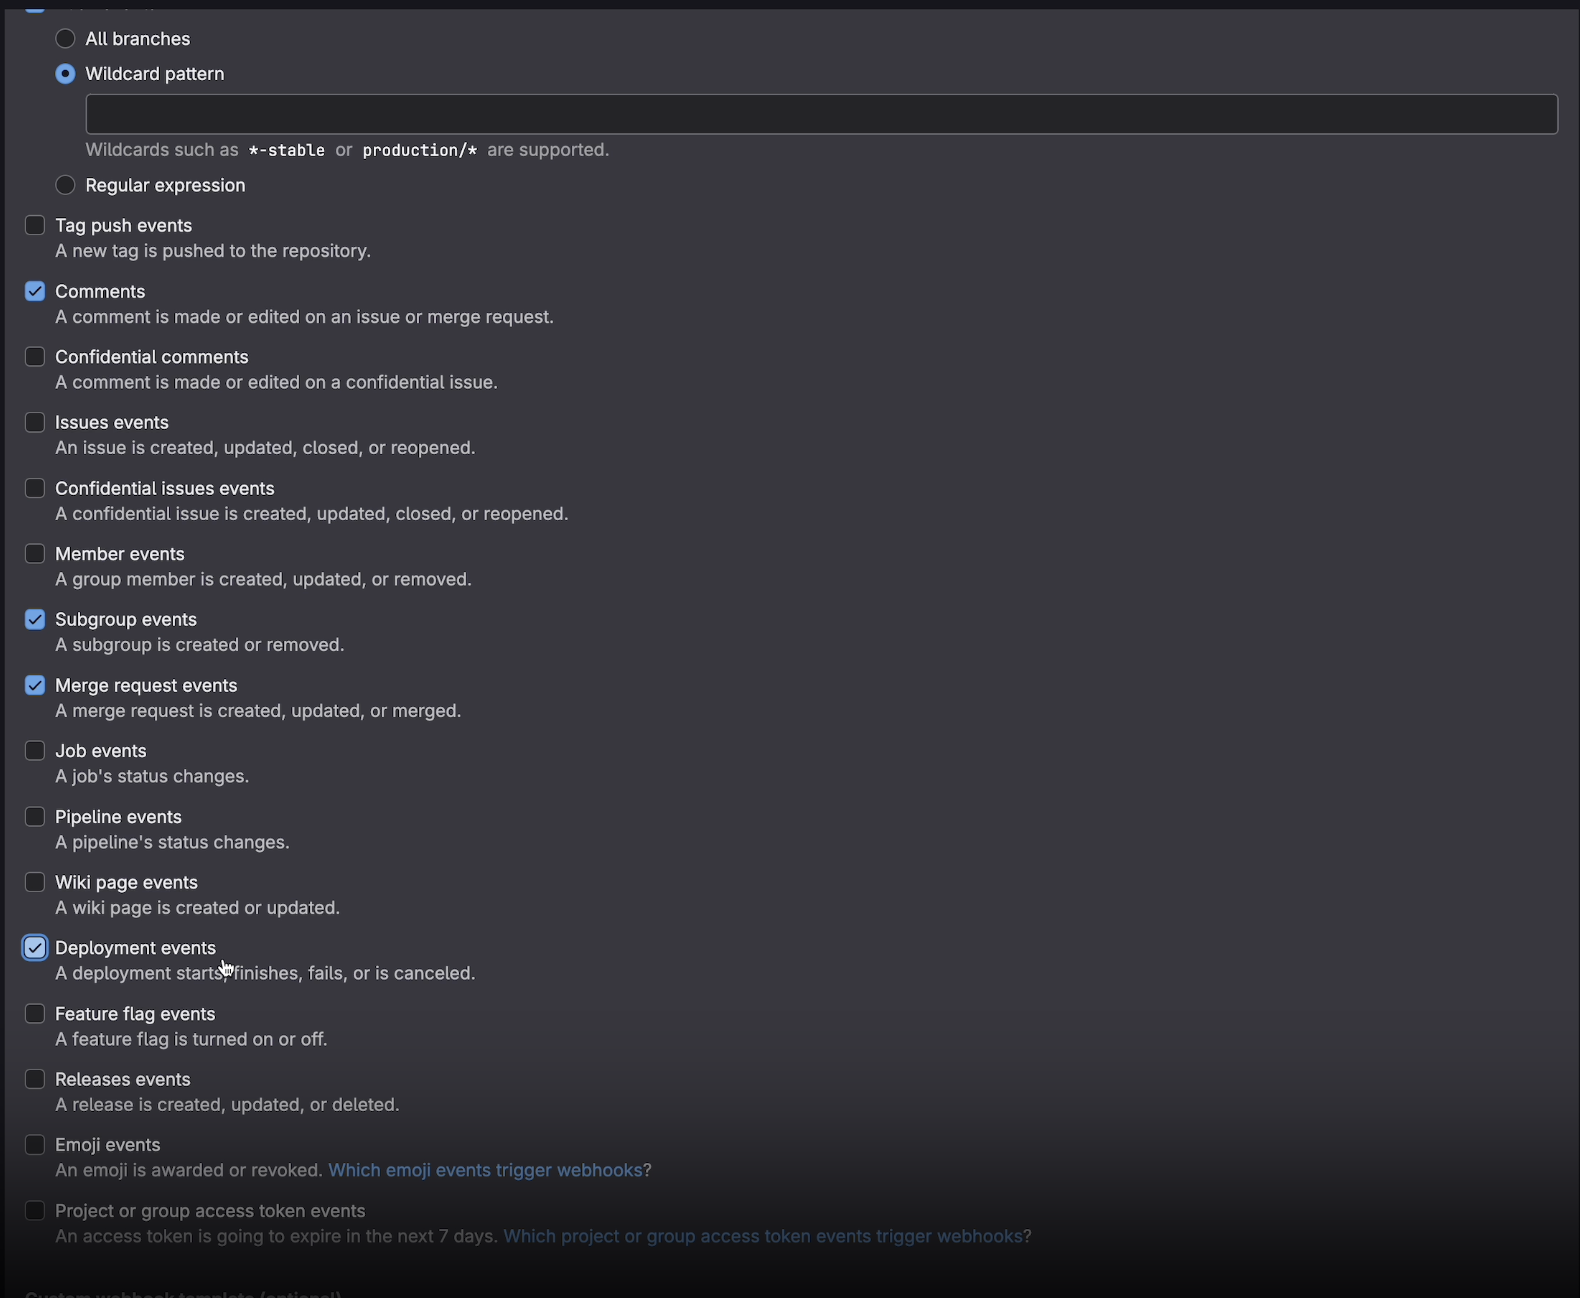
- Press 'add webhook'
- Paste the token you’ve created to the designated place in Jit's installation wizard
Once the webhooks are created, we’ll validate them to ensure they are configured correctly.
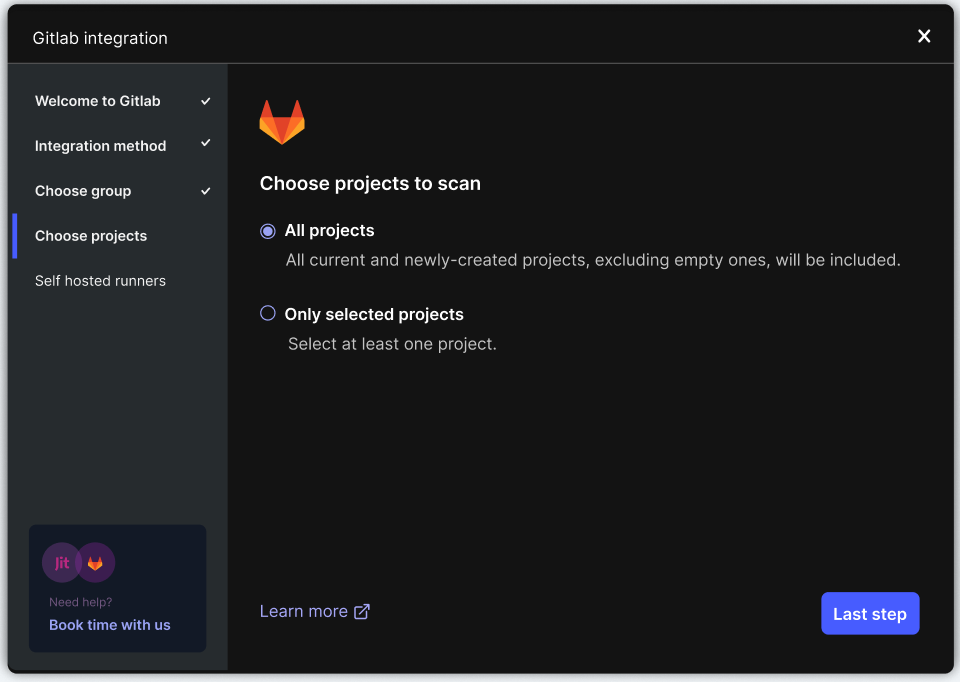
Choose Projects
Choose which projects you would like Jit to cover:
Recommended: Select All projects to protect existing and newly created repositories automatically. This option ensures that Jit scans all repositories for security vulnerabilities, including new ones, without requiring any manual configuration. When needed, repositories can later be excluded in Manage Resources.
Alternatively, you can choose to have Jit cover only selected projects by selecting the second option. This allows for more granular control but requires manual updates to add new repositories to Jit’s coverage.
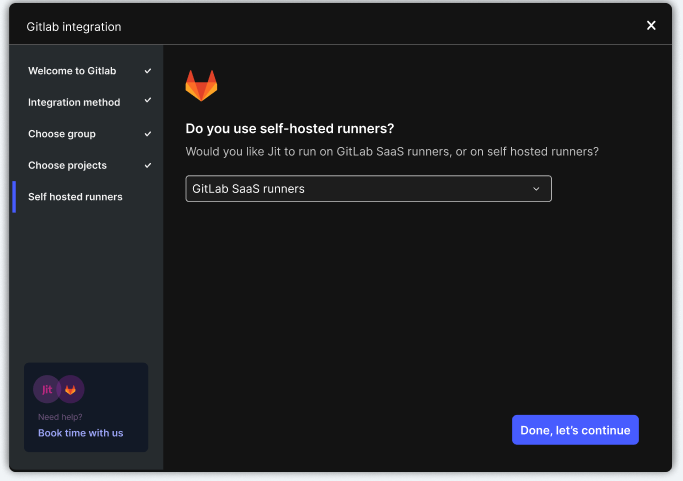
Self-Hosted Runners
Specify whether you want to use GitLab SaaS runners or self-hosted runners. Once you make a selection, we’ll validate the runner configuration to ensure Jit has the required access.
- If you choose self-hosted runners, you will be directed to an additional configuration process.
- If you choose SaaS runners, the setup will proceed automatically.
Done!
Congratulations! Your GitLab integration is now complete. After pressing the 'Start Scanning' button, the scan will begin. You can then start monitoring your repositories via Jit and access detailed onboarding reports in the dashboard.

Updated 11 days ago