Jira Integration
Integrating with Jira
Integrating Jira with Jit streamlines the process of assigning security-related tickets directly to Engineering and Security teams from the Jit platform. Learn more about this here.
Jit supports 2 methods of Jira integration. One is straight through the web app (recommended), and the other is through as-code configuration (old version).
Web app integration (recommended)
Quickstart
-
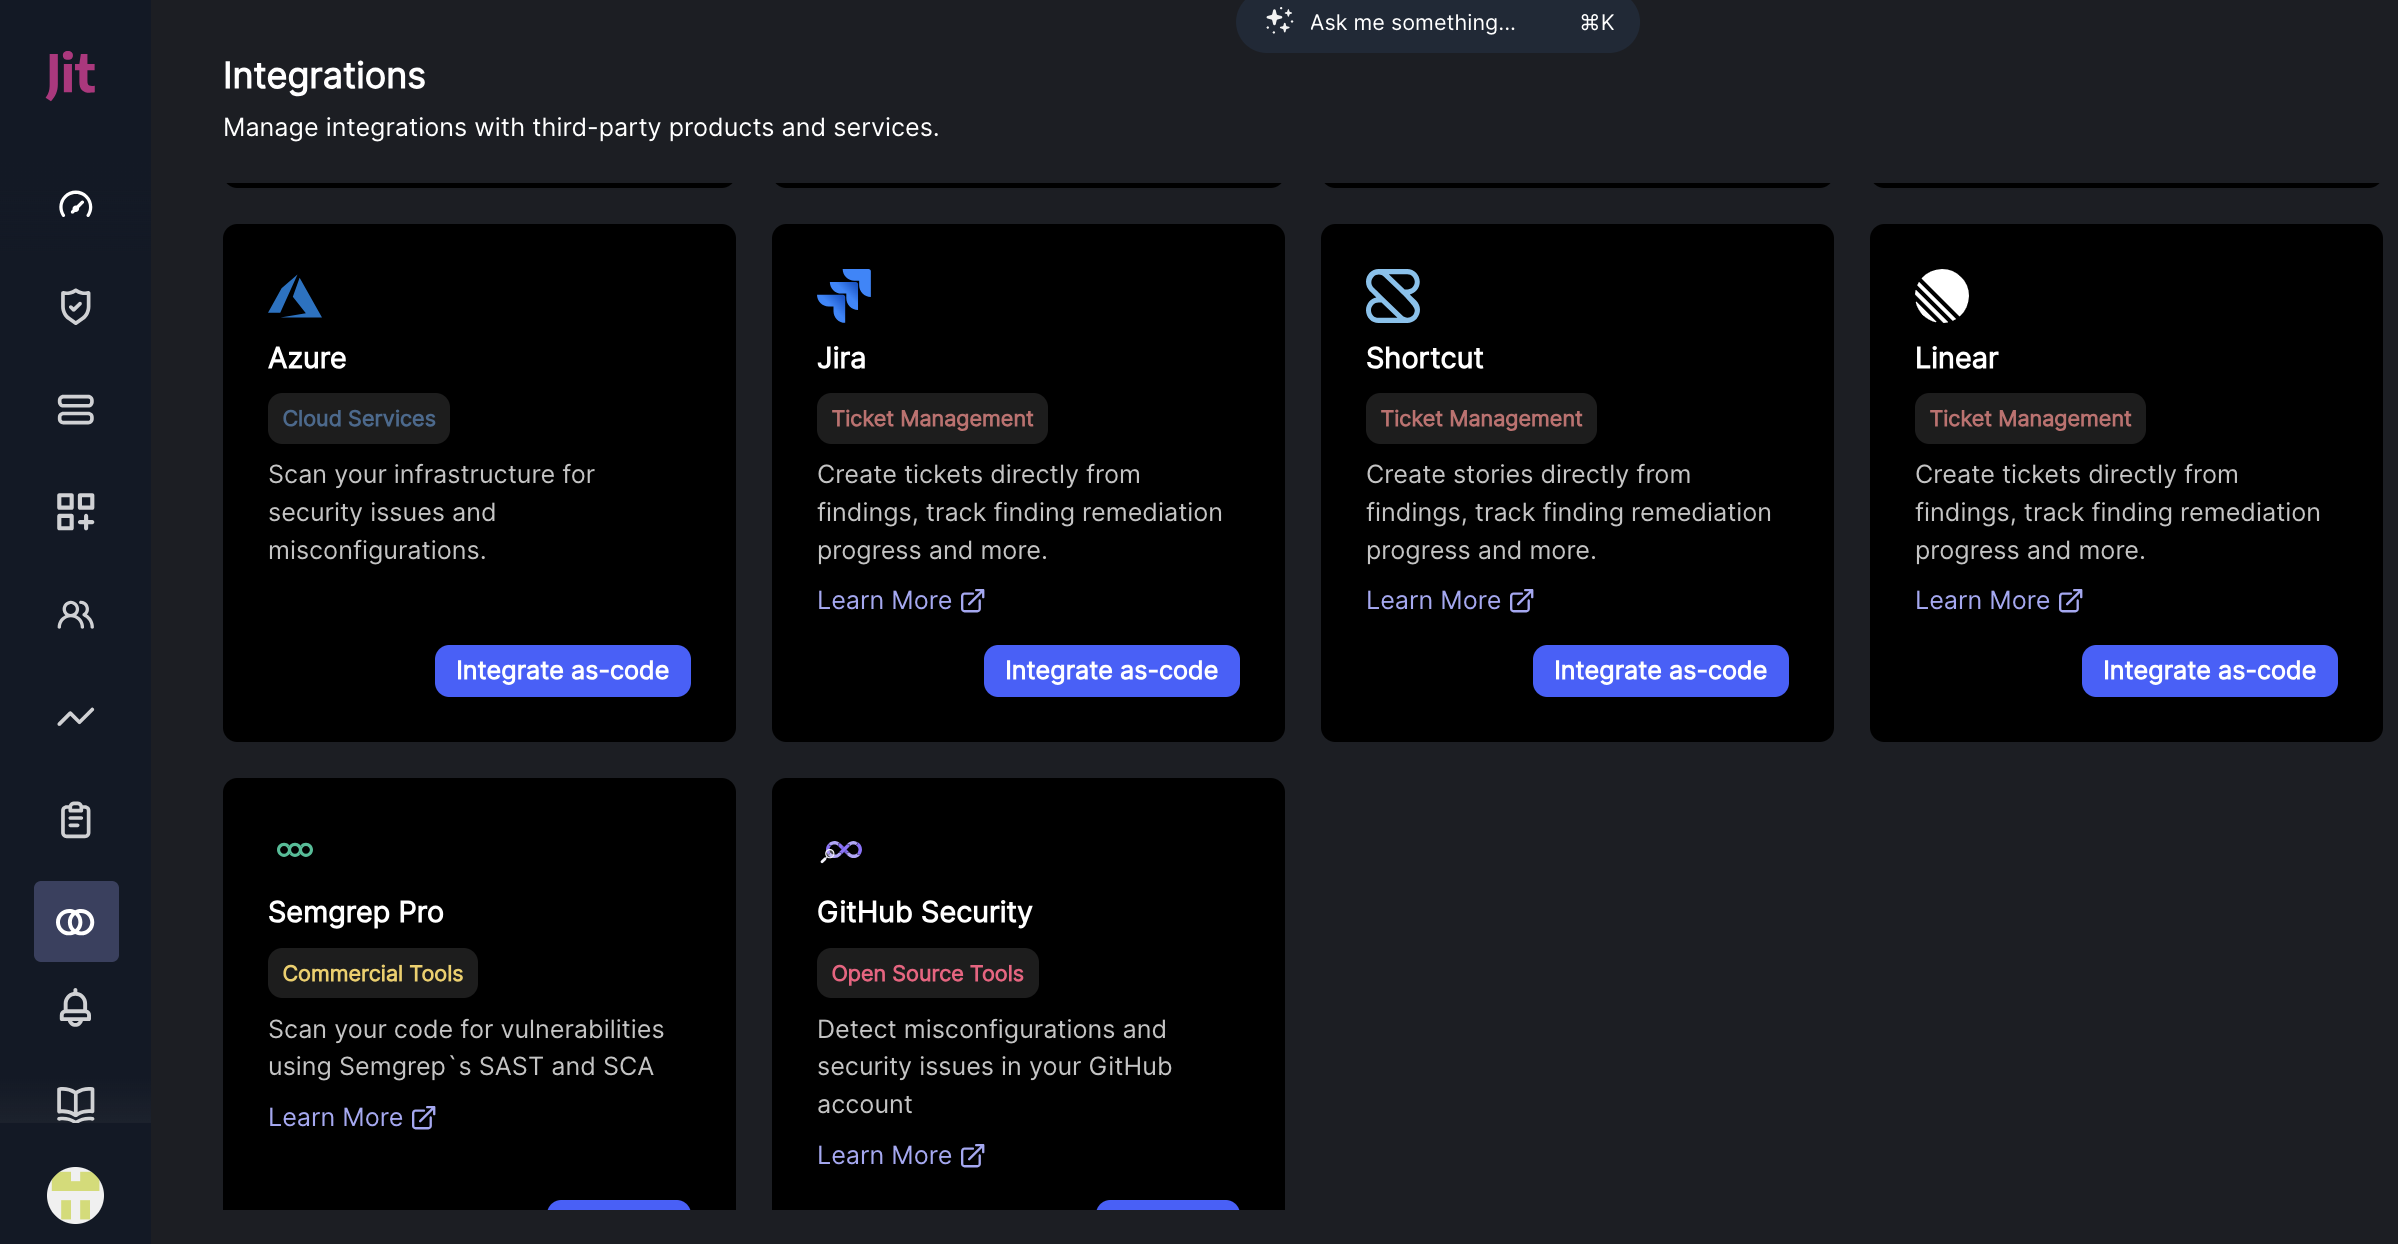
In Jit's webapp, go to the Integrations page:
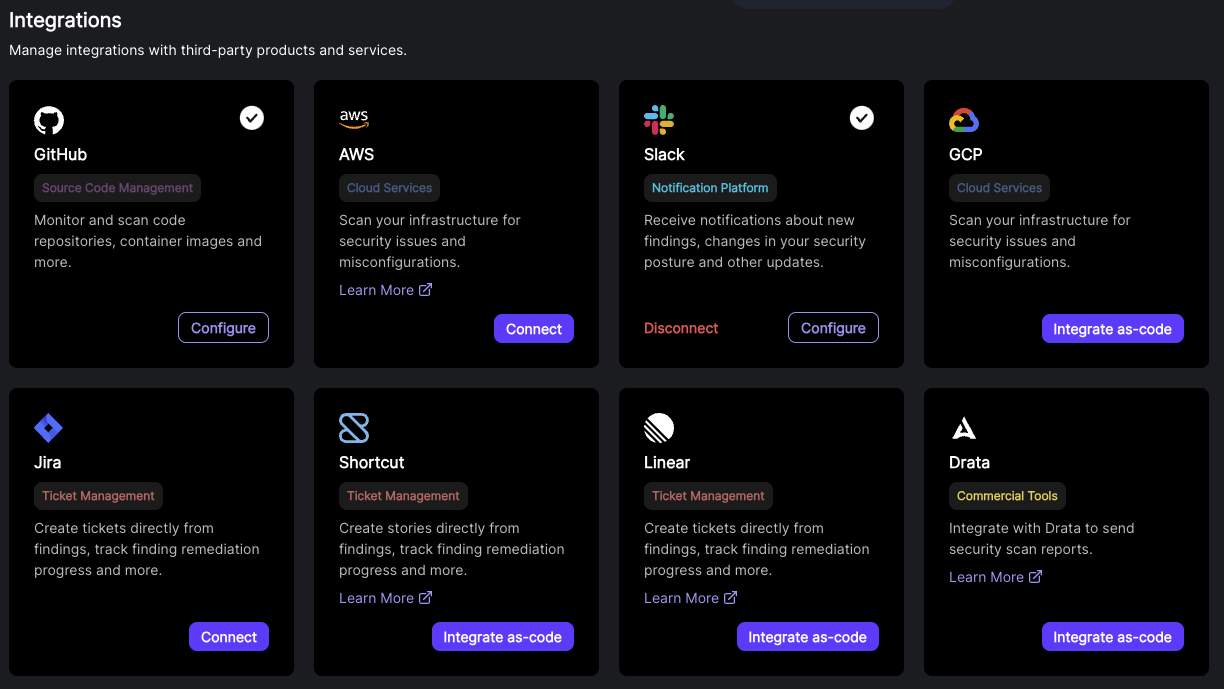
-
Find the "Jira" card and click "Connect".
-
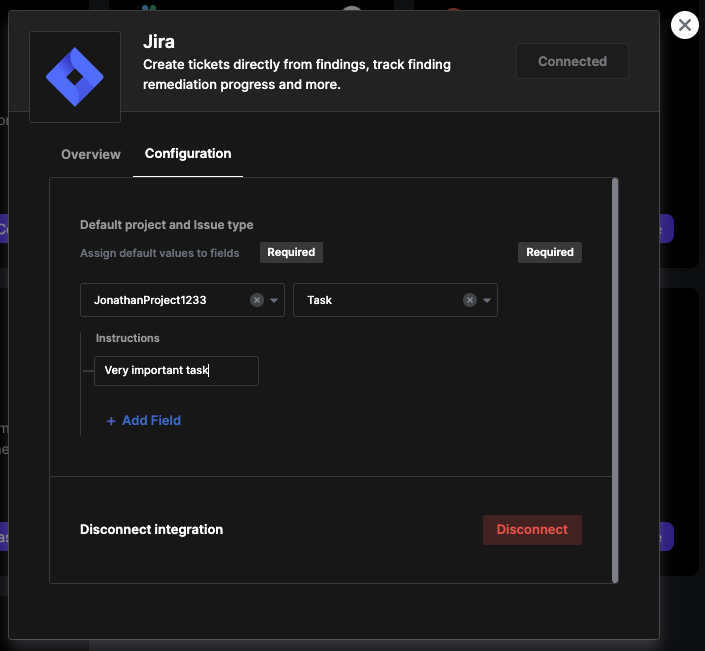
You should now see a Jira integration window. Click on "Connect" at the top right corner.
- You should now be prompted to install Jit's jira app to your Atlassian account.
- After installing the app, you'll be prompted to select your desired project, as well as any relevant custom fields.
- If your Jira configuration requires any custom fields, please set them now.
-
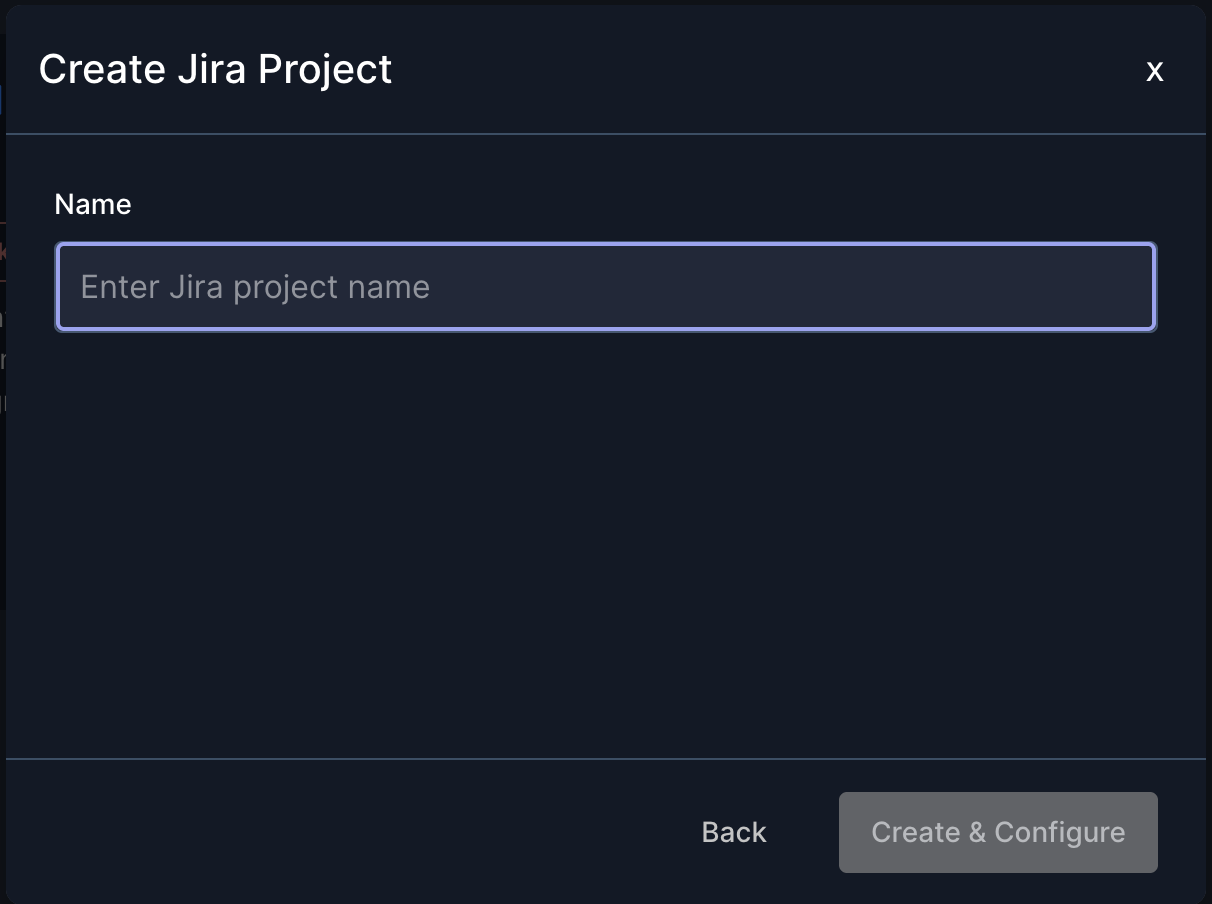
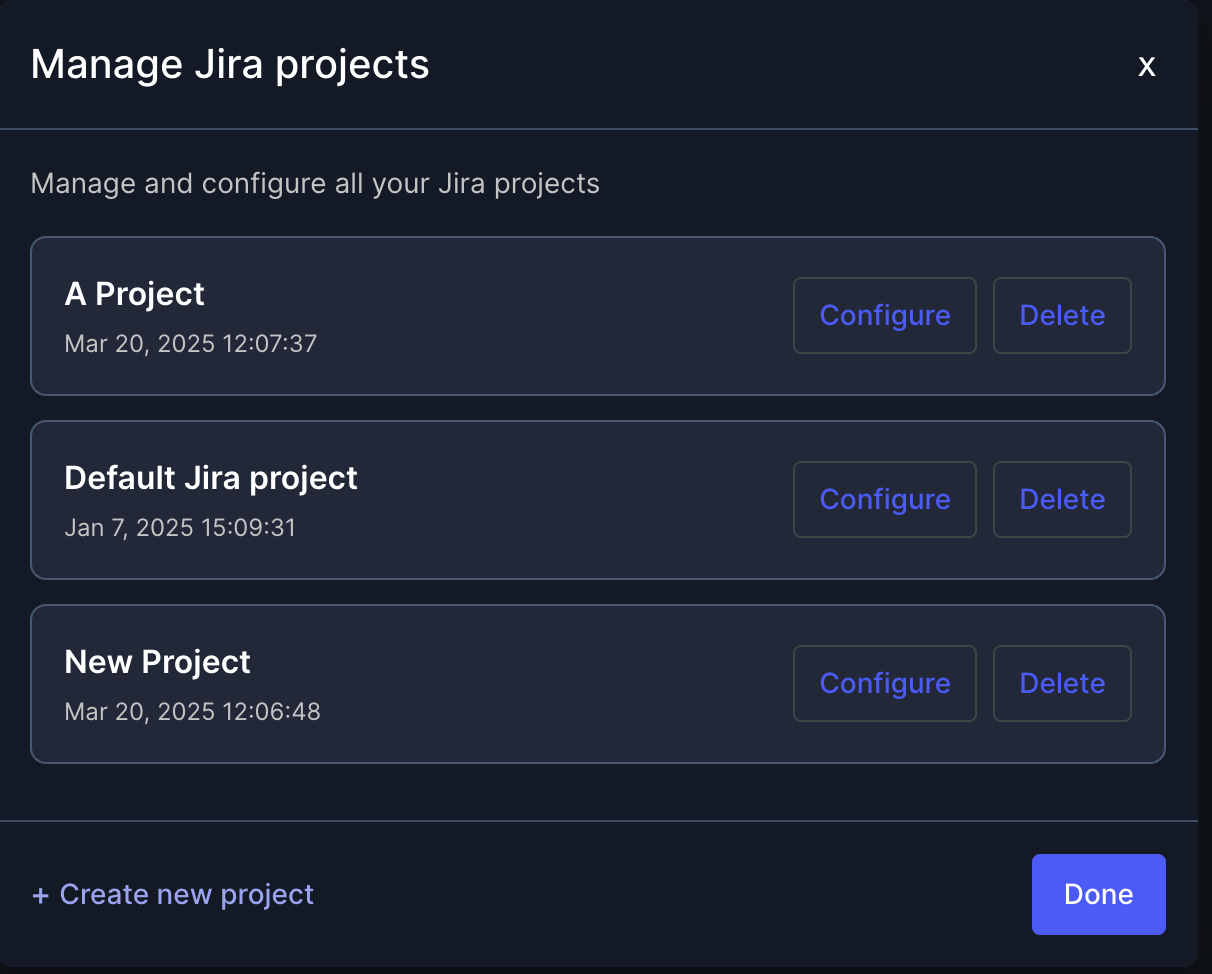
You can now add multiple Jira configurations, each linked to a specific Jira project.
- During setup, select your desired project and any required custom fields.
- You can add, manage, or delete multiple Jira configurations from the Integrations page.
-
After configuring your projects, you can create Jira tickets for findings and actions across the Jit platform.
-
Further configurations:
The Jira integration supports bi-directional connection, you can enable two options in the project configuration section:- Close ticket From Fixed finding - this option will change the status of the ticket and will move it to the "completed lane" that you choose once the finding that is connected to the ticket is marked as fixed by the Jit platform.
- Update Jira Issue Status - this option will let you see the status of the ticket inside the Jit platform under the finding details.
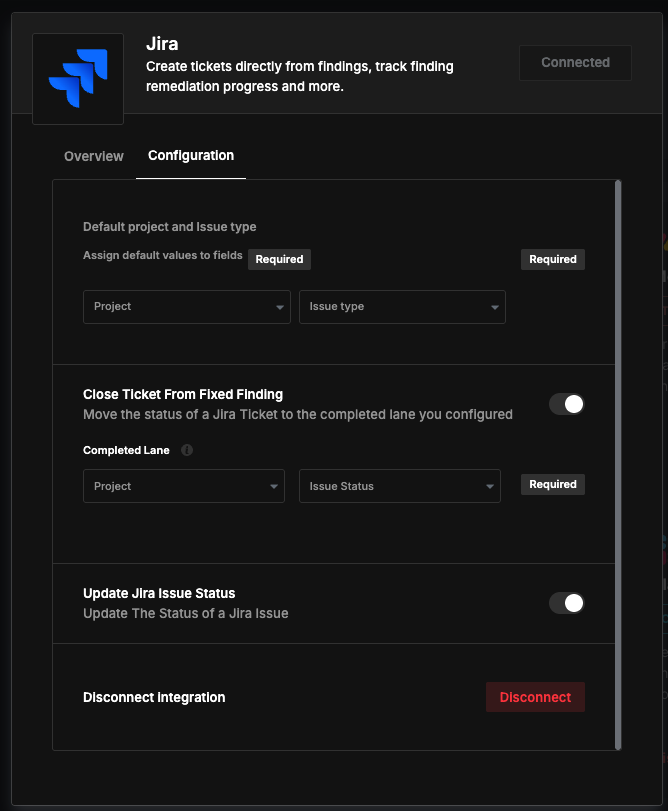
Important note: Custom labels are not supported and will be overridden if set. Jira tickets will always be created with the Opened-by-Jit label.
As-code integration (old)
Important – New users
The As-code Jira integration is deprecated and should not be used by new customers.
New users should use the current Jira integration via the Jit platform UI, which replaces this flow and is actively maintained.This page is kept for existing customers only.
Prerequisites
- Ensure that you have Jira permissions and you are familiar with the Jira configurations in your organization.
- Jit supports software development project types in Jira only.
Note: It is recommended to set up a new user in Jira for this integration and not to link this to a specific individual's personal account.
Integration steps
- Step 1: Create an API token in your Atlassian account.
- Step 2: Assign a secret to the API token in Jit.
- Step 3: Configure the integration in Jit.
Step 1: Create an API Token in Your Atlassian Account
-
Log in to your Atlassian account.
-
Navigate to API token.
- Click Create API Token.
- Assign a Label for easy identification, like
jit_token. - Click Create, then Copy to clipboard the generated token.
Learn more in Atlassian documentation.
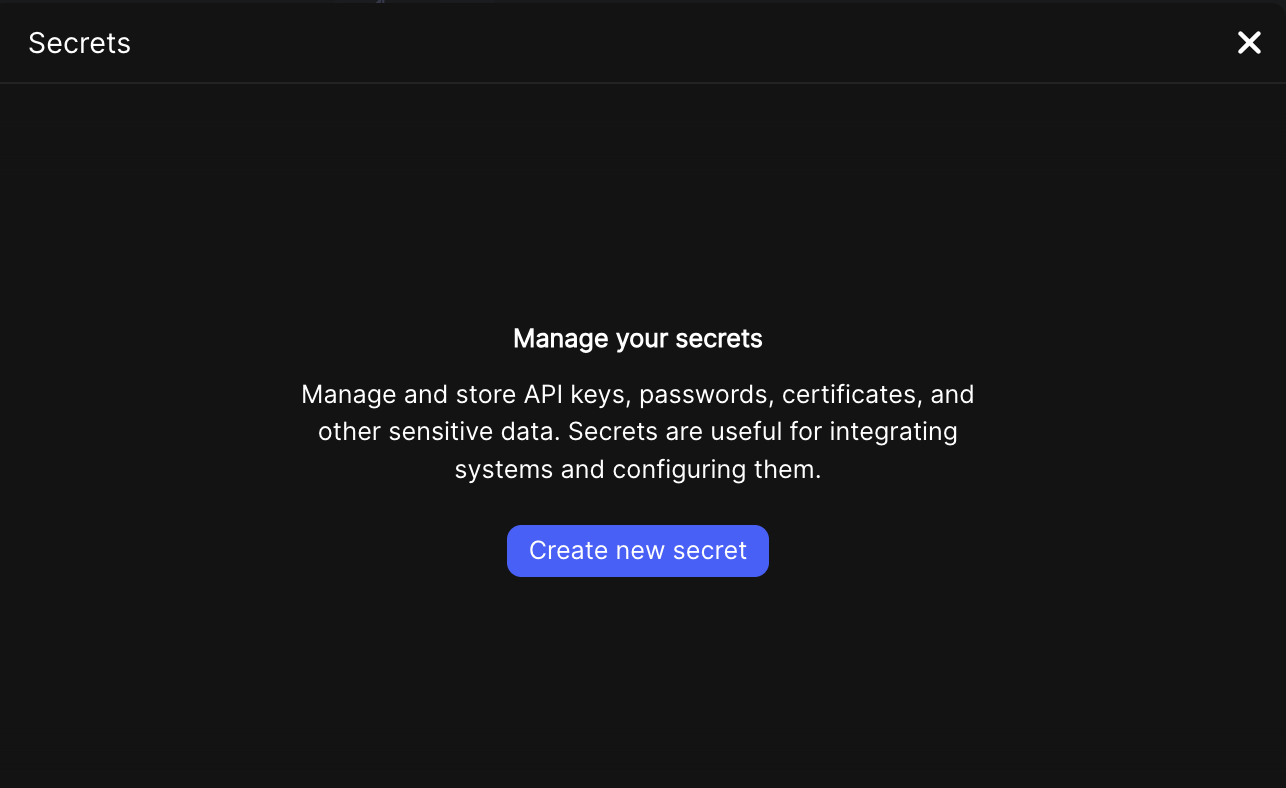
Step 2: Assign a Secret to the API Token in Jit
-
In the Jit platform, go to Settings > Secrets.
-
Click Create new secret and add the API token you created. It's recommended to name the secret something recognizable, like
jira_token.
Learn more about managing Jit Secrets.
Step 3: Configure the Integration in Jit
-
In the Jit platform, go to Integrations and locate the Jira tile.
-
Click Integrate as-code to open the jit-integration.yml file in your centralized Jit repository.
-
Copy and paste the Jira integration-structure at the end of the file.
jira:
  `jira_integration_name`:
    auth:
      api_token: ${{ jit_secrets.`secret_name` }}
      email: `email_address`
      domain: `jira_domain_name`
    preferences:
      project_id: `jira_project_id`
      issue_type_id: `jira_issue_type_id`
      fields:
        `customfield_XXXXX`:
          - value: "`customfield_XXXXX_value`"
        components:
          - name: "`component_YYY`"
- Replace the placeholders with your specific information as outlined in the table below:
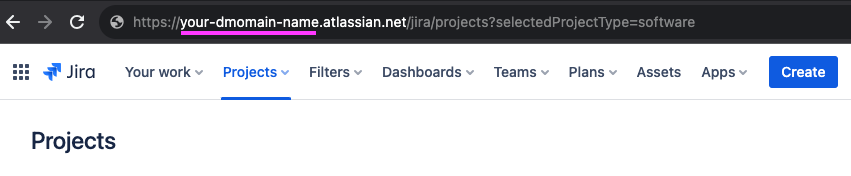
Your Jira organization domain name can be extracted from your Atlassian URL.
| Key | Value |
|---|---|
| jira_integration_name | Name this integration, possibly after your Jira project, e.g., Engineering. |
| secret_name | The name you assigned to the secret in Step 2, e.g., jira_token. |
| email_address | The security champion's email (listed in the Atlassian account). |
| jira_domain_name | Your Jira organization domain name can be extracted from your Atlassian URL (described above). See Verify a domain to manage accounts. |
| jira_project_id | See How to get Jira Project ID. |
| issue_type_id | See Finding the ID for Jira issue types. Choose the default issue type ID (e.g., the ID of Story or Incident types). |
| customfield_XXXXX, customfield_XXXXX_value | If applicable, add any custom fields with default values. Remove if not used. Read more on Jira custom fields here or by trying to edit them. |
| component_YYY | Include relevant components here if used in your project. Remove if not used. |
Adjust or remove the fields key as needed for your Jira setup. For more options, see the Jira Create Issue POST API here.
For example:
jira:
  Engineering:
    auth:
      api_token: ${{ jit_secrets.jira_token }}
      email: [email protected]
      domain: Jit
    preferences:
      project_id: 10200
      issue_type_id: 10001
      fields:
        customfield_10007:
          - value: "security"
        assignee:
          id: "9990a2b5896d10ebd47114df"
        components:
          - name: "Development"