Configuring Vulnerability Scans for Web Applications
Activate web app scanning with Jit DAST
Complete the following steps to begin configuring DAST for web app scanning:
- Select Security Plans from the left menu, scroll to Dynamic Application Security Testing and locate Scan your web applications for vulnerabilities.

- Select Activate.
- Click Add new application to begin configuring DAST scanning for your web app.
Configure web app scanning with Jit DAST
- Step 1: Setting the target and authentication
- Step 2: Setting the scanning triggers
- Step 3: Configure notifications (recommended)
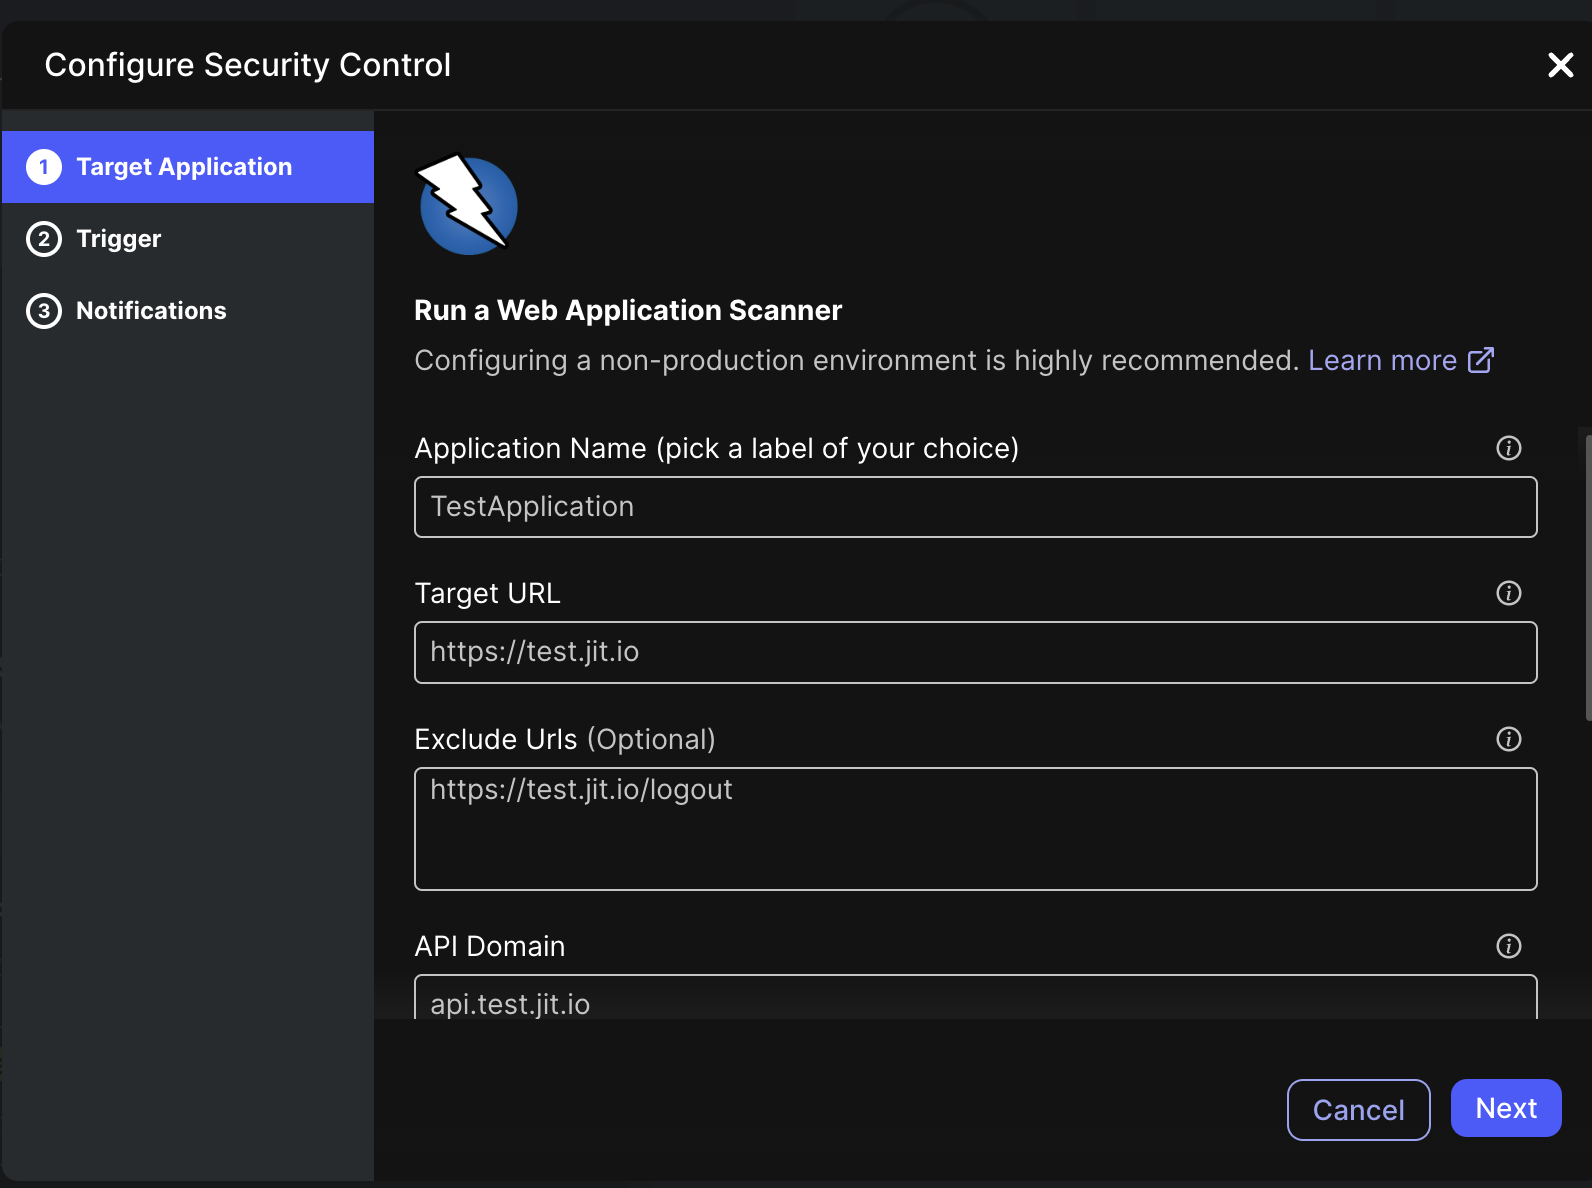
Step 1: Setting the target and authentication
Setting the target and authentication
| Field | Description |
|---|---|
| Application name | Name of the application that is scanned. |
| Target URL | The URL route of the application. |
| (Optional) Exclude URLs | URLs that are not scanned. For example, Logout. We recommend excluding Logout so that Jit scanning remains continually connected. |
| API domain | The base URL where the API is hosted, serving as the entry point for making API requests. |
| Enable authentication (see more below) | We recommend enabling this option for enhanced security scanning. See Enabling authentication below. |
Enabling Authentication (recommended)
Enabling Authentication requires some specialized configuration, which is why we ask that you meet with us for a free onboarding session if you want to enable Authentication. Schedule your onboarding session here.
There are two authentication modes:
- Without authentication, for black box testing.
- With authentication, highly recommended for deeper security scanning to identify more security risks. This requires some specialized configuration, which is why we ask that you meet with us for a free onboarding session if you want to enable authentication.
For Authenticated Mode, check Enable authentication. There are four types of authentication:
| Authentication Type | Fields | Description |
|---|---|---|
| Form-based authentication | Login URL | Login URL for authentication. |
| Username | Username to be authenticated. | |
| Password | Password to be authenticated. | |
| Enable Selectors Configuration | Check to enable enhanced authentication using the username and password selectors that are derived from the source of the Login's web page. When unchecked, Jit searches for common selectors. See Configuring authentication using selectors below. | |
| Local storage | Local Storage Item Key | The specific identifier used in the Web Storage API for storing and retrieving data in the web browser's local storage. |
| Local Storage Item Value | The actual information that is stored and retrieved using a specific key. | |
| Cookie value | Value of the cookie used for authentication. | |
| Bearer token header | Value | The value of the bearer token header consisting of the word Bearer followed by a space and then the actual token. |
Steps for enabling authentication:
-
Check Enable Selectors Configuration.
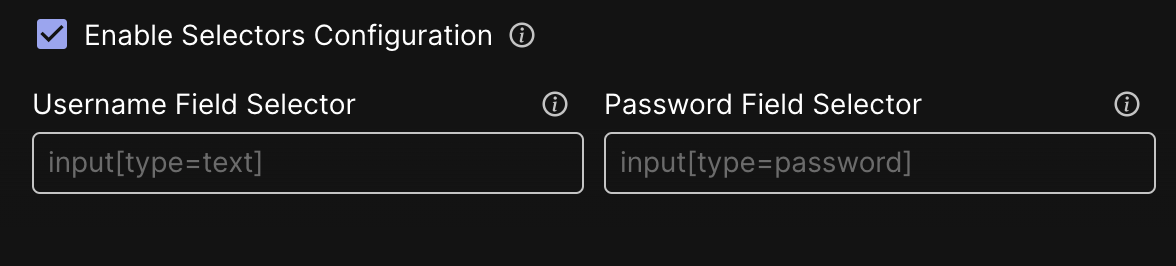
-
To complete the Username Field Selector and Password Field Selector fields, go to your application's website and open the Developer Tools and then use the Inspect Element to find the matching selectors for the Username and Password.
For example:


-
Copy the text into the Username Field Selector and Password Field Selector fields.
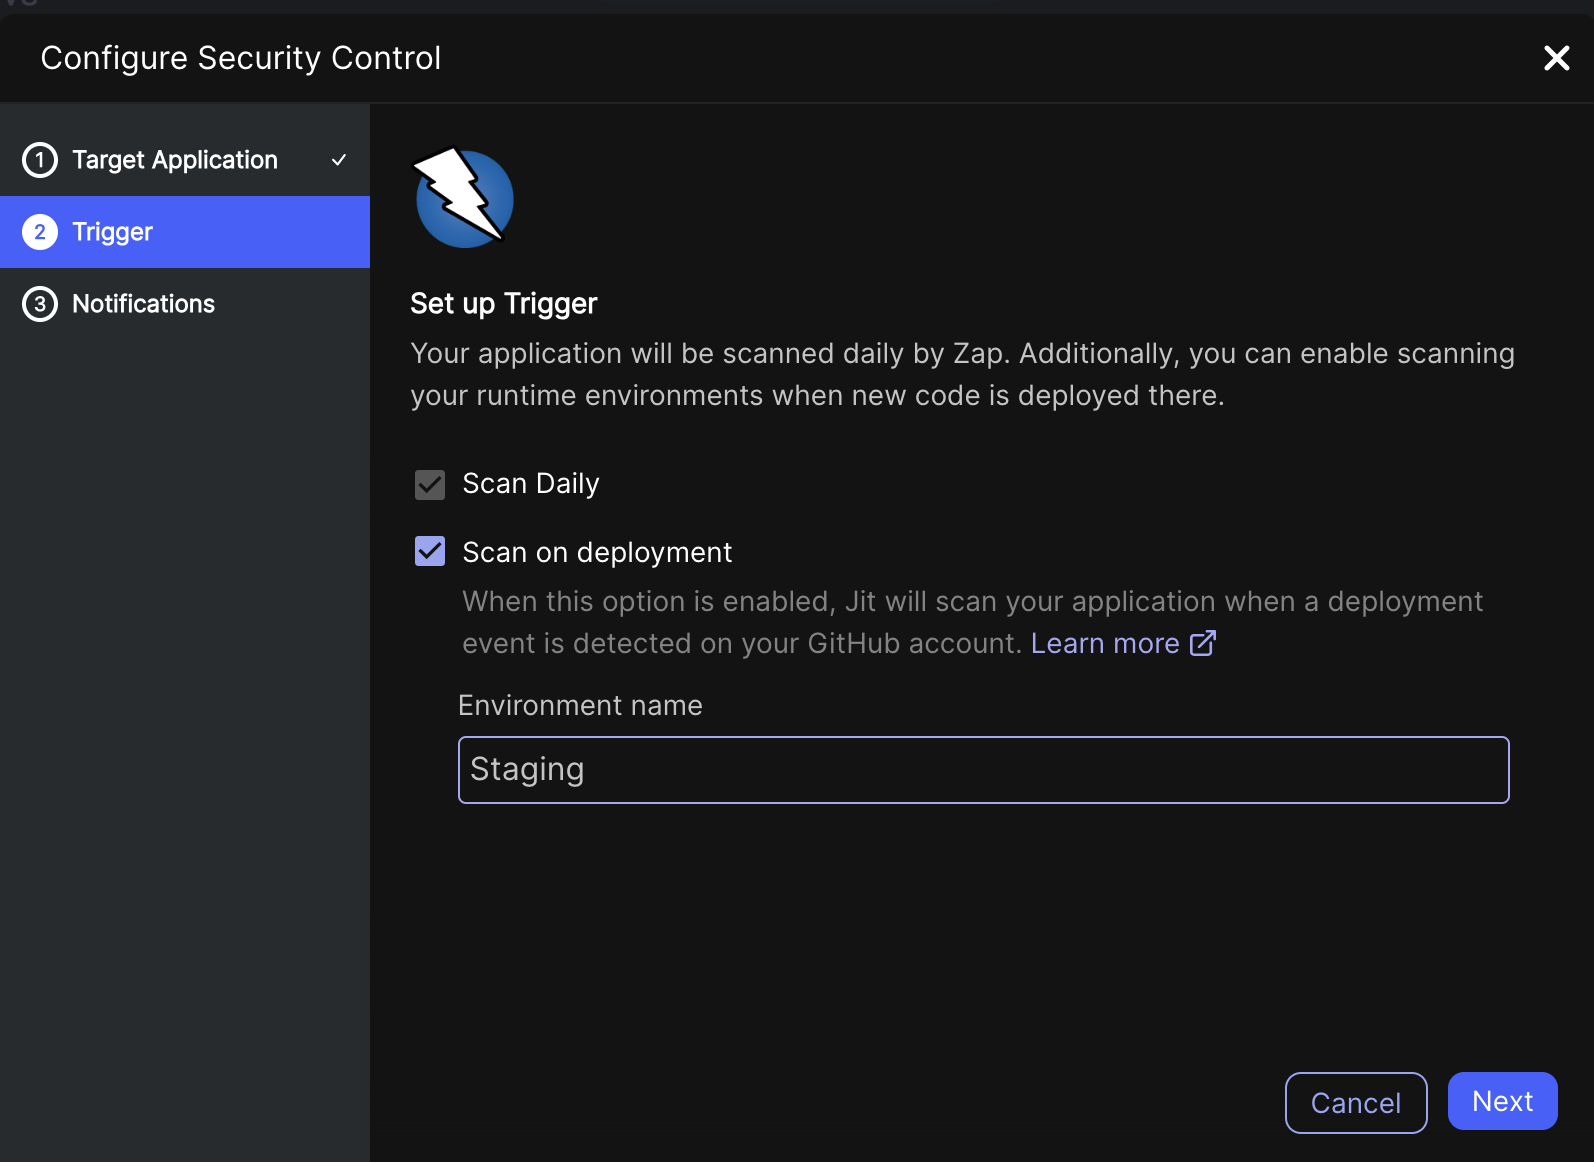
Step 2: Setting the scanning trigger
| Field | Description |
|---|---|
| Scan Daily | ZAP scans your application daily. |
| Scan on deployment | Jit scans your application when a deployment event is detected in your GitHub organization. |
| Environment name | The environment defined in the deployment YAML on Github actions. Jit needs an exact match between the environment name defined in Jit and in Github Actions to trigger a scan. See Deployment-based Scanning. |
Step 3: Integrate with Slack
Integrate with Slack to stay notified of new scan results. See configuration instructions here.
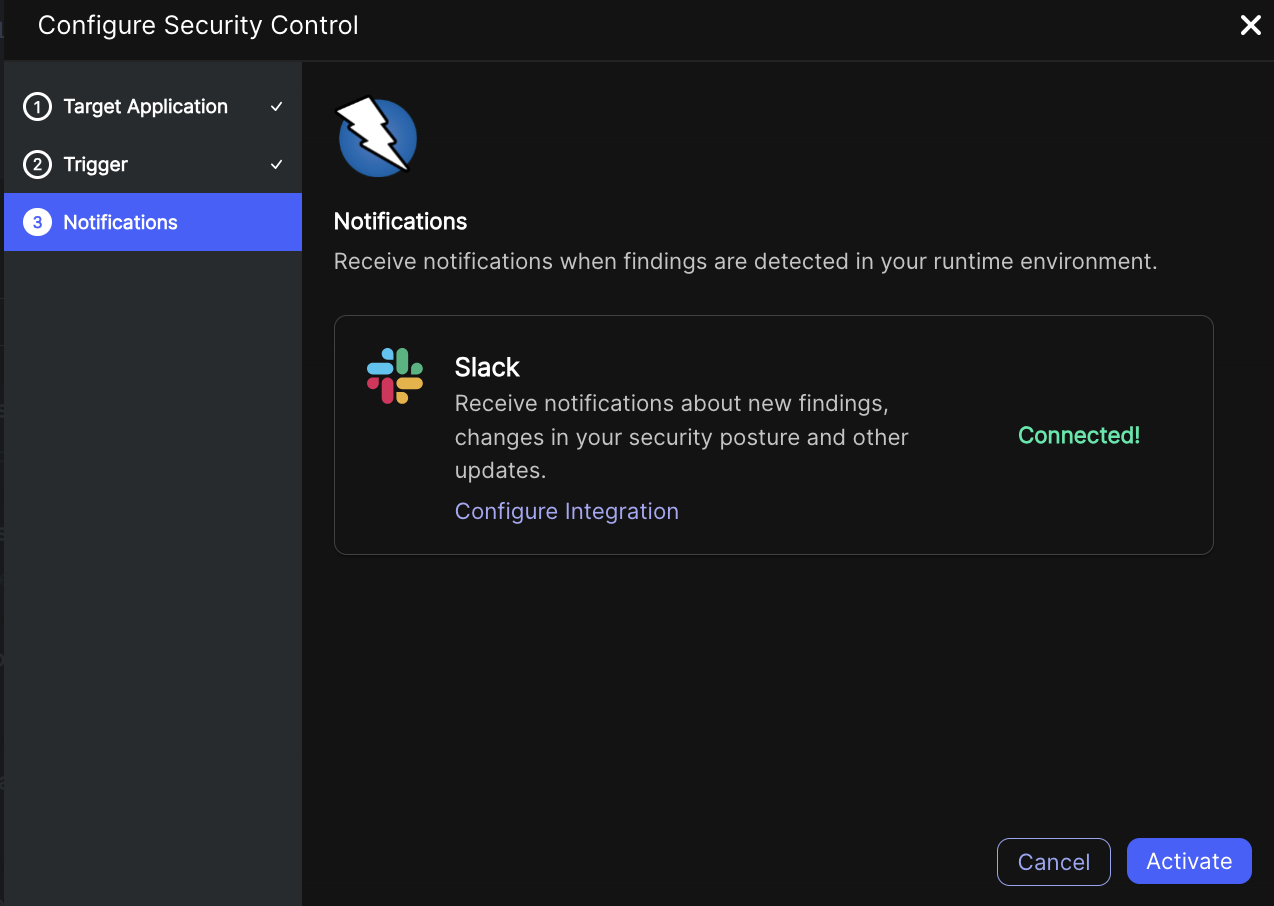
Click Activate. Jit creates a header based on your configurations and shares the authentication information with ZAP. The header is integrated by ZAP and used to authenticate each page included in the scan. Jit then generates security findings, which are documented in the Backlog page.
Whitelisting Jit DAST scanners
To perform web application scans, Zap requires access to your applications. If your web applications are secured with a whitelist, please ensure the following IP addresses are included:
For Jit - 🇺🇸 US site (https://platform.jit.io)
- 3.220.250.224/32
- 52.45.232.22/32
For Jit - 🇪🇺 Europe site (https://platform.eu.jit.io)
- 18.198.245.94/32
- 18.157.204.182/32
Adding these IP addresses to your whitelist will enable Zap to conduct its scans without interruption.