Connect Jit with your Bitbucket Account
To connect Jit with your Bitbucket account, follow the steps below.
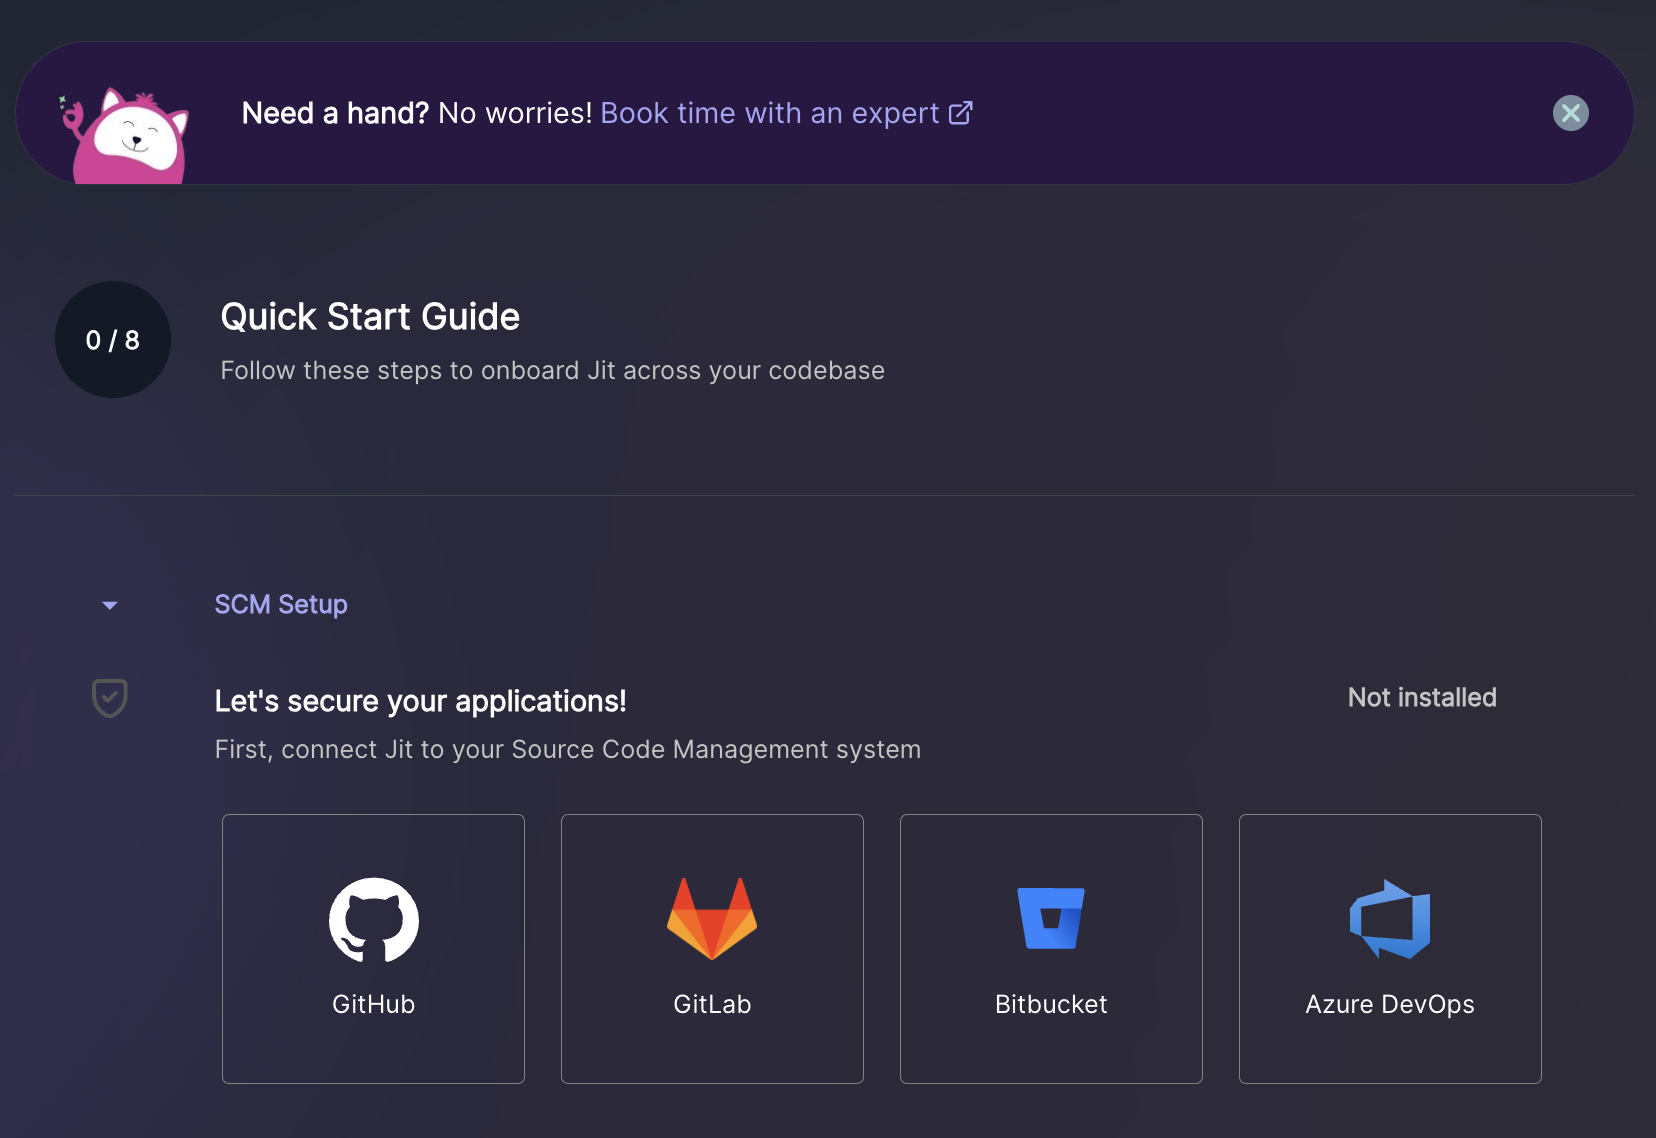
Create an account and begin the Quick Start flow
- Start a free trial to create a Jit account.
- This will bring you to our Quick Start Guide, where you’ll be directed to “Integrate Source Code Manager”. Hit the Bitbucket icon.
Connect Jit with your Bitbucket Account
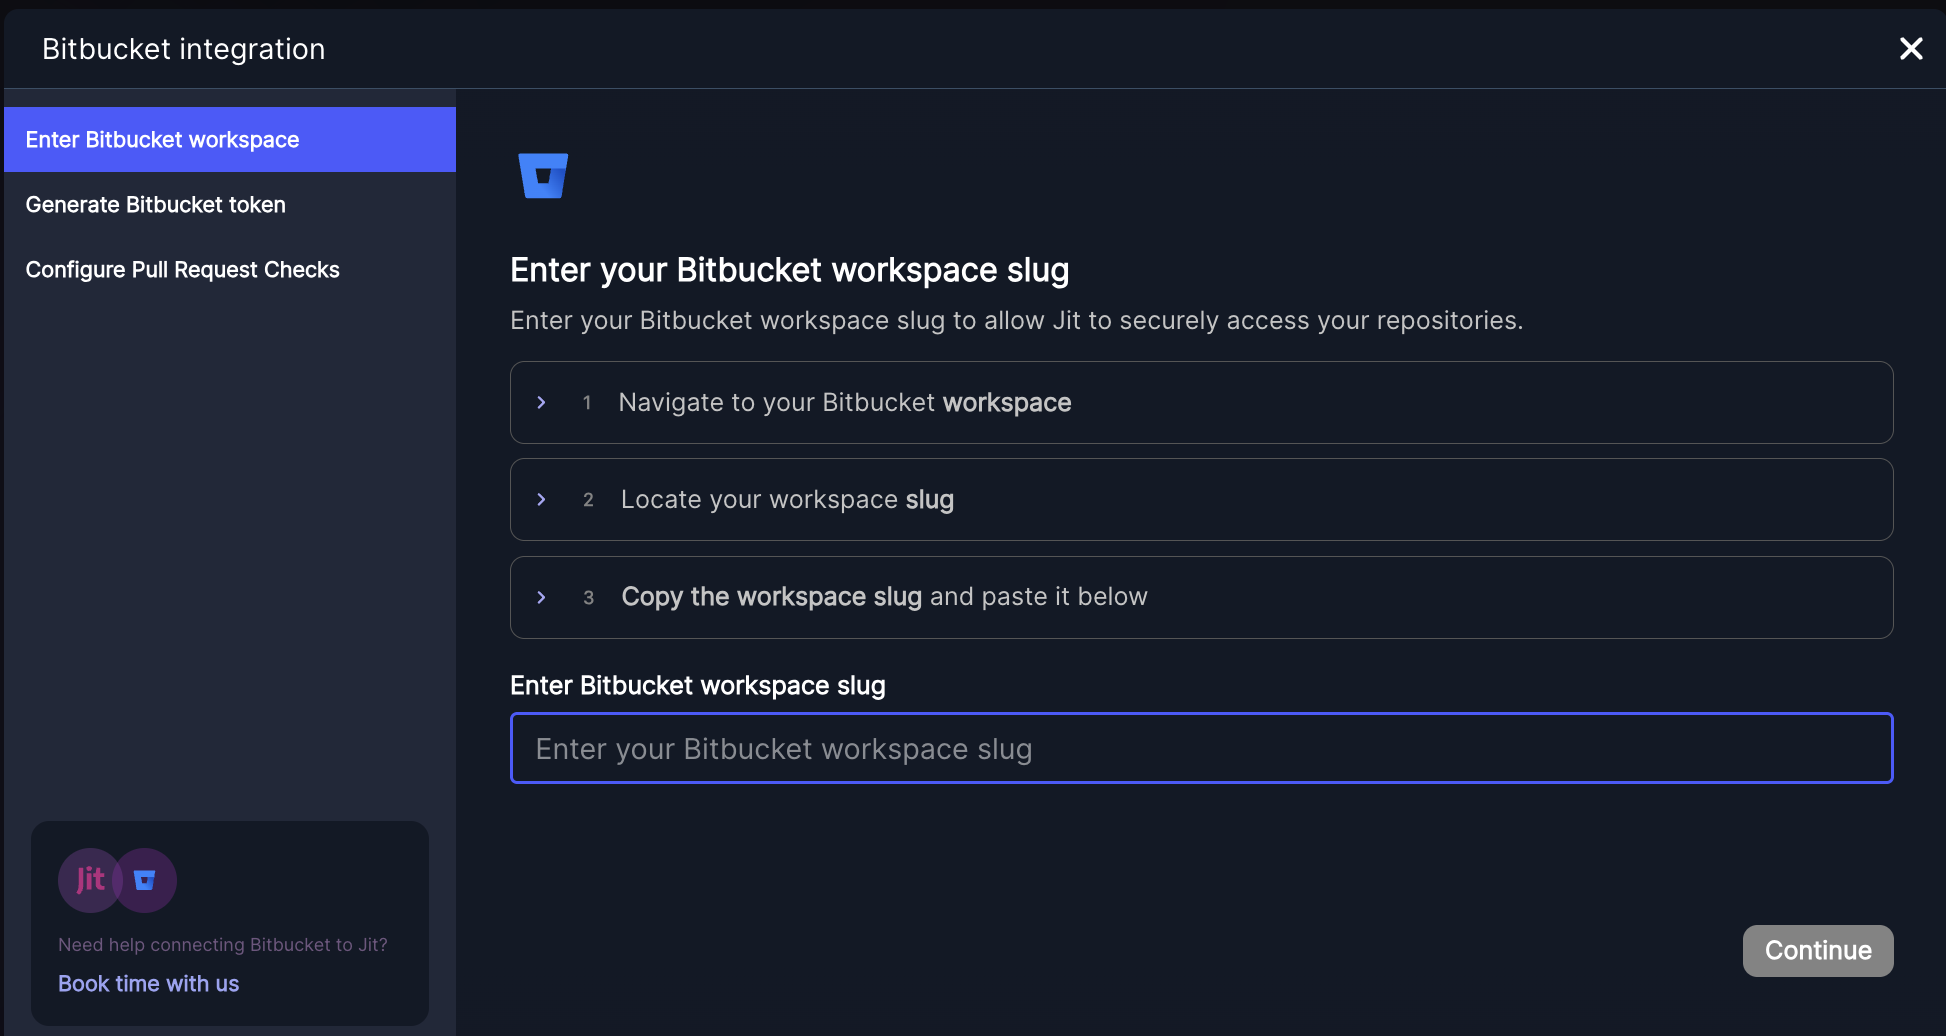
Step 1: Enter Your Bitbucket Workspace Slug
To connect Jit with your Bitbucket account, start by entering your workspace slug:
- Navigate to your Bitbucket workspace.
- Locate your workspace slug (e.g., my-company).
- Copy the slug and paste it in the input field in the Jit wizard.
Once entered, click Continue.
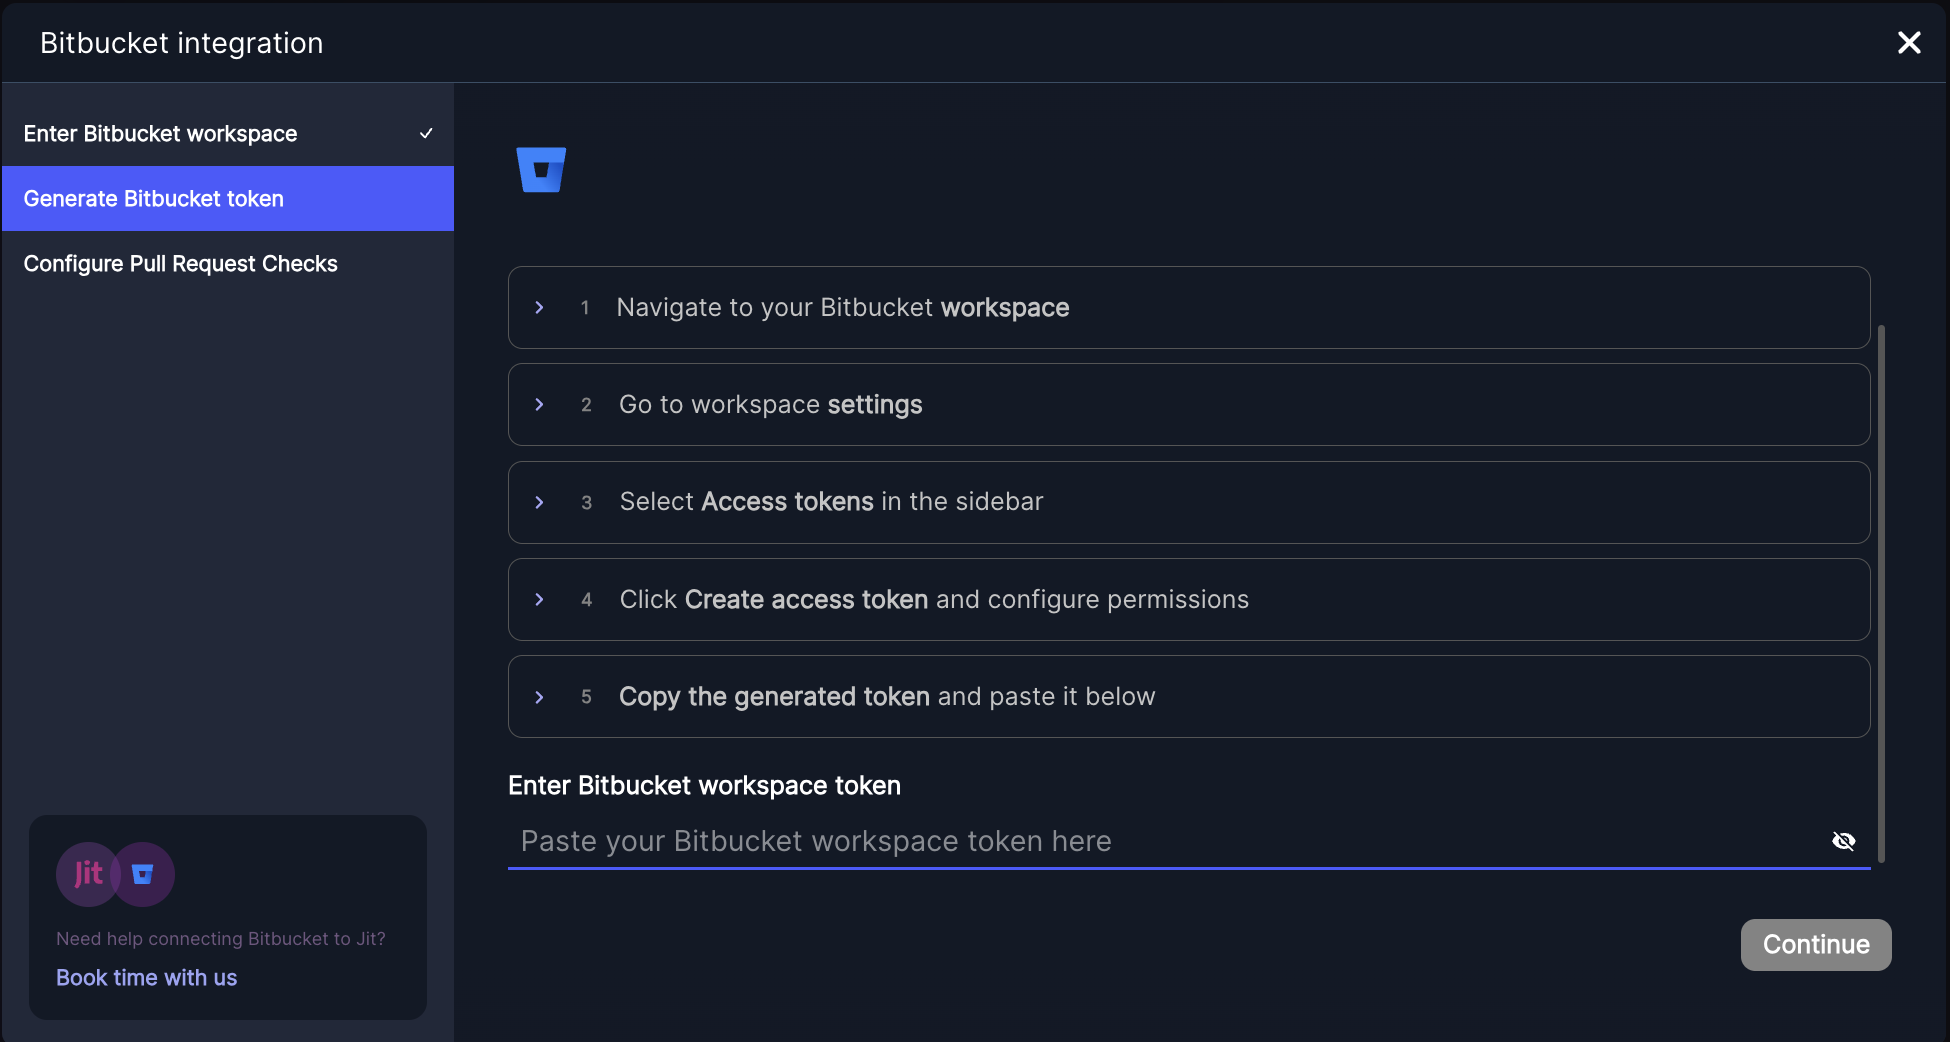
Step 2: Generate Bitbucket Token
To allow Jit to access your Bitbucket repositories, generate a workspace-level access token:
- Navigate to your Bitbucket workspace.
- Go to Settings (workspace-level settings, not project-level).
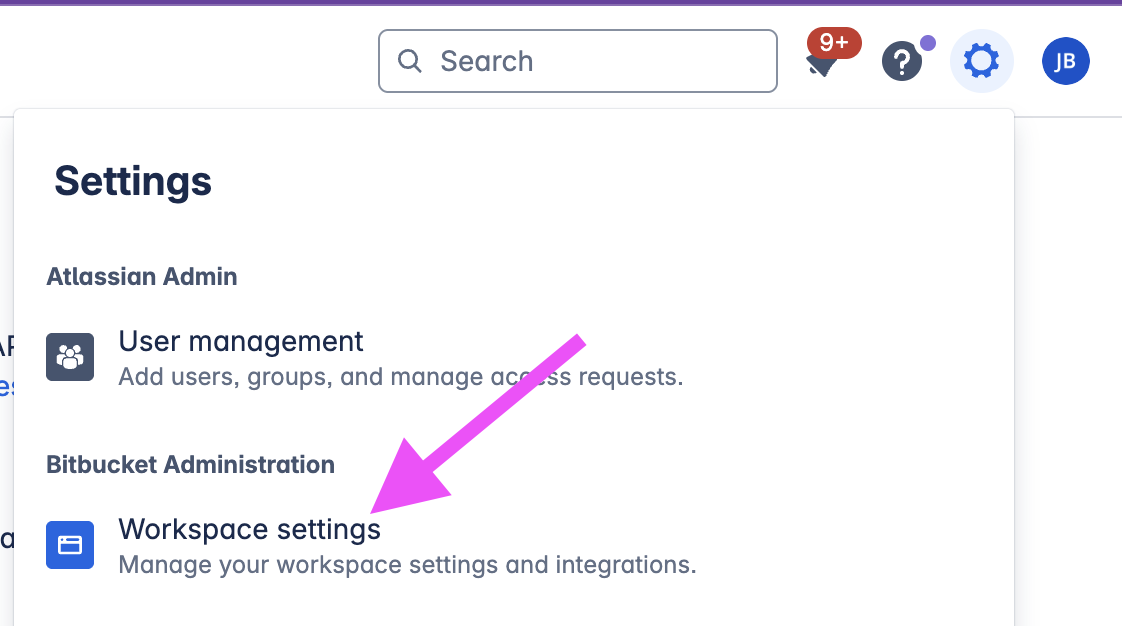
-
Select Access tokens from the sidebar.
-
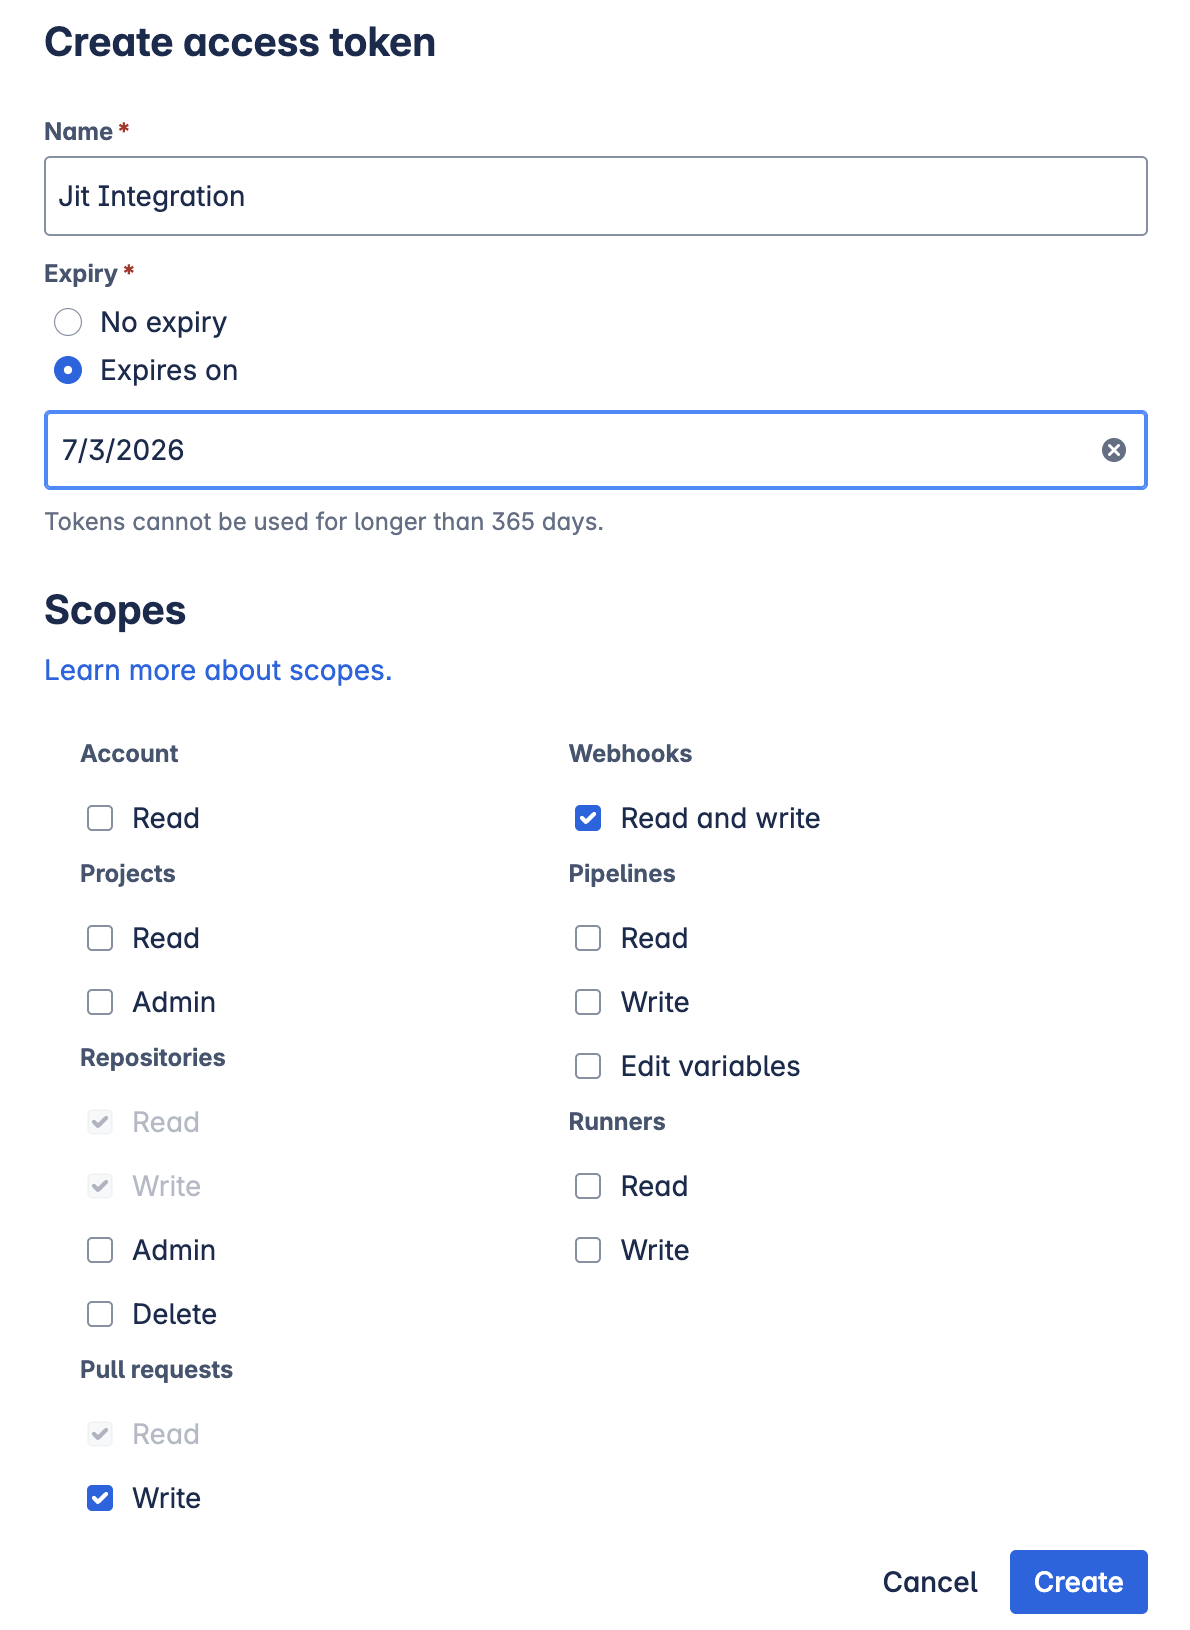
Create an access token with the following configuration:
-
Name: Choose a descriptive name, such as
Jit Integration, to identify this token. -
Expiration: Set to 1 year to balance security with the convenience of fewer token renewals.
-
Scopes:
- Pull requests: Write
- Webhooks: Read and Write
-
-
Copy the generated token and paste it in the input field in the Jit wizard.
Click Continue to proceed.
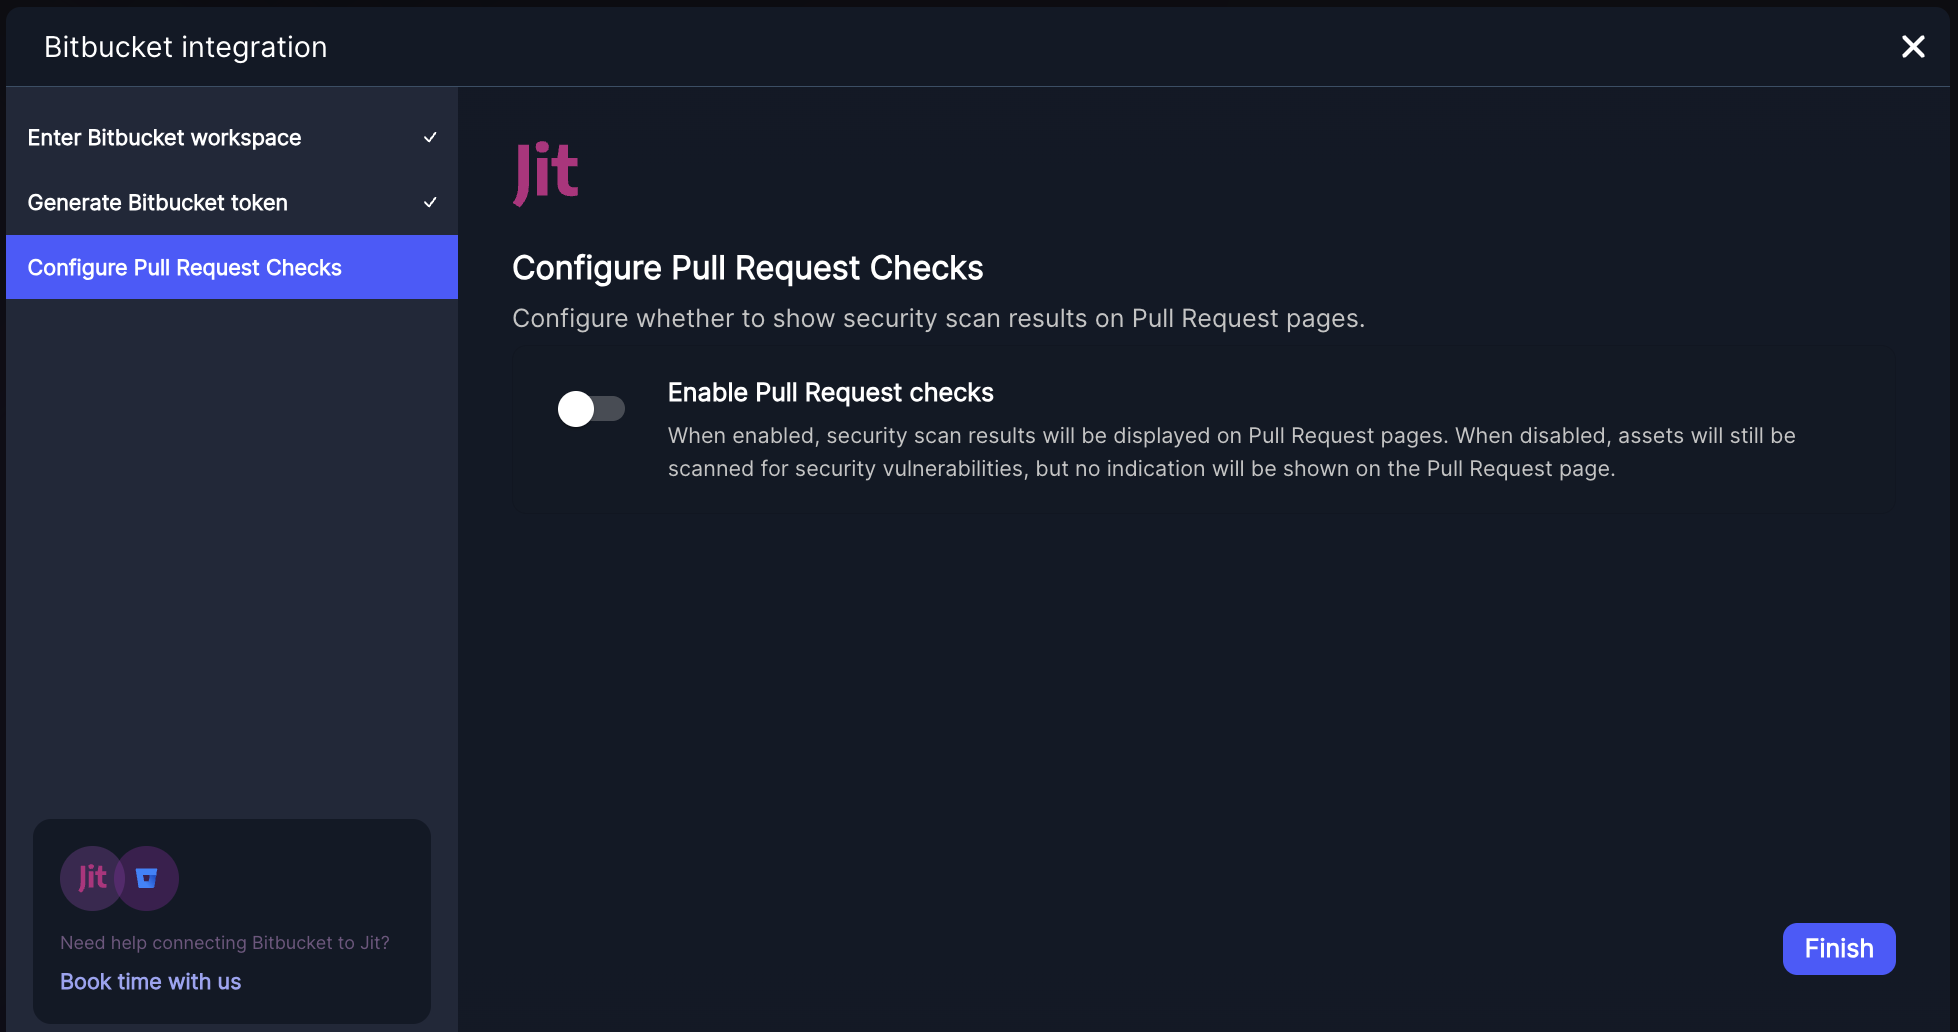
Step 3: Configure Pull Request Checks
- Enable Pull Request checks (optional).
When enabled, Jit will scan your Bitbucket Pull Requests for security issues and display the results directly on the PR page. This helps in identifying and addressing vulnerabilities early in the development process. - You can always update this setting later.
Go to Settings → Manage Resources to enable or disable Pull Request checks at any time.
Click Finish to complete the integration.
ℹ️ After completing the integration, you can manage which Bitbucket repositories Jit scans by navigating to Settings → Manage Resources in the Jit dashboard. Here, you can select or deselect repositories based on your preferences. Repositories that are not selected will not be scanned by Jit.
Jit is now scanning your codebase!
Now that you’ve implemented the integration with Bitbucket, Jit will automatically begin scanning your codebase (or the repositories you selected).
Specifically, Jit will activate the SCA, SAST, and Secrets detection tools – these scanners will detect known vulnerabilities in your open-source components, security flaws in your custom code, and hardcoded secrets, respectively.
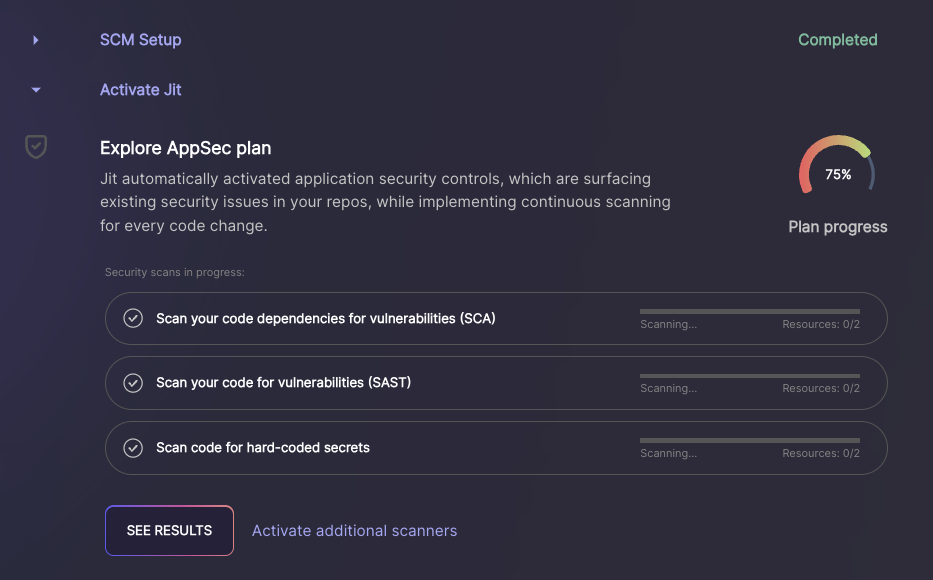
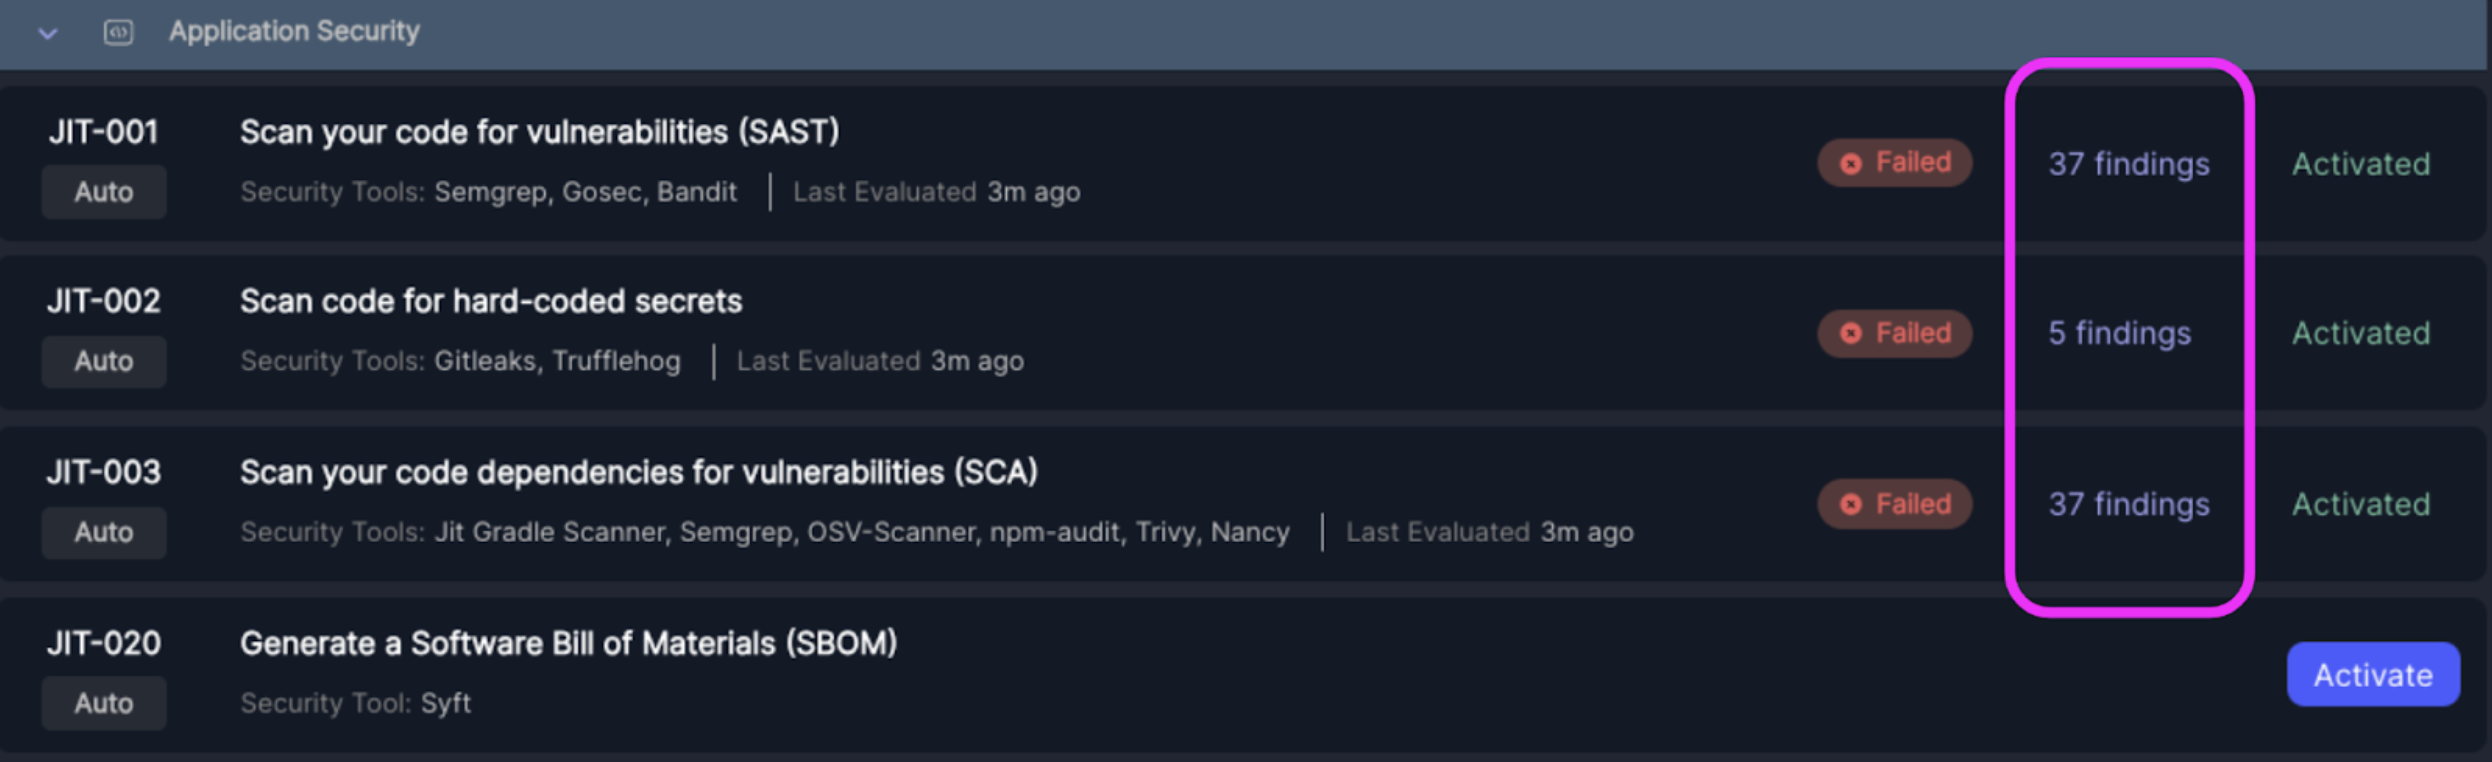
- Once the scans are complete, hit “See Results”, which will bring you to the security scanners that have been activated. If the scanners are marked as "Failed", that means they detected security issues. You may need to wait a few minutes before the findings appear.
- Click on the findings, which will bring you to the findings page where you can gather more details about the security issues.
Success!
You are good to go.
Click Explore Jit's features to learn how Jit prioritizes your security risks, enables continuous scanning for developers, integrates with a notification system, and much more.
Updated 3 months ago