Azure Integration
Integrating with Azure
Overview
Azure integration enables you to scan your Azure cloud infrastructure for runtime misconfigurations. Integration with multiple concurrent subscriptions is not supported.
Though it does not require the integration steps below, Jit recommends that you also activate the Scan IaC for Misconfigurations security requirement for complete infrastructure protection.
Prerequisites
The following are required before you can proceed with Azure integration
- A subscription to Azure Security.
- Microsoft Defender.
Steps for integrating with Azure
To integrate Jit with Microsoft Azure
- Create and configure an Azure app using the instructions in Azure app setup.
- From the Jit platform, select Secrets in the menu bar under Settings.
- Follow the instructions in Secrets to create secrets for your Azure client ID and Azure client secret named
azure_client_id,azure_client_secret, andazure_subscription_ids, respectively. You must use these exact names.
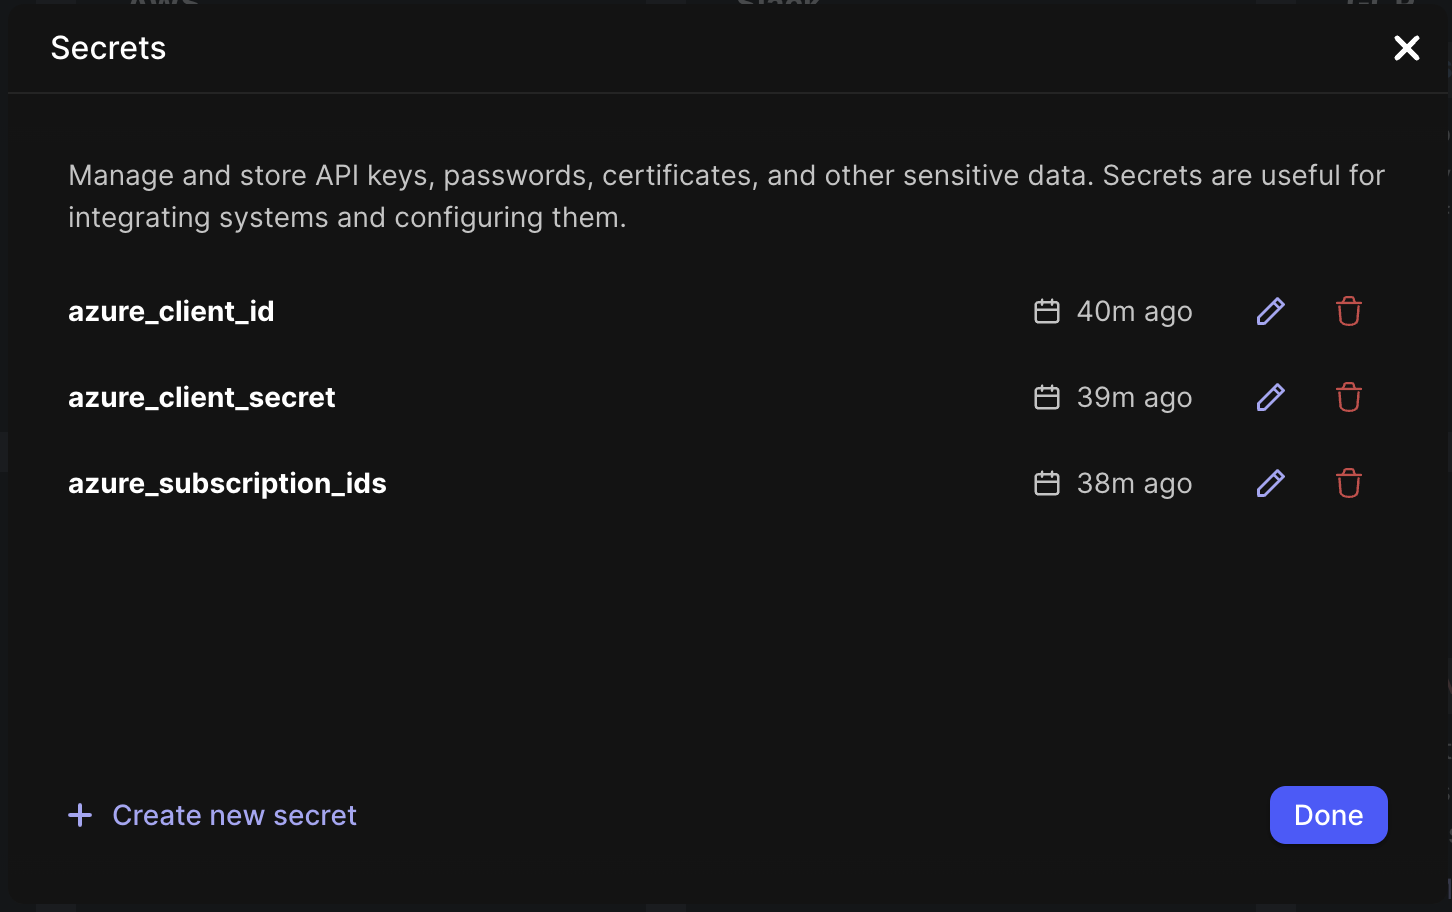
Azure secrets example
- Select Integrations.
- Locate the Azure tile and select integrate-as-code. You are taken to the
jit-integration.ymlfile. Add the information below to this file. If the option to integrate as-code is not available, you may need to manually addjit-integration.ymlto the repo containing Jit's configuration files.
azure:
  <integration_id>:
    type: azure_account
    name: "<your account name>"
    auth:
      client_id: "${{ jit_secrets.azure_client_id }}"
      client_secret: "${{ jit_secrets.azure_client_secret }}"
    tenant_id: <your Azure tenant ID>
    subscription_id: "${{ jit_secrets.azure_subscription_ids }}"
| Key | Value/description |
|---|---|
| azure: | Integration type. Key must be azure:. The Azure integration is nested in this mapping. |
| <integration_id>: | This key is the name you choose for your Azure integration. |
| type: | Enter azure_account as shown in the example. |
| name: | Enter the name of your Azure account. |
| client_id: | Enter exactly as shown in the example. To view this information in the Azure console, navigate to App registrations > (the app you created in step 1) > Overview. |
| client_secret: | Enter exactly as shown in the example. |
| tenant_id: | Enter your Azure tenant ID as shown in the example. To view this information in the Azure console, navigate to App registrations > (the app you created in step 1) > Overview. |
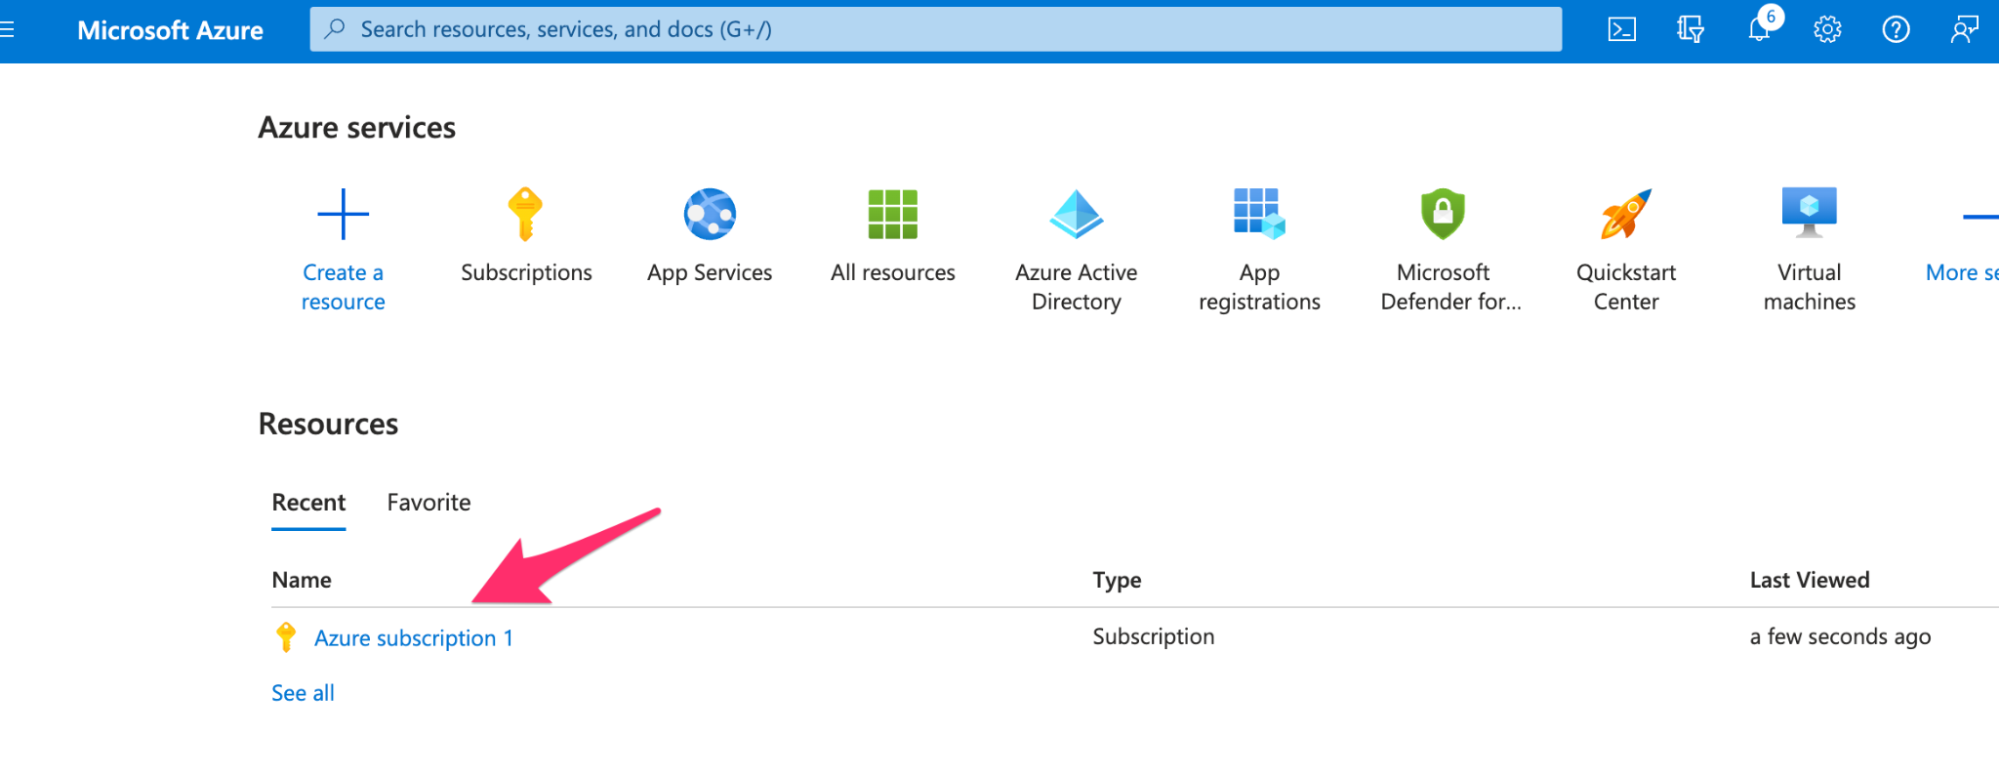
| subscription_id: | Enter your Azure subscription ID as shown in the example. To view this information in the Azure console, select your subscription from the Resources list on the home page, and then select Overview. |
Azure app setup
Create an app
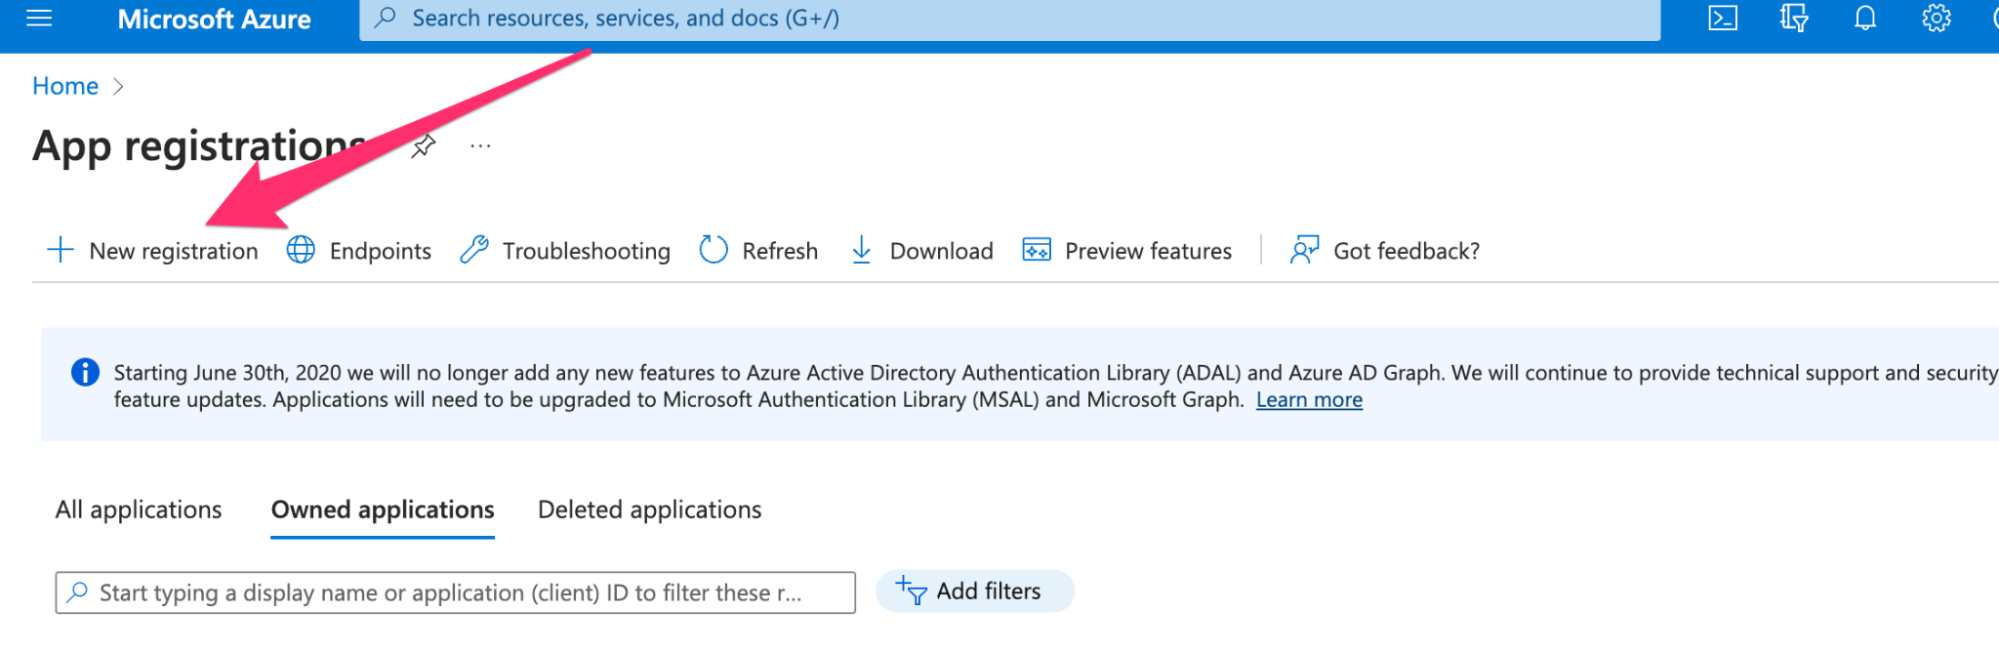
- In the Azure Portal, go to App registrations.
💡 Can’t find "App registrations"? Go to Microsoft Entra ID → Manage → App registrations.
- Click + New registration.
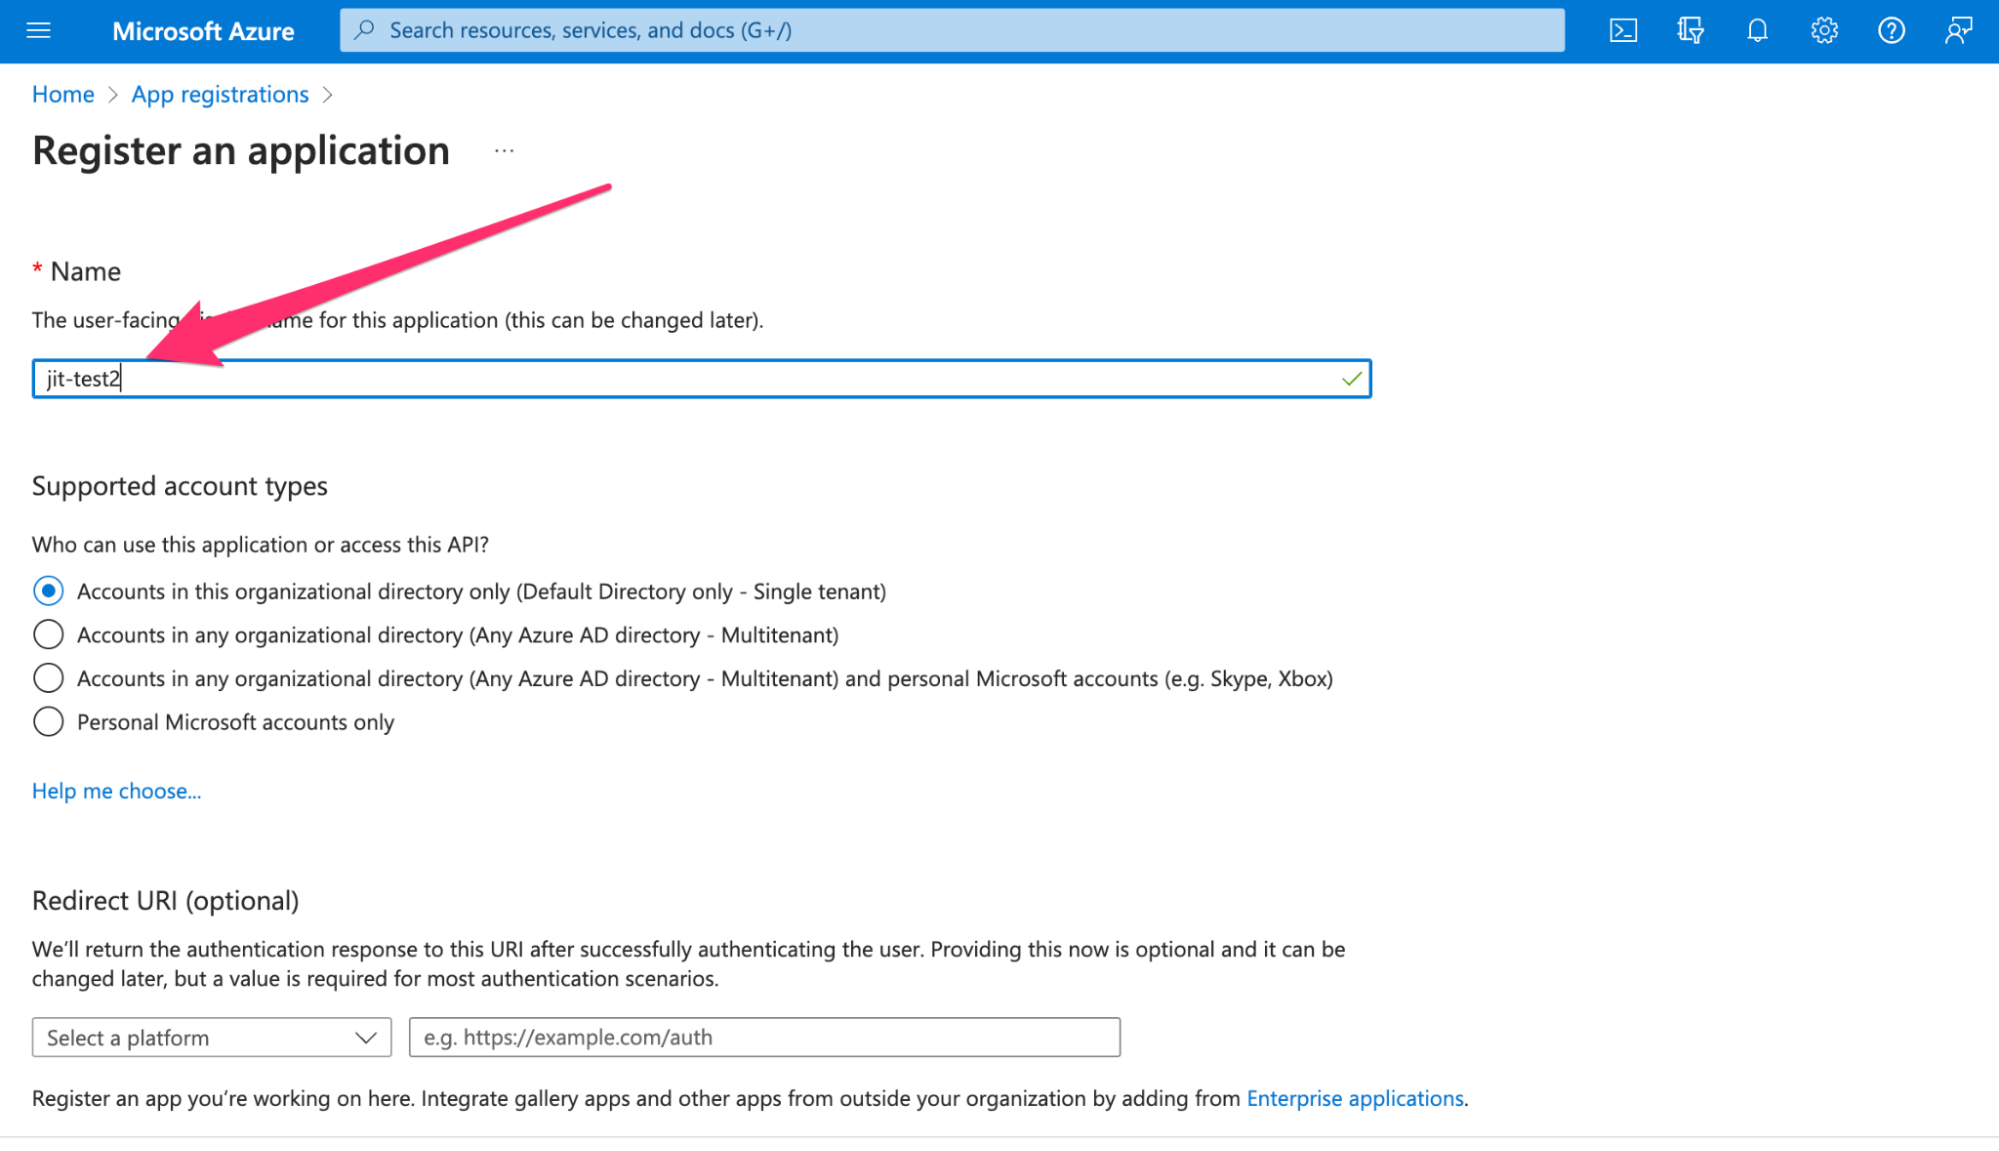
- Enter a name for the app (e.g., jit-integration).
- Leave the rest of the defaults, then click Register.

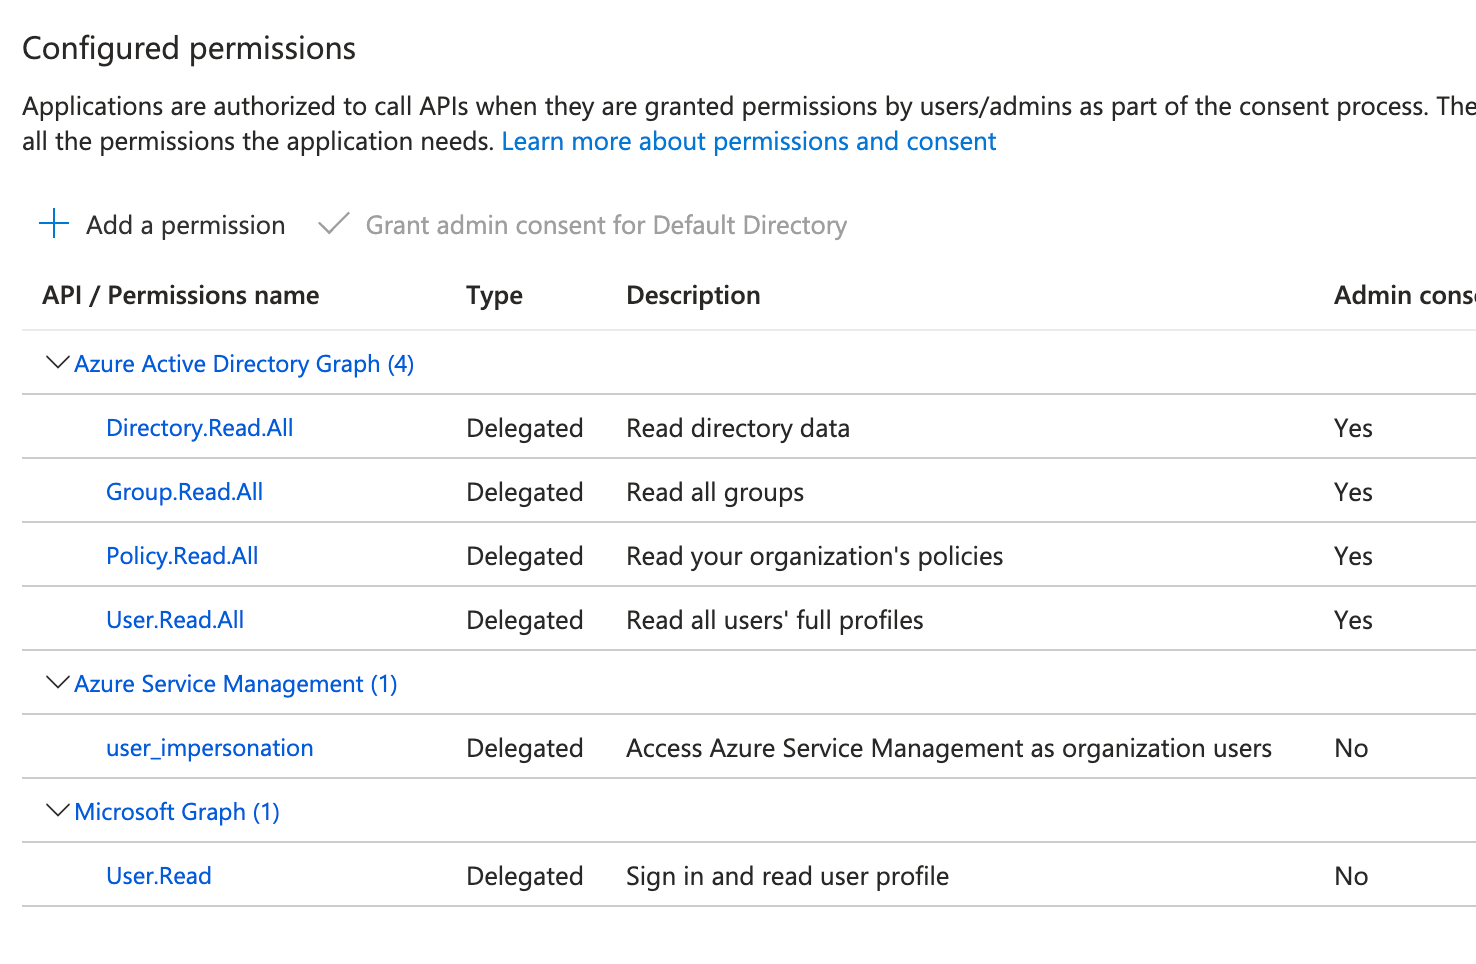
Add API Permissions
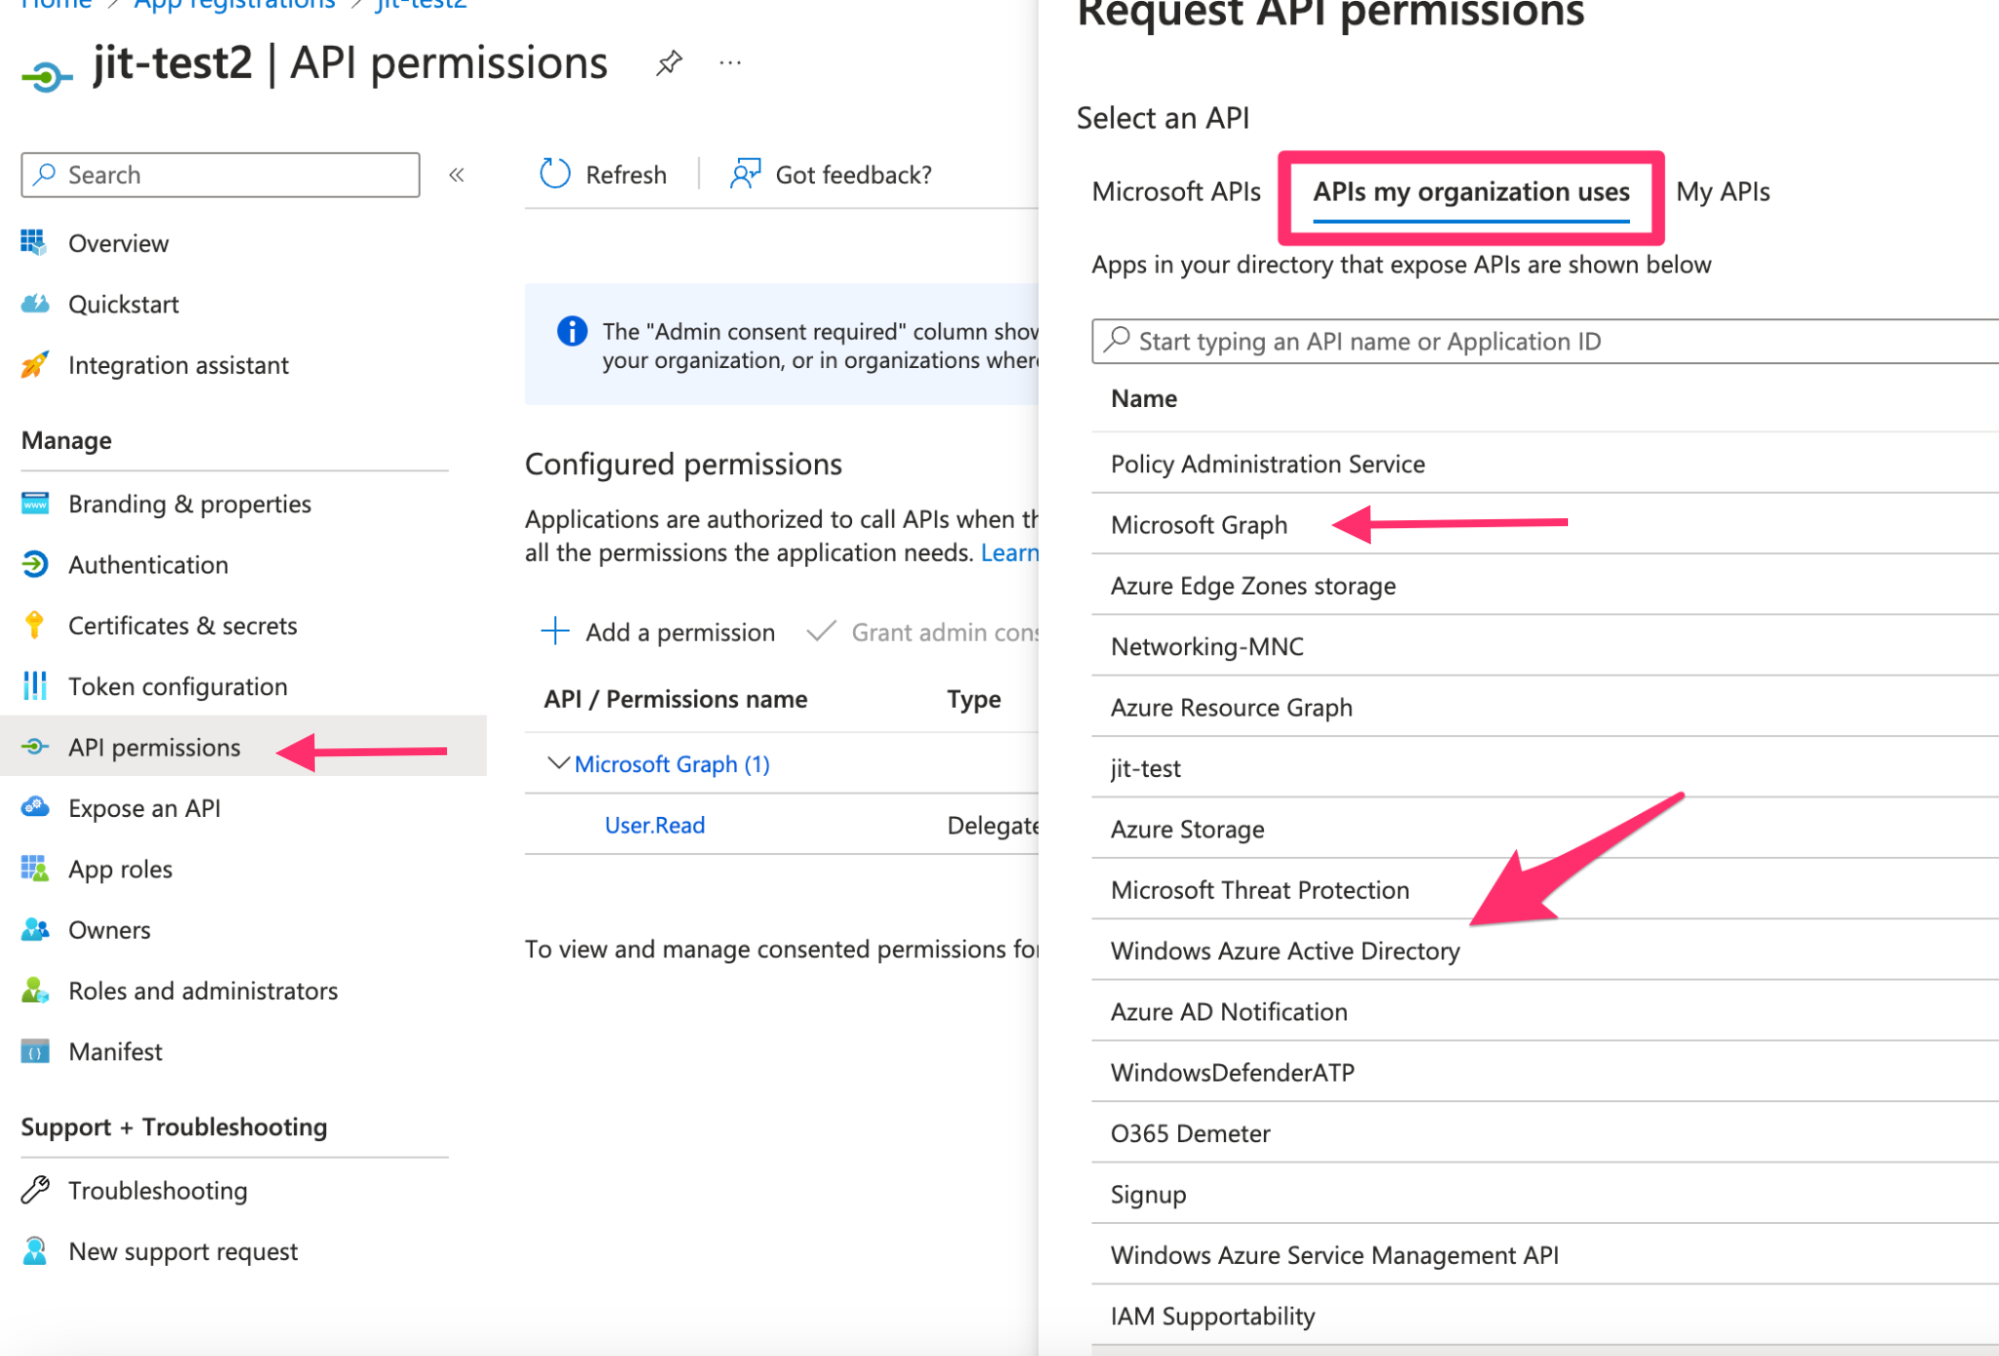
- In your registered app, go to API permissions under the Manage section.
- Click + Add a permission.
- Under APIs my organization uses, search for and select Windows Azure Active Directory.
- Select Delegated permissions.
- Expand the permission categories and check the following:
Directory.Read.AllGroup.Read.AllPolicy.Read.AllUser.Read.All
- Click Add permissions.
Repeat these steps to add:
user_impersonationpermission from Azure Service Management API.User.Readpermission from Microsoft Graph API.
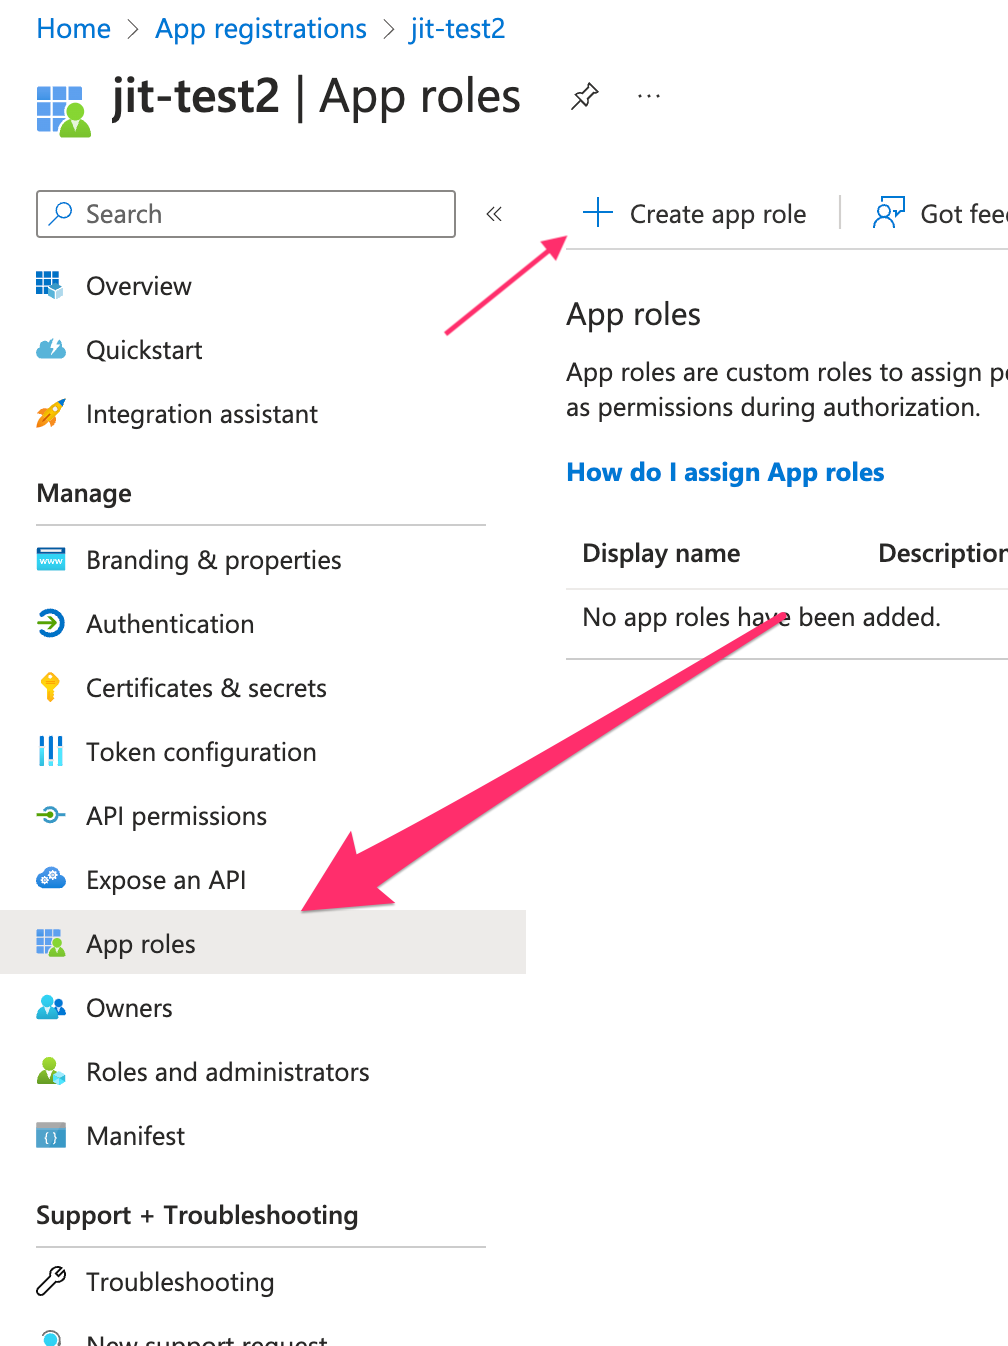
Create an App Role
-
Select App roles from the Manage menu.
-
Select Create app role.
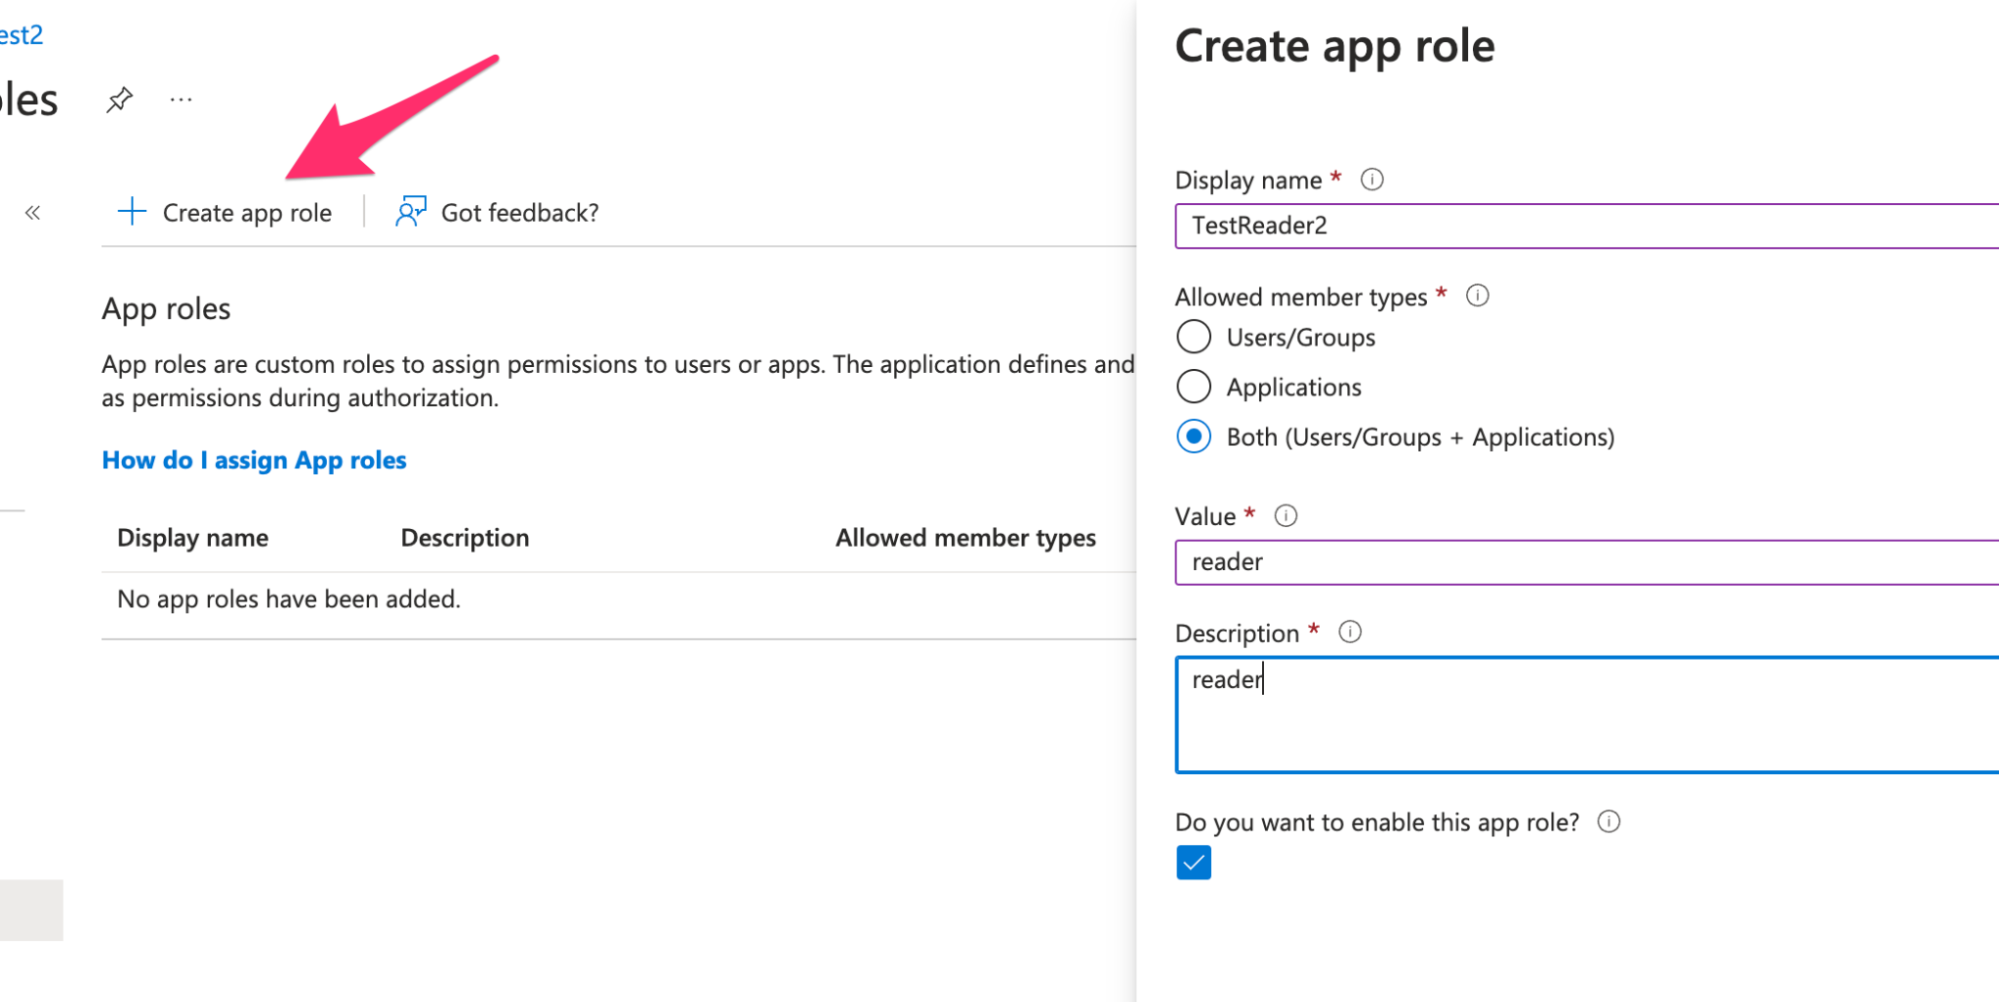
-
Fill in the fields:
- Display name: Reader (or any meaningful name)
- Allowed member types: Select Both (Users/Groups + Applications)
- Value: reader
- Description: e.g. reader app role
-
Check the box Do you want to enable this app role?
-
Click Create.
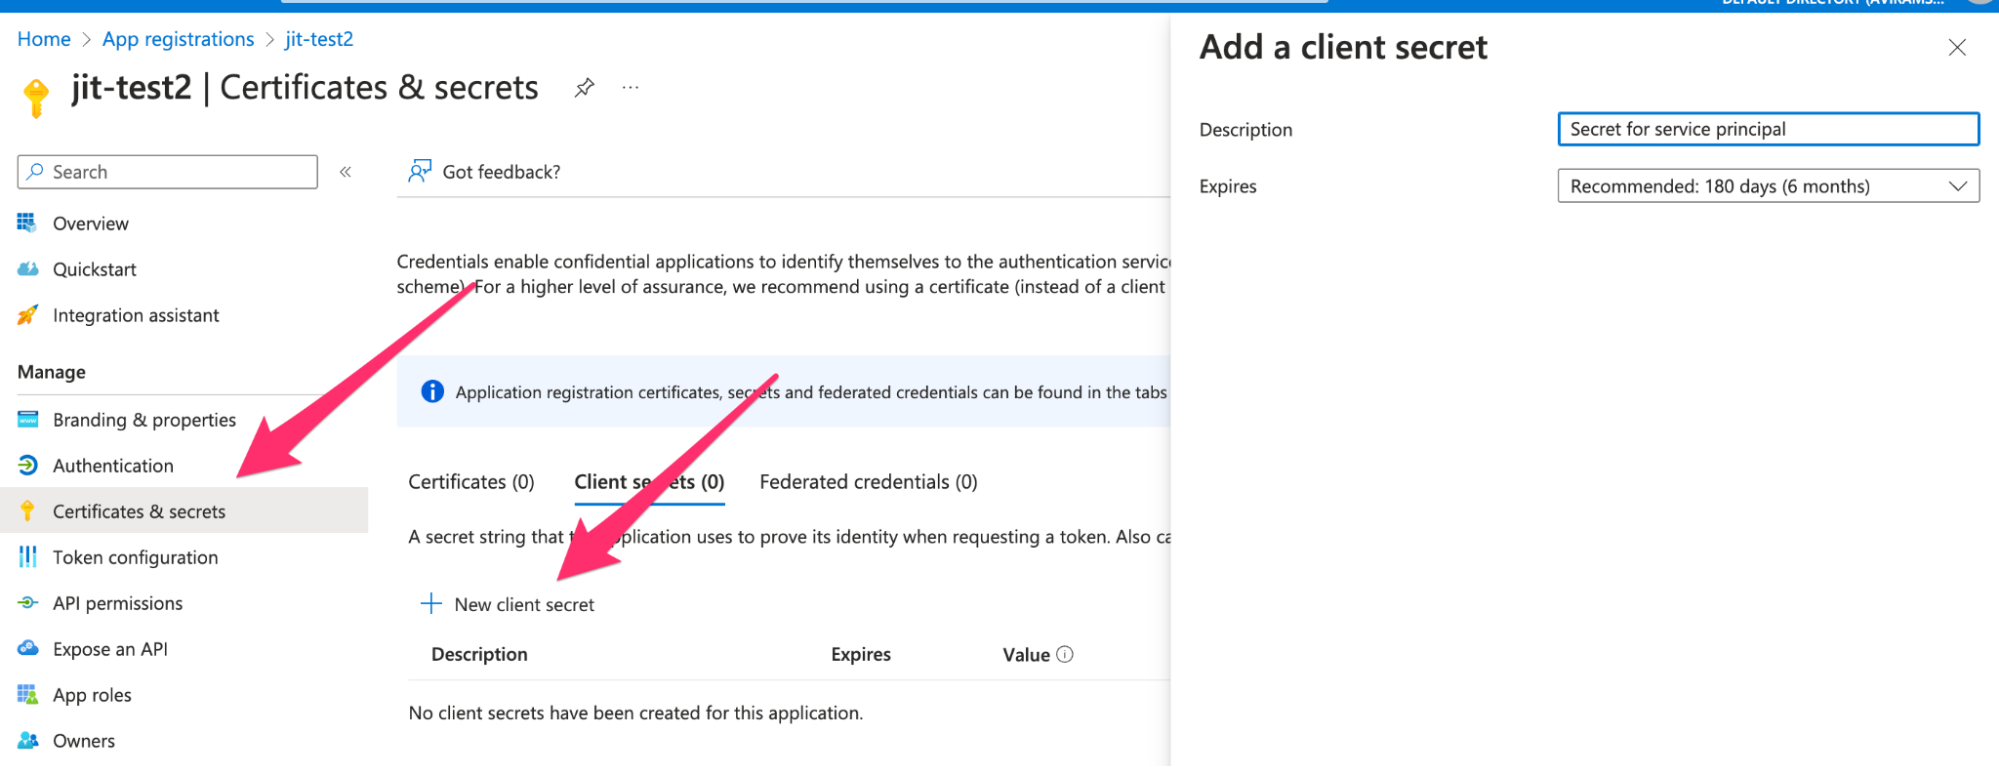
Create a Client Secret
- In the registered app, go to Certificates & secrets under the Manage section.
- Click + New client secret.
- Enter a Description and select an Expiration period.
- Click Add.
⚠️ Important: Copy the Value of the secret now, this is the only time you’ll be able to view it. You’ll need it later when setting up the Azure integration in Jit.
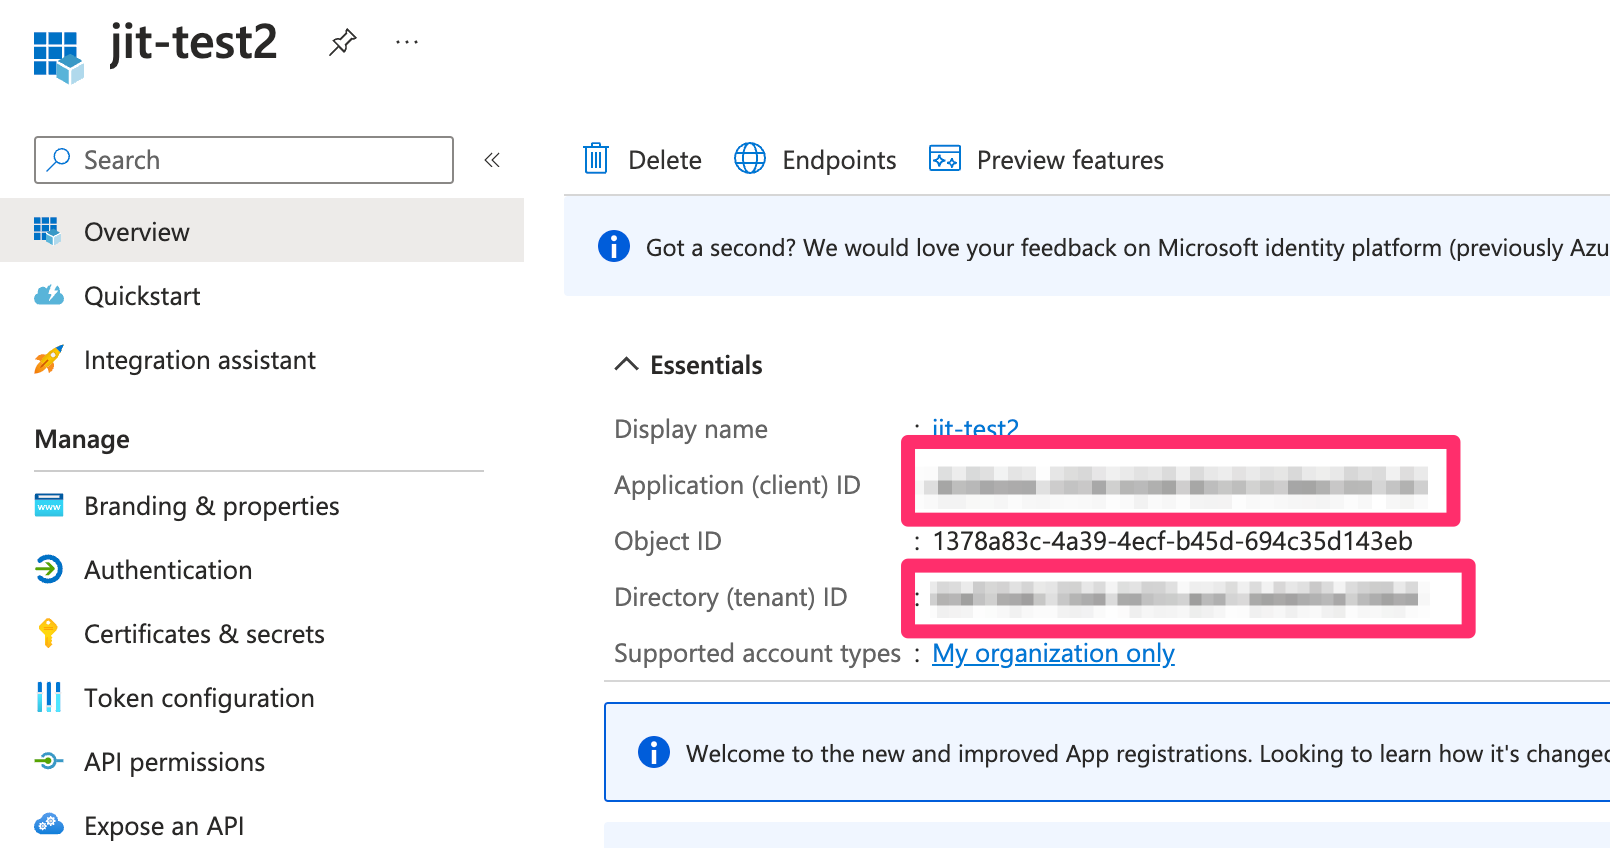
Retrieve Azure Identifiers
- In your app’s Overview tab, copy the following:
- Application (client) ID — used as azure_client_id
- Directory (tenant) ID — used as tenant_id
💡 You’ll use these values when configuring the integration in Jit.
Assign the App Role to Your Subscription
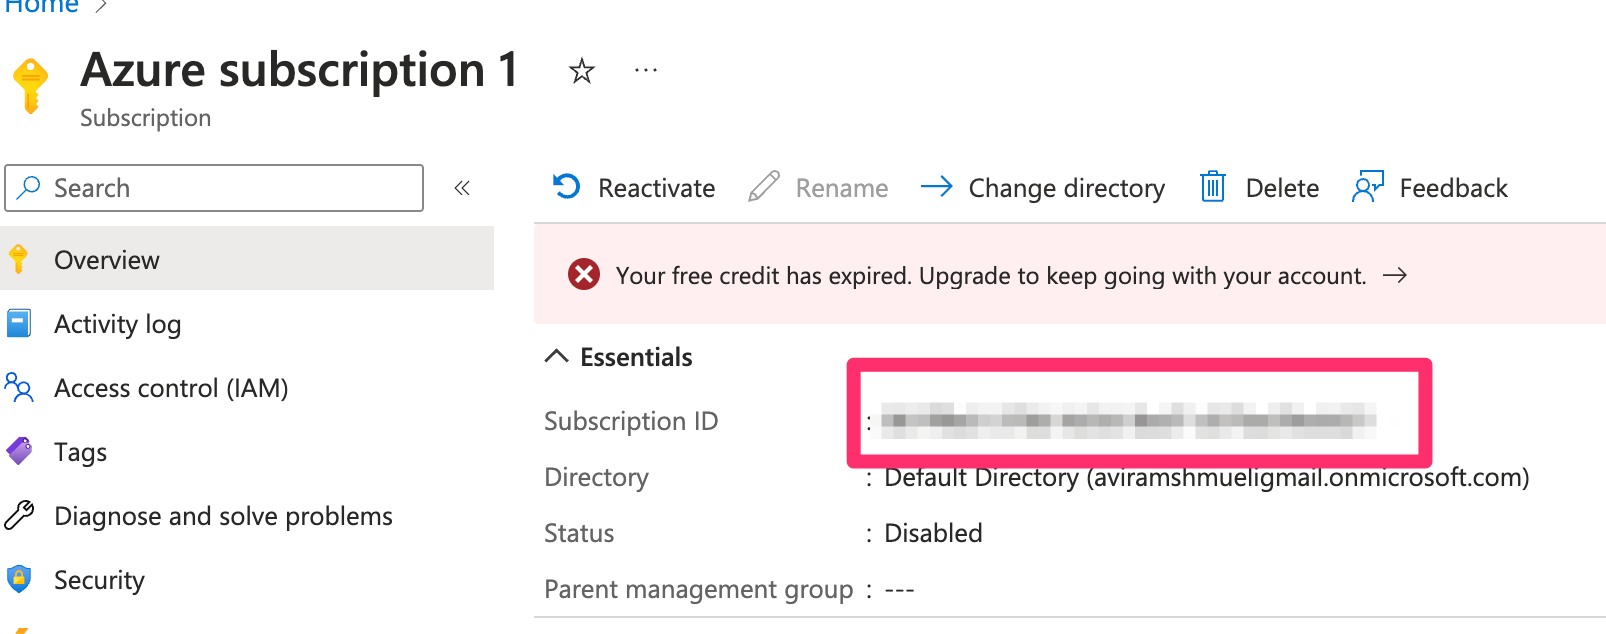
- In the Azure Portal, go to Subscriptions and select your target subscription.
- In the Overview tab, copy the Subscription ID, You will need it later in the integration process.
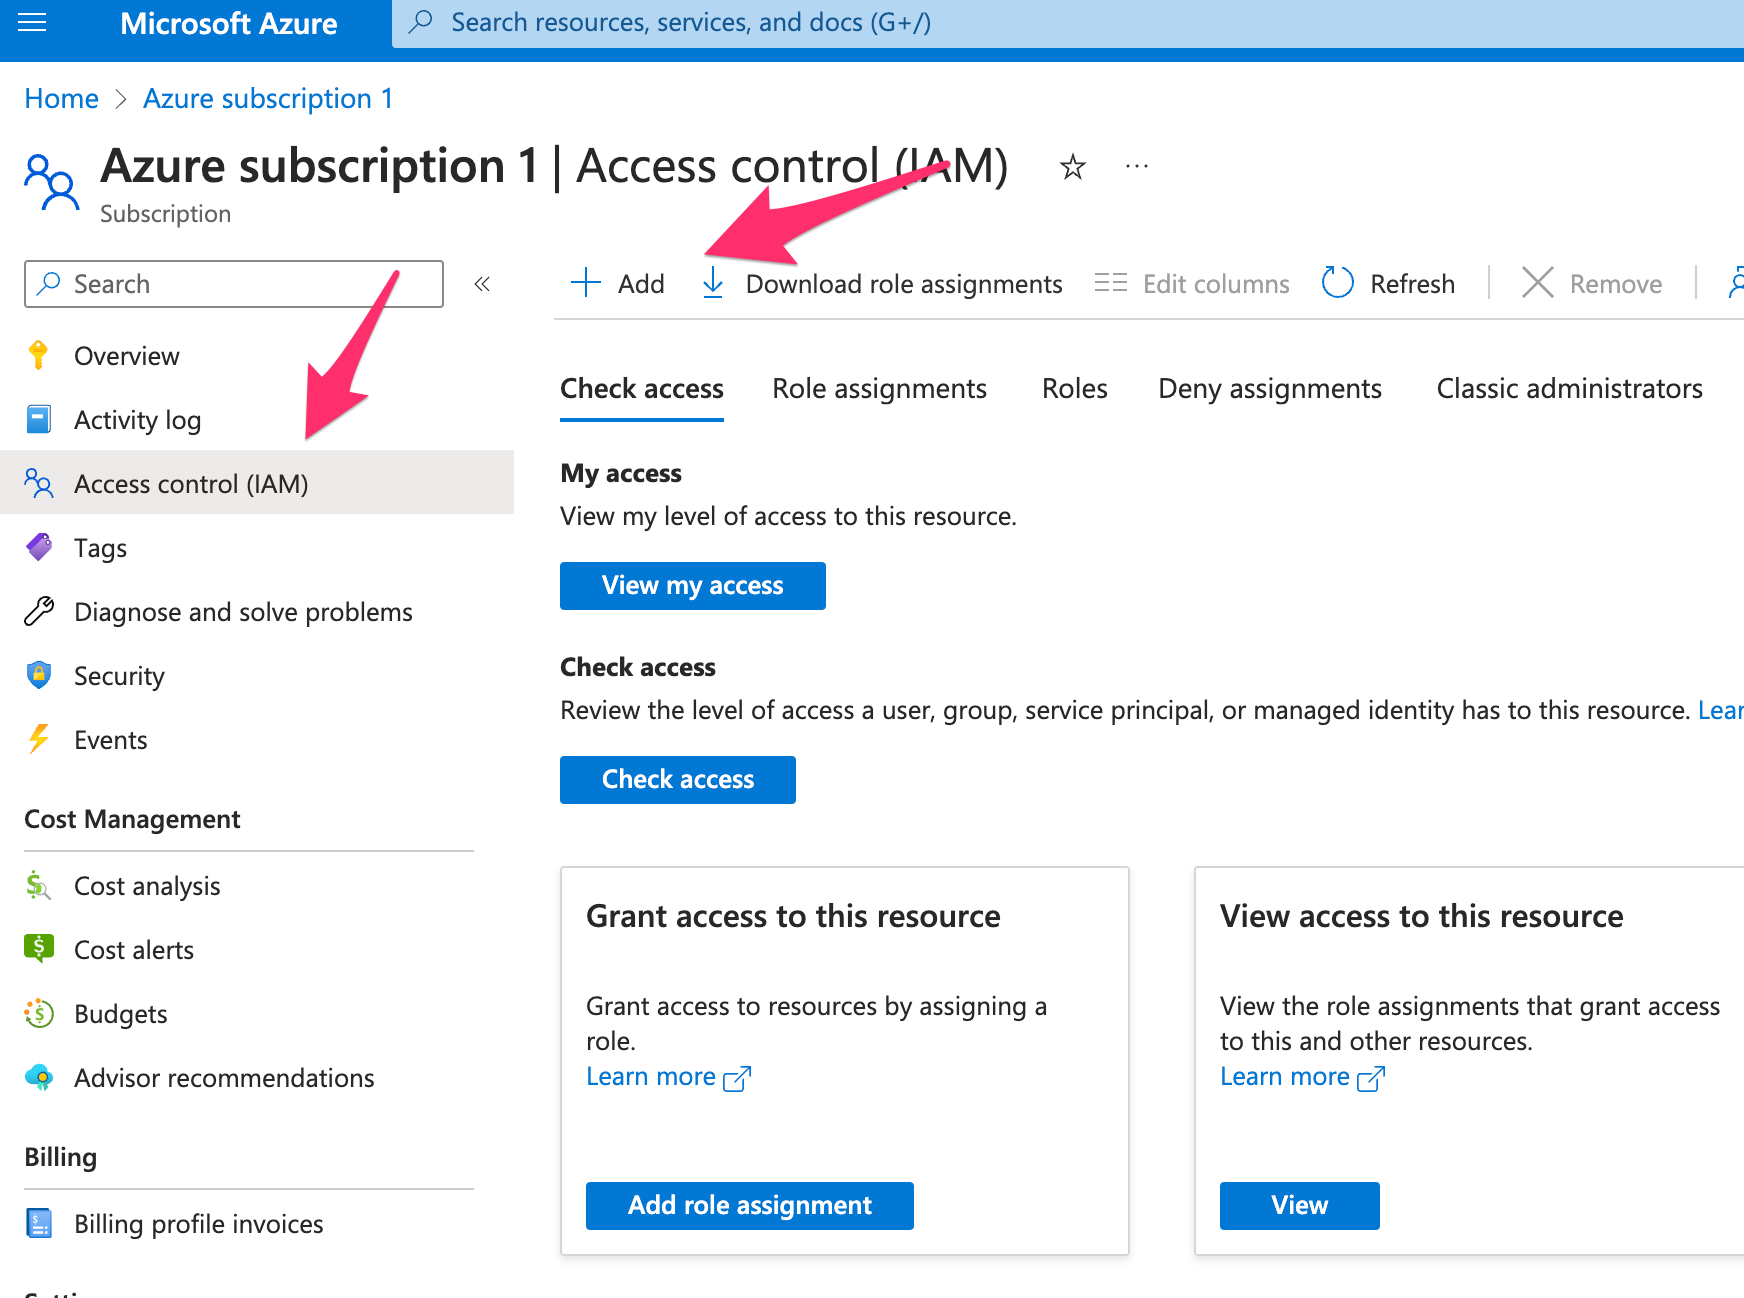
- Go to Access control (IAM).
- Click + Add → Add role assignment.
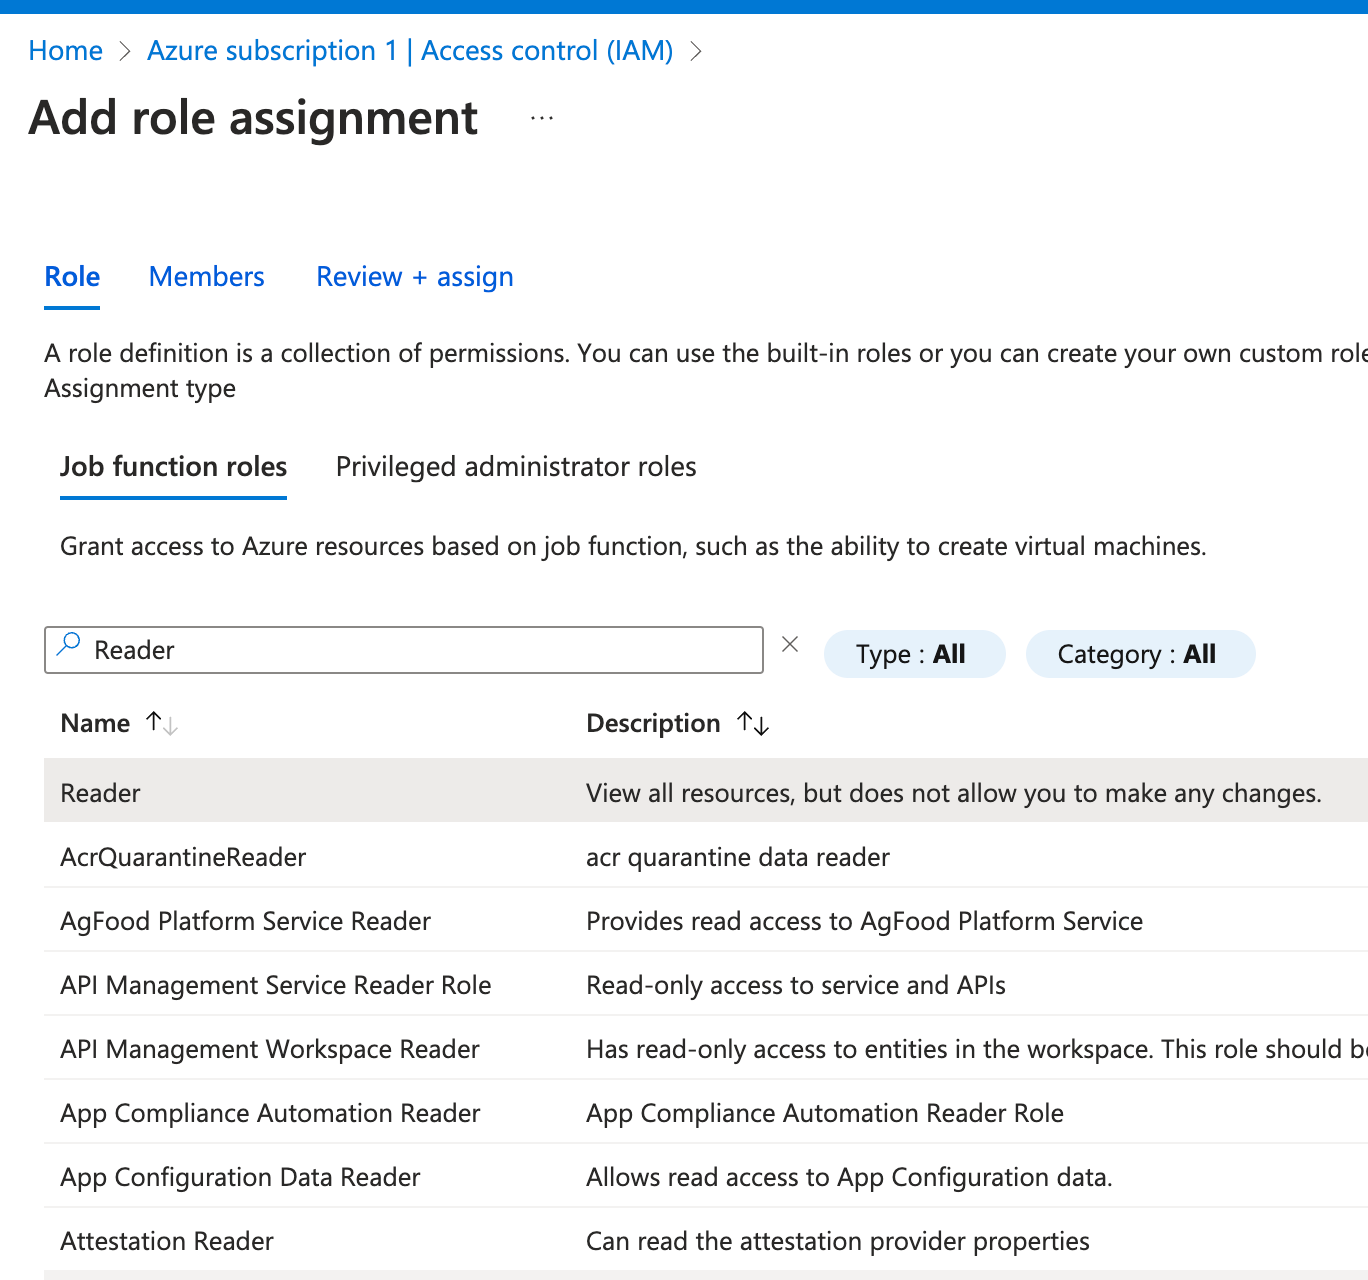
- In the Role tab, search for the role name you created earlier (e.g.,
Reader) and select it.
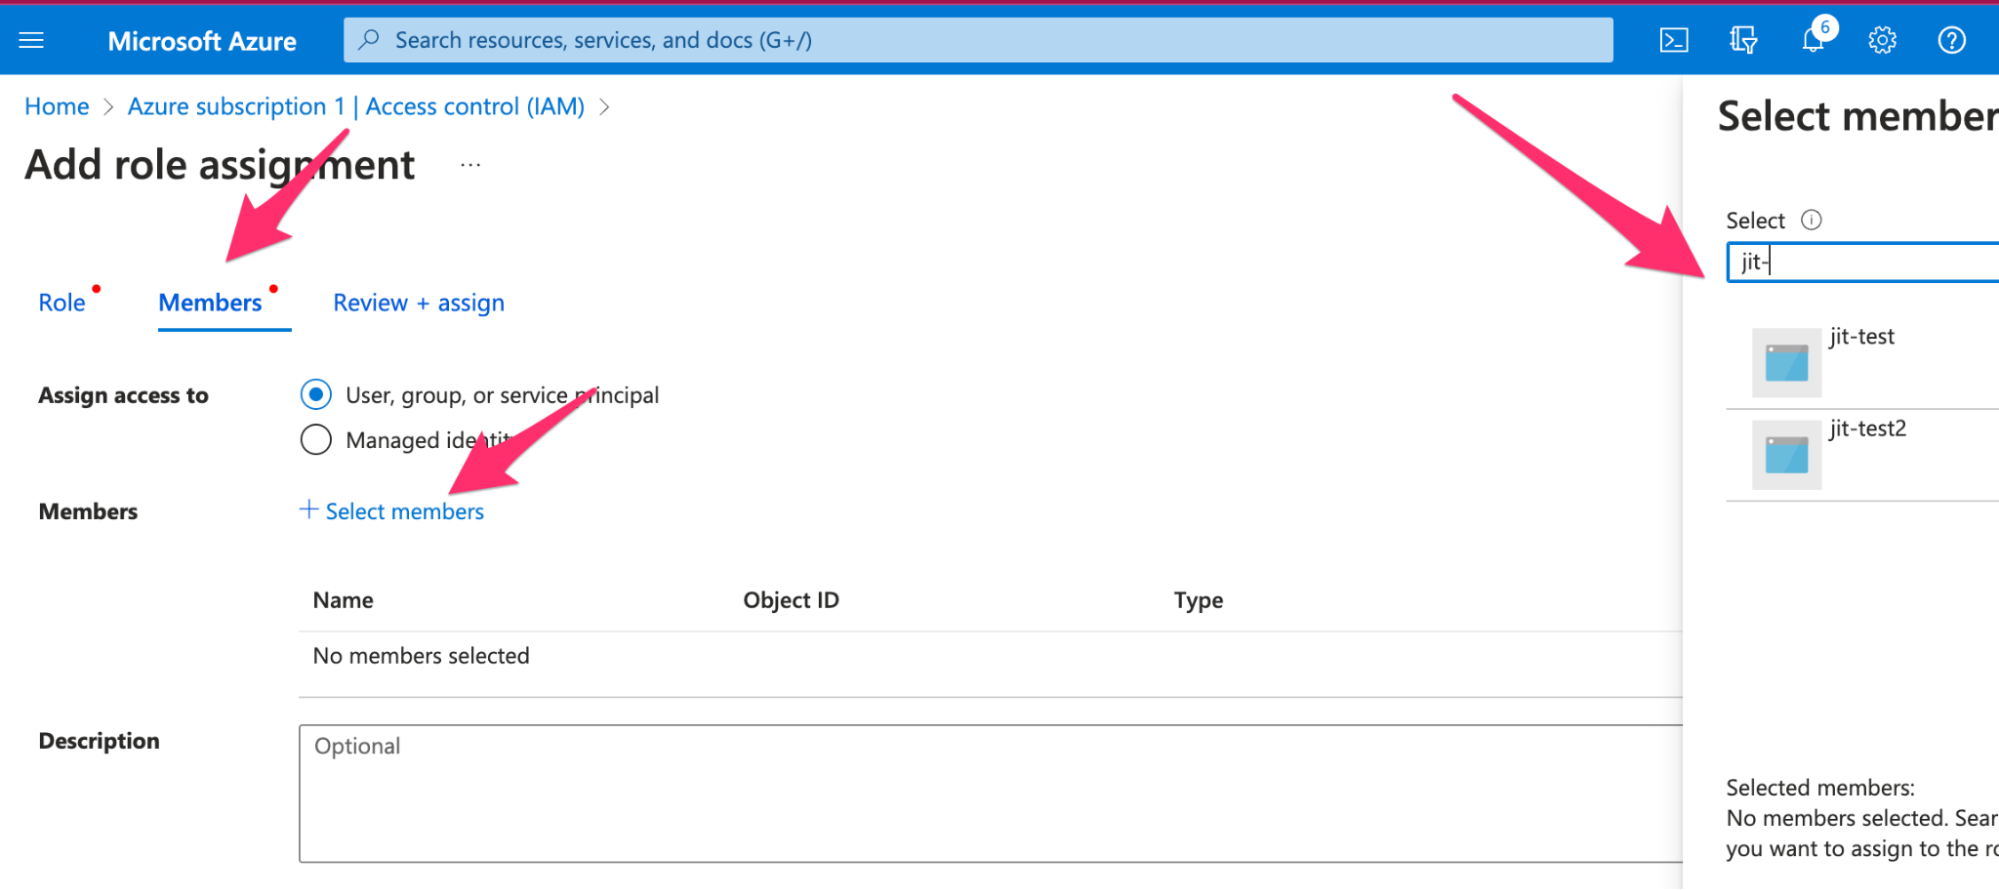
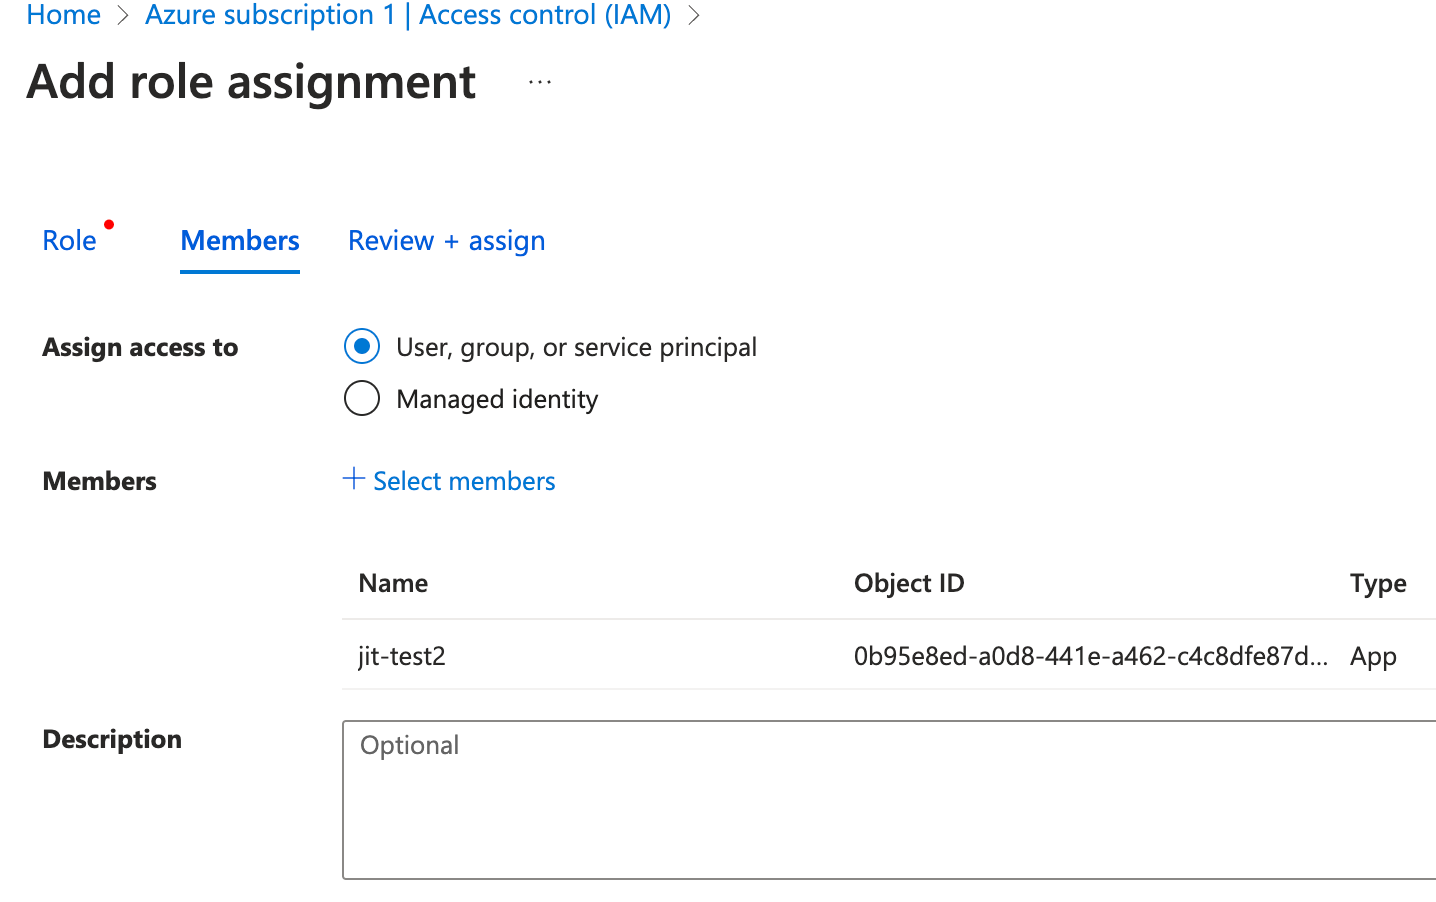
- In the Members tab:
- Click + Select members
- Search for and select your registered app
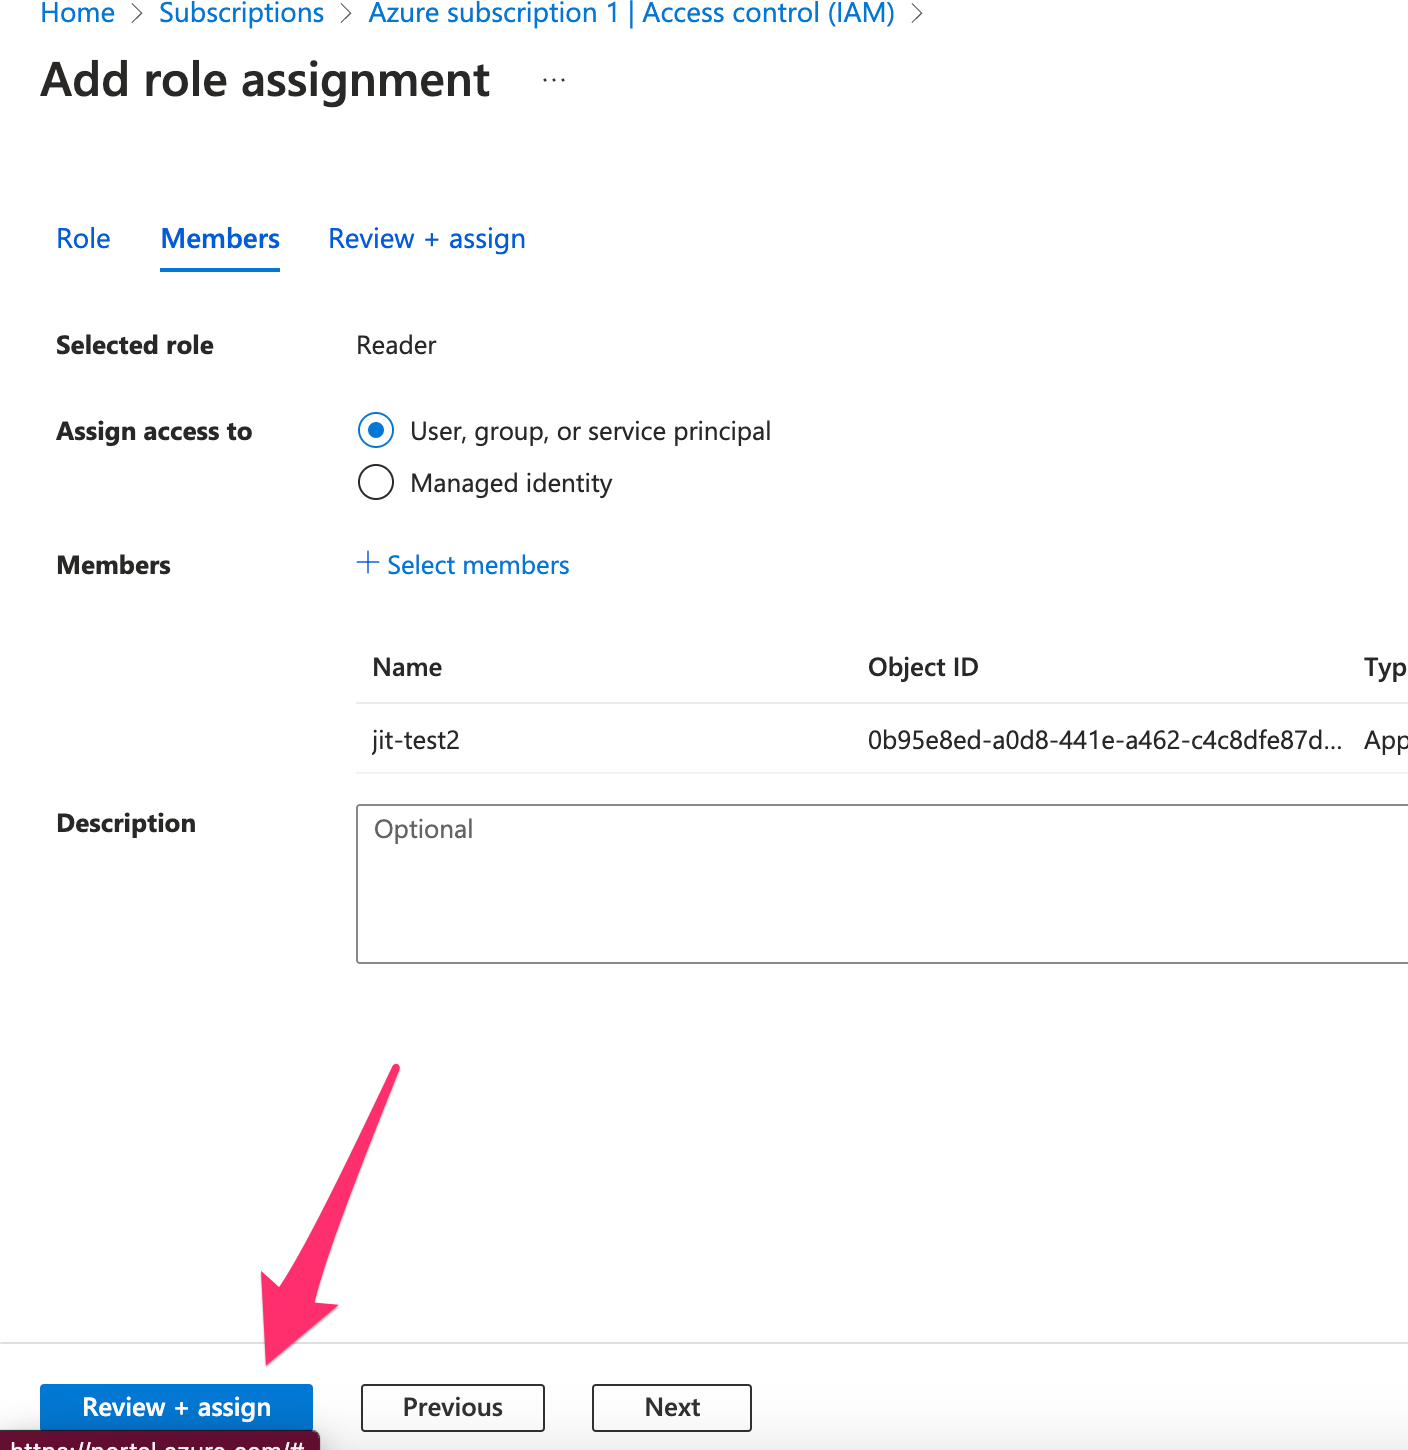
- Click Review + assign to complete the process.

Limitations
Jit currently supports integration with one Azure subscription per tenant.
Updated about 1 year ago