Shortcut Integration
Integrating with Shortcut
Integrating Shortcut with Jit allows you to create security-related stories directly from findings and track remediation progress. Stories are automatically created with the [Jit] prefix and the Opened-by-jit label for easy identification. Learn more here.
Web App Integration
Quickstart
- In the Jit web app, go to the Integrations page.
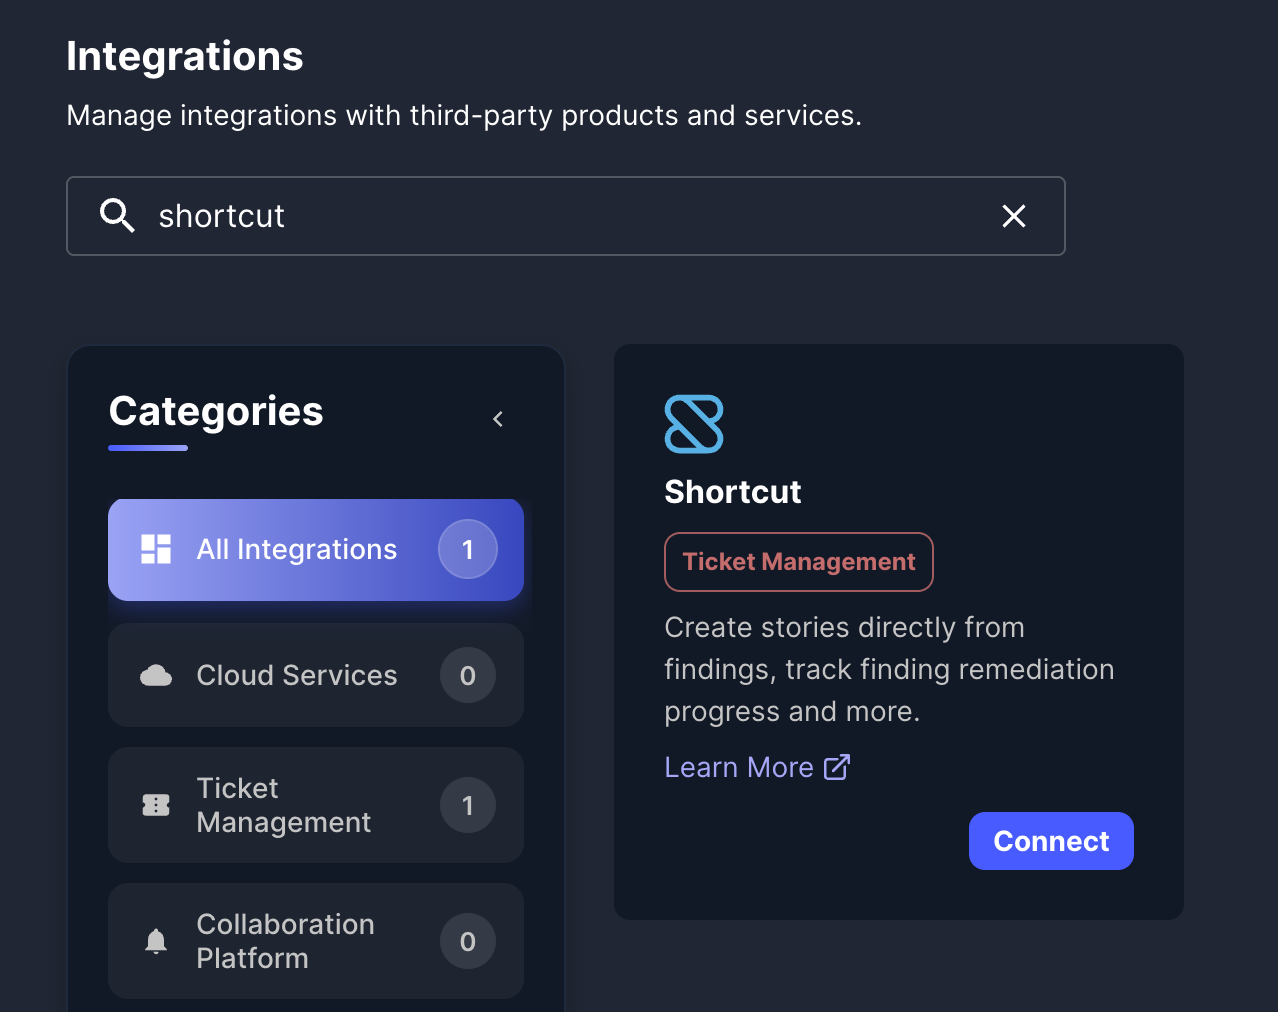
- Find the Shortcut card and click Connect.
- A connection window will appear. Click Connect in the top-right corner.

- Generate and provide a Shortcut API Token. Learn more here.
- Log into your Shortcut account.
- Go to Settings → API Tokens.
- Create a new token with appropriate permissions.
- Copy the token and paste it in the API Token field.
❗️ Note your token expiration Make note of the expiration date - You will need to reconnect when expiration is reached, we advise to set Never as expiration.
-
Connect the integration
Use created API token to connect to Shortcut.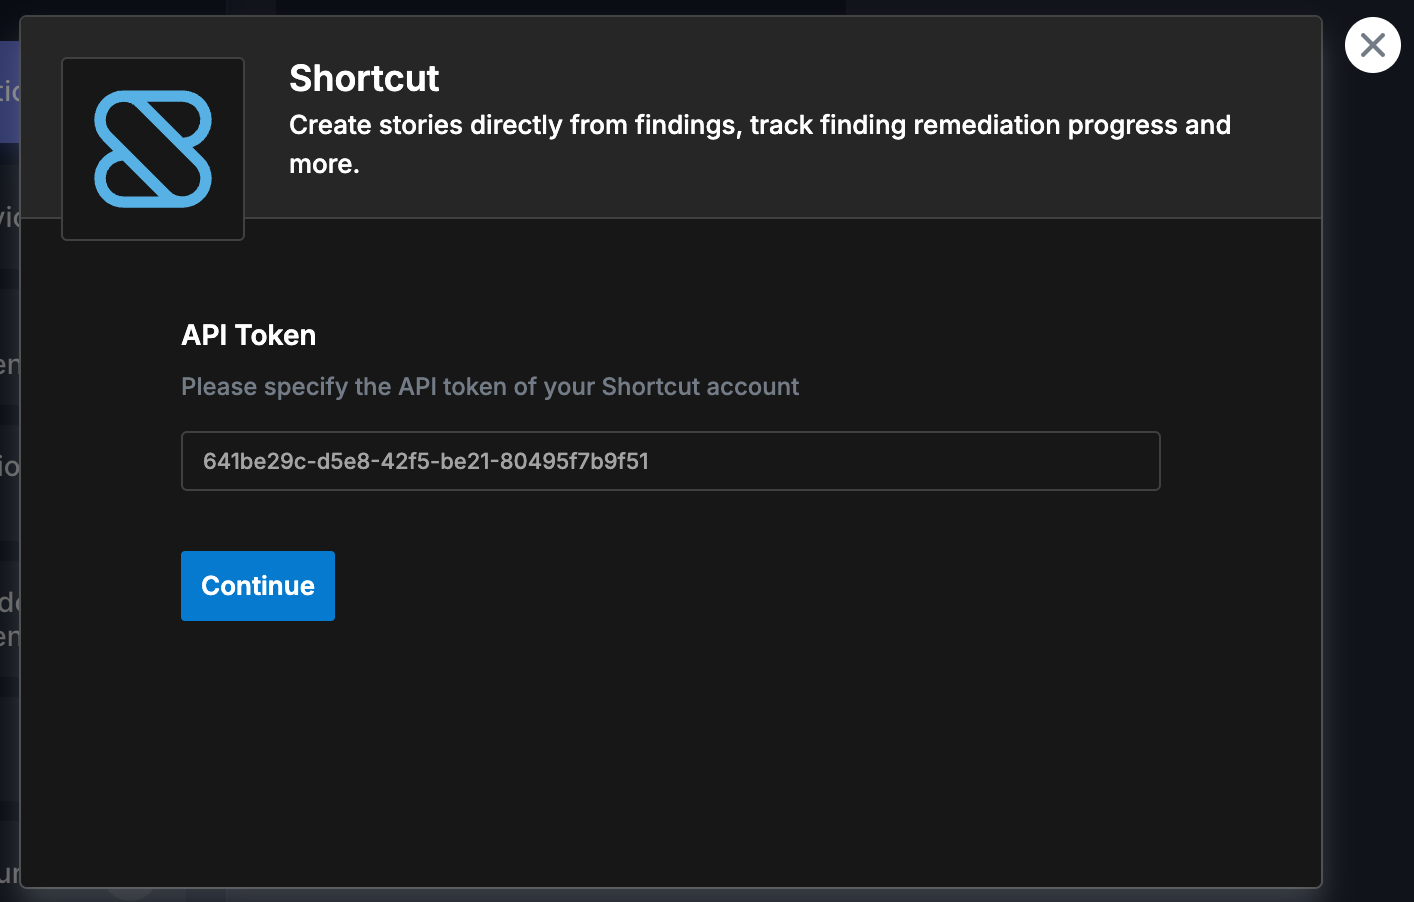
-
Configure the integration:
- Default Workflow Name – Enter the name of the workflow to use for new stories (required).
- Default Project Name (Optional) – Optionally enter a project name to associate stories with.
- Default Epic Name (Optional) – Optionally enter an epic name to use as default for new stories.
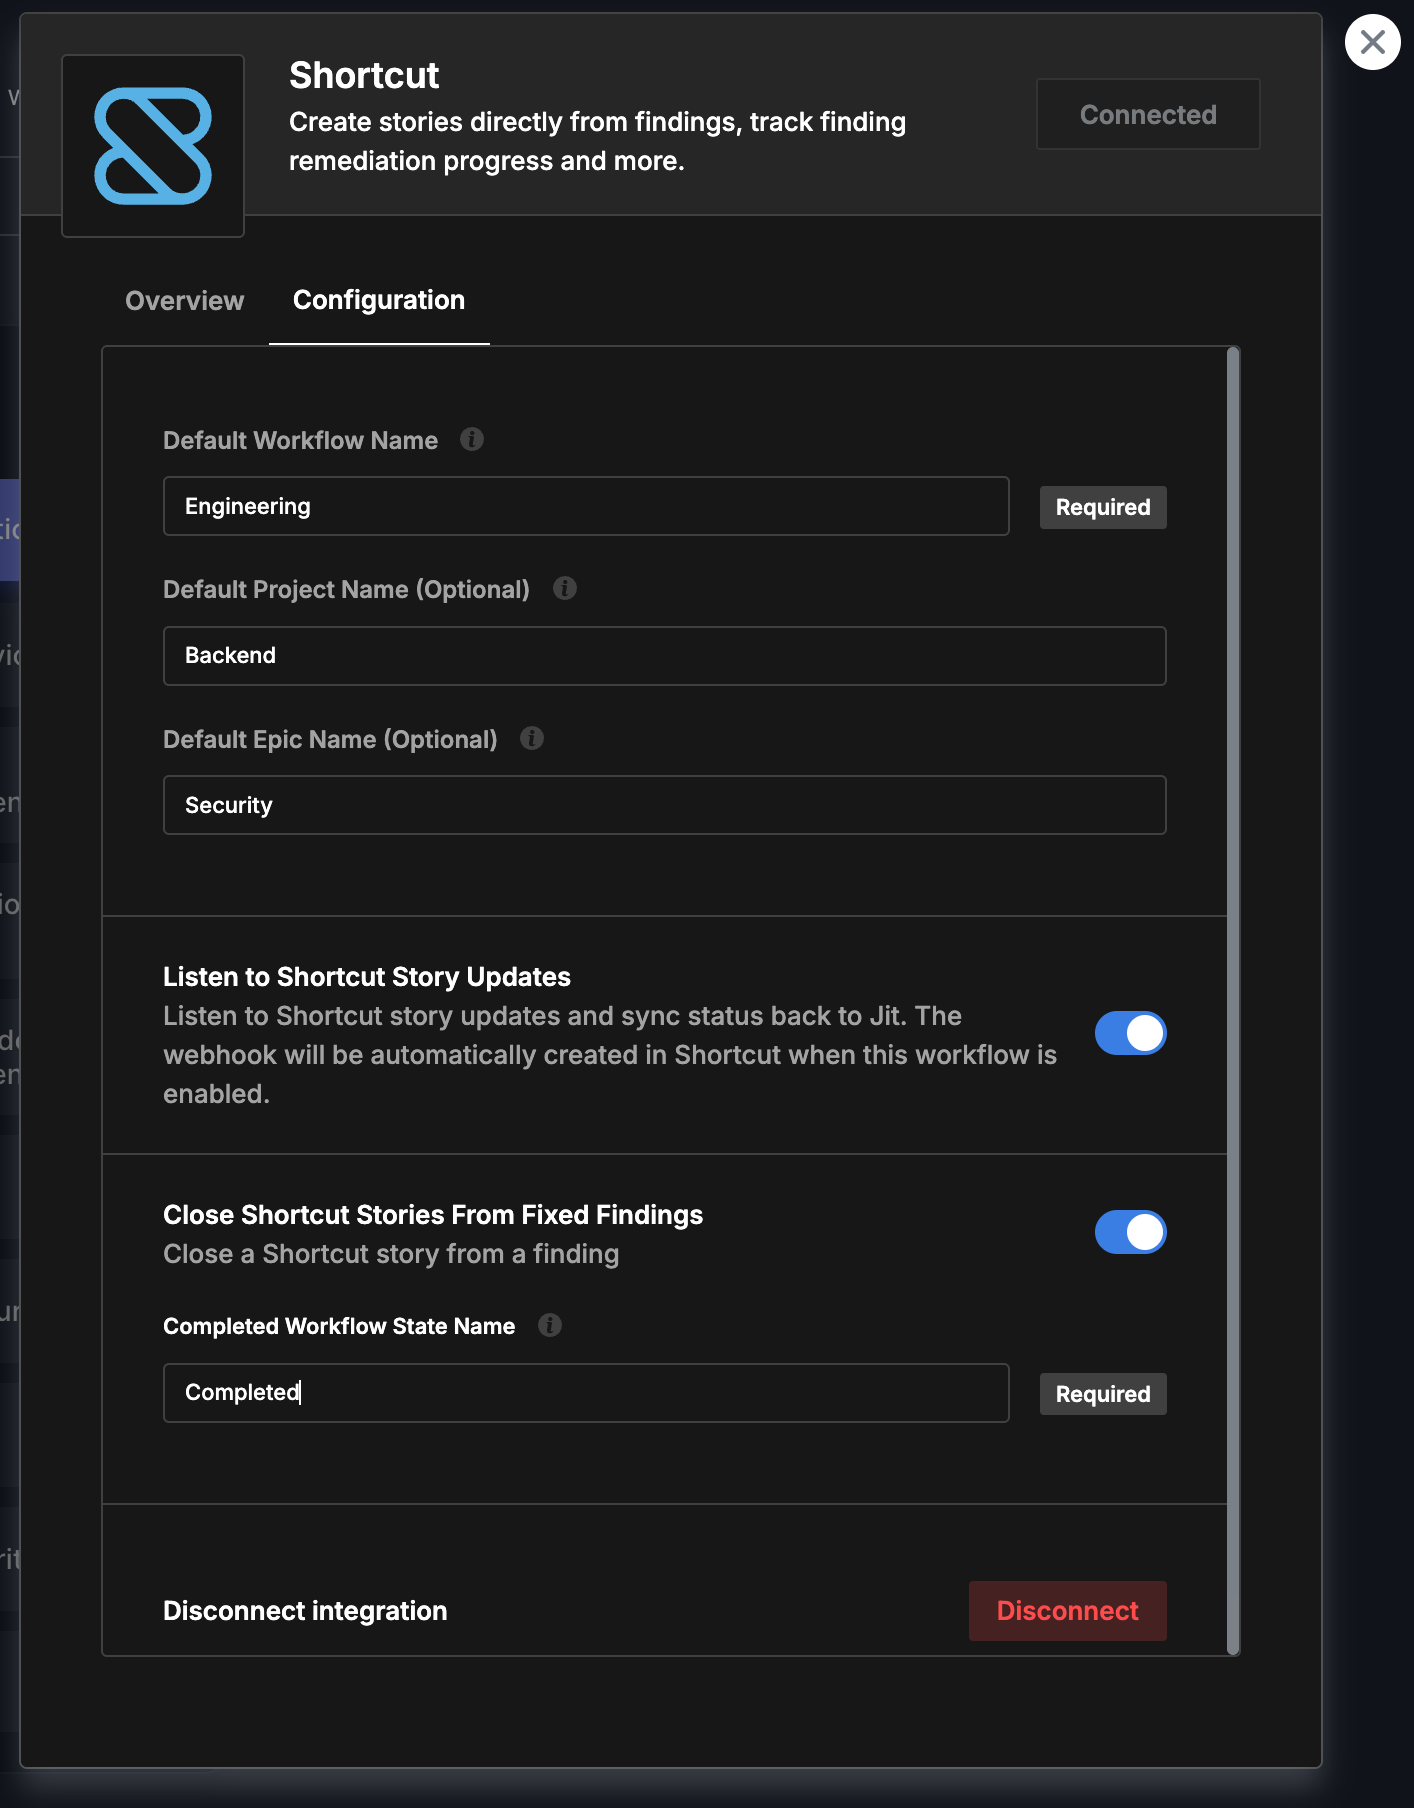
Configuration Fields
Default Workflow Name (Required)
The workflow name determines which workflow state will be used when creating new stories. The system will automatically find the workflow by name and use its default state ID. This field is required because Shortcut's API requires a workflow_state_id when creating stories.
Example: Engineering, Product, Backend
Default Project Name (Optional)
If provided, stories will be associated with the specified project. The system will automatically find the project by name and add the project_id to the story. Projects are optional and can be used in addition to workflows for better organization.
Example: Backend, Frontend, Infrastructure
Default Epic Name (Optional)
If provided, new stories will be automatically associated with the specified epic. The system will search for the epic by name and add the epic_id to the story. This is useful for grouping related security findings.
Example: Security Q1 2024, Vulnerability Remediation
Completed Workflow State Name (Required for Auto-Close)
When enabling the "Close Shortcut Stories From Fixed Findings" workflow, you must specify the workflow state name that represents a completed/closed state. The system will automatically find this state by name across workflows and use it when closing stories.
Example: Done, Completed, Closed
Features
Create Stories from Findings
From the Findings page, create stories directly from security findings.
Stories are automatically:
- Created with the
[Jit]prefix in the name for easy identification - Tagged with the
Opened-by-jitlabel - Set as
bugstory type - Associated with your configured workflow (required)
- Optionally associated with your configured project and epic
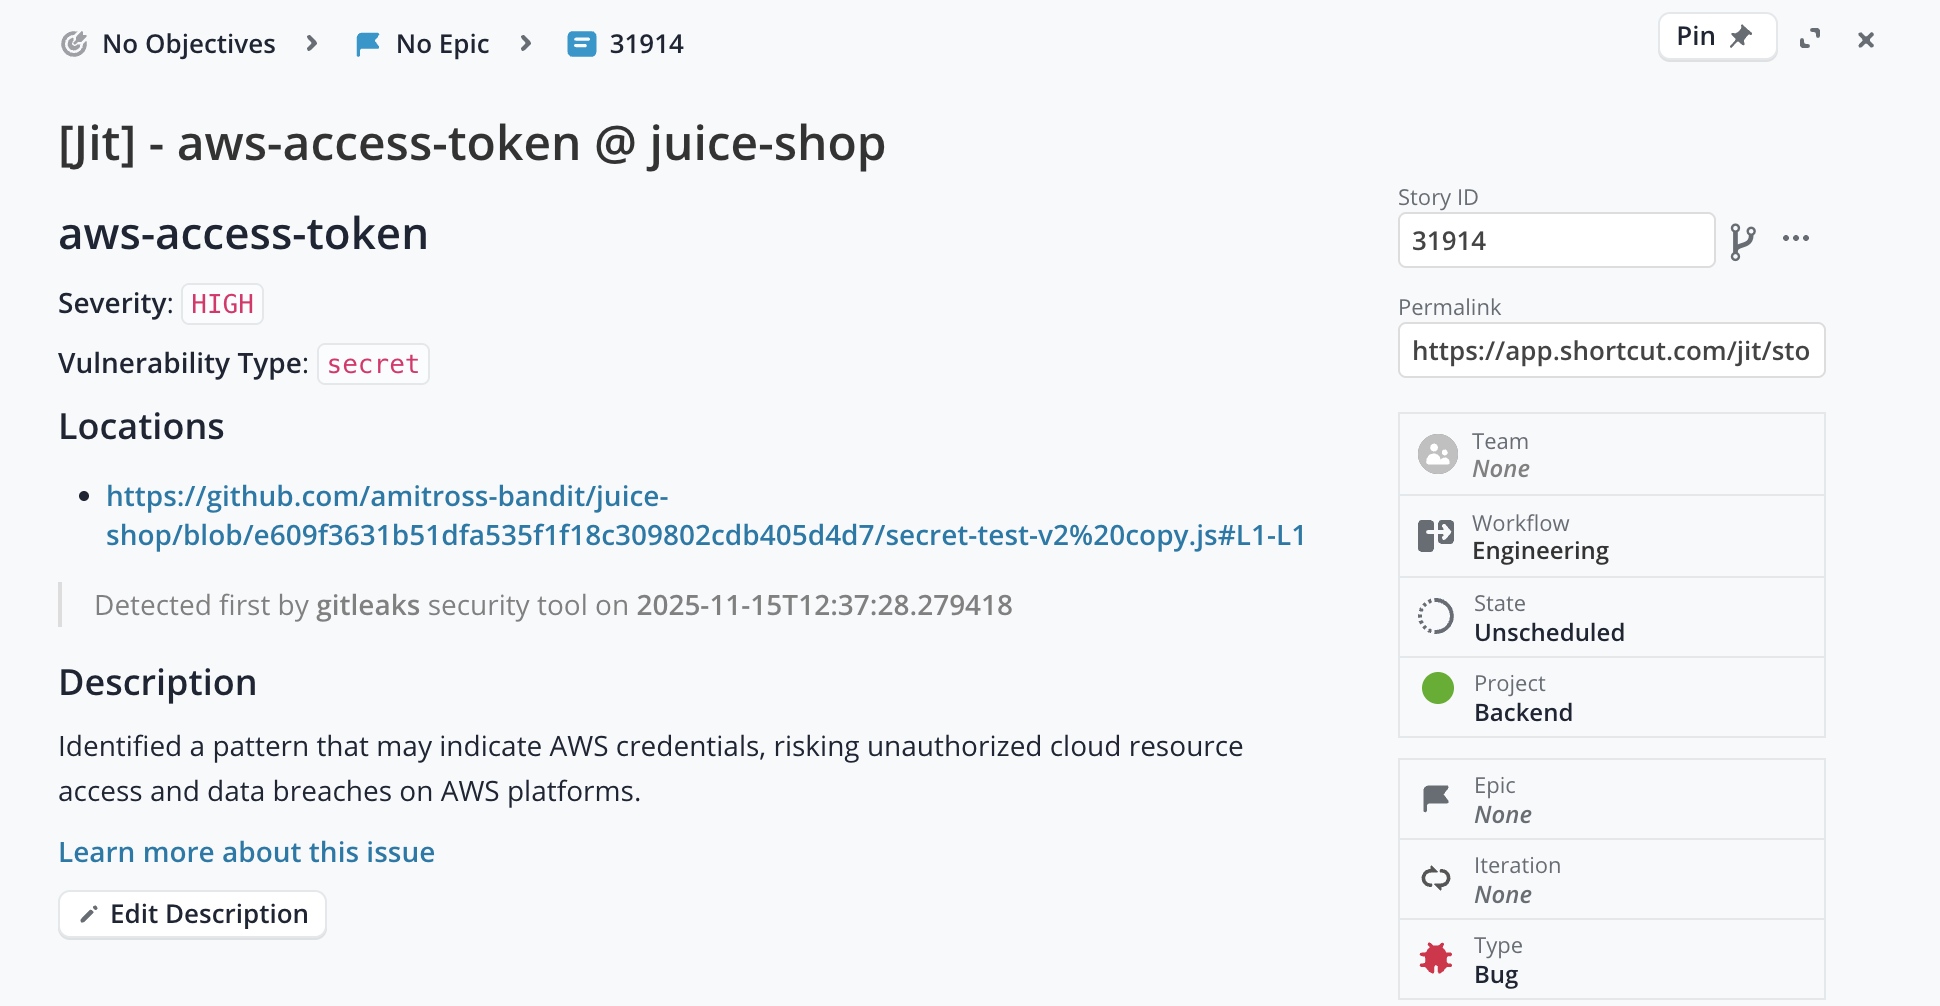
The story description includes:
- Finding title, severity, and type
- Location information
- Detection details (security tool and date)
- Full finding description
- Links to learn more about the issue
Auto-Close Stories
Enable the Close Shortcut Stories From Fixed Findings workflow to automatically move stories to your specified completed state when findings are fixed in Jit.
Configuration:
- Enable the workflow toggle
- Enter the Completed Workflow State Name (e.g., "Done", "Completed")
- The system will automatically find the state by name across all workflows
❗️ Important The completed state name must match exactly (case-insensitive) with a workflow state in your Shortcut workspace.
Sync Story Status
Enable the Listen to Shortcut Story Updates workflow to automatically sync story status changes from Shortcut back to Jit. This enables bidirectional synchronization:
- When a story's workflow state changes in Shortcut, the status is updated in Jit
- When a story is archived in Shortcut, the status is set to "Archived" in Jit
- Only stories with the
[Jit]prefix are processed
Automatic Webhook Creation: When you enable this workflow, Jit automatically creates a webhook in your Shortcut account. You don't need to manually configure webhooks - the integration handles this for you.
❗️ Important
- The webhook is automatically created when the workflow is enabled
- The webhook is user-specific and tied to your Shortcut connection
- Only workflow state changes and archive actions are synced back to Jit
- Stories without workflow state changes (e.g., title-only updates) are ignored
Workflows
Integrate Shortcut into your workflows to automate story creation and status synchronization.
After connecting:
- Configure your default workflow (required) and optionally set default project and epic
- Enable the workflows you want to use:
- Create Stories from Findings - Automatically creates stories when findings are created
- Close Shortcut Stories From Fixed Findings - Automatically closes stories when findings are fixed
- Listen to Shortcut Story Updates - Syncs status changes from Shortcut back to Jit
- Go to Settings → Workflows to create automation rules
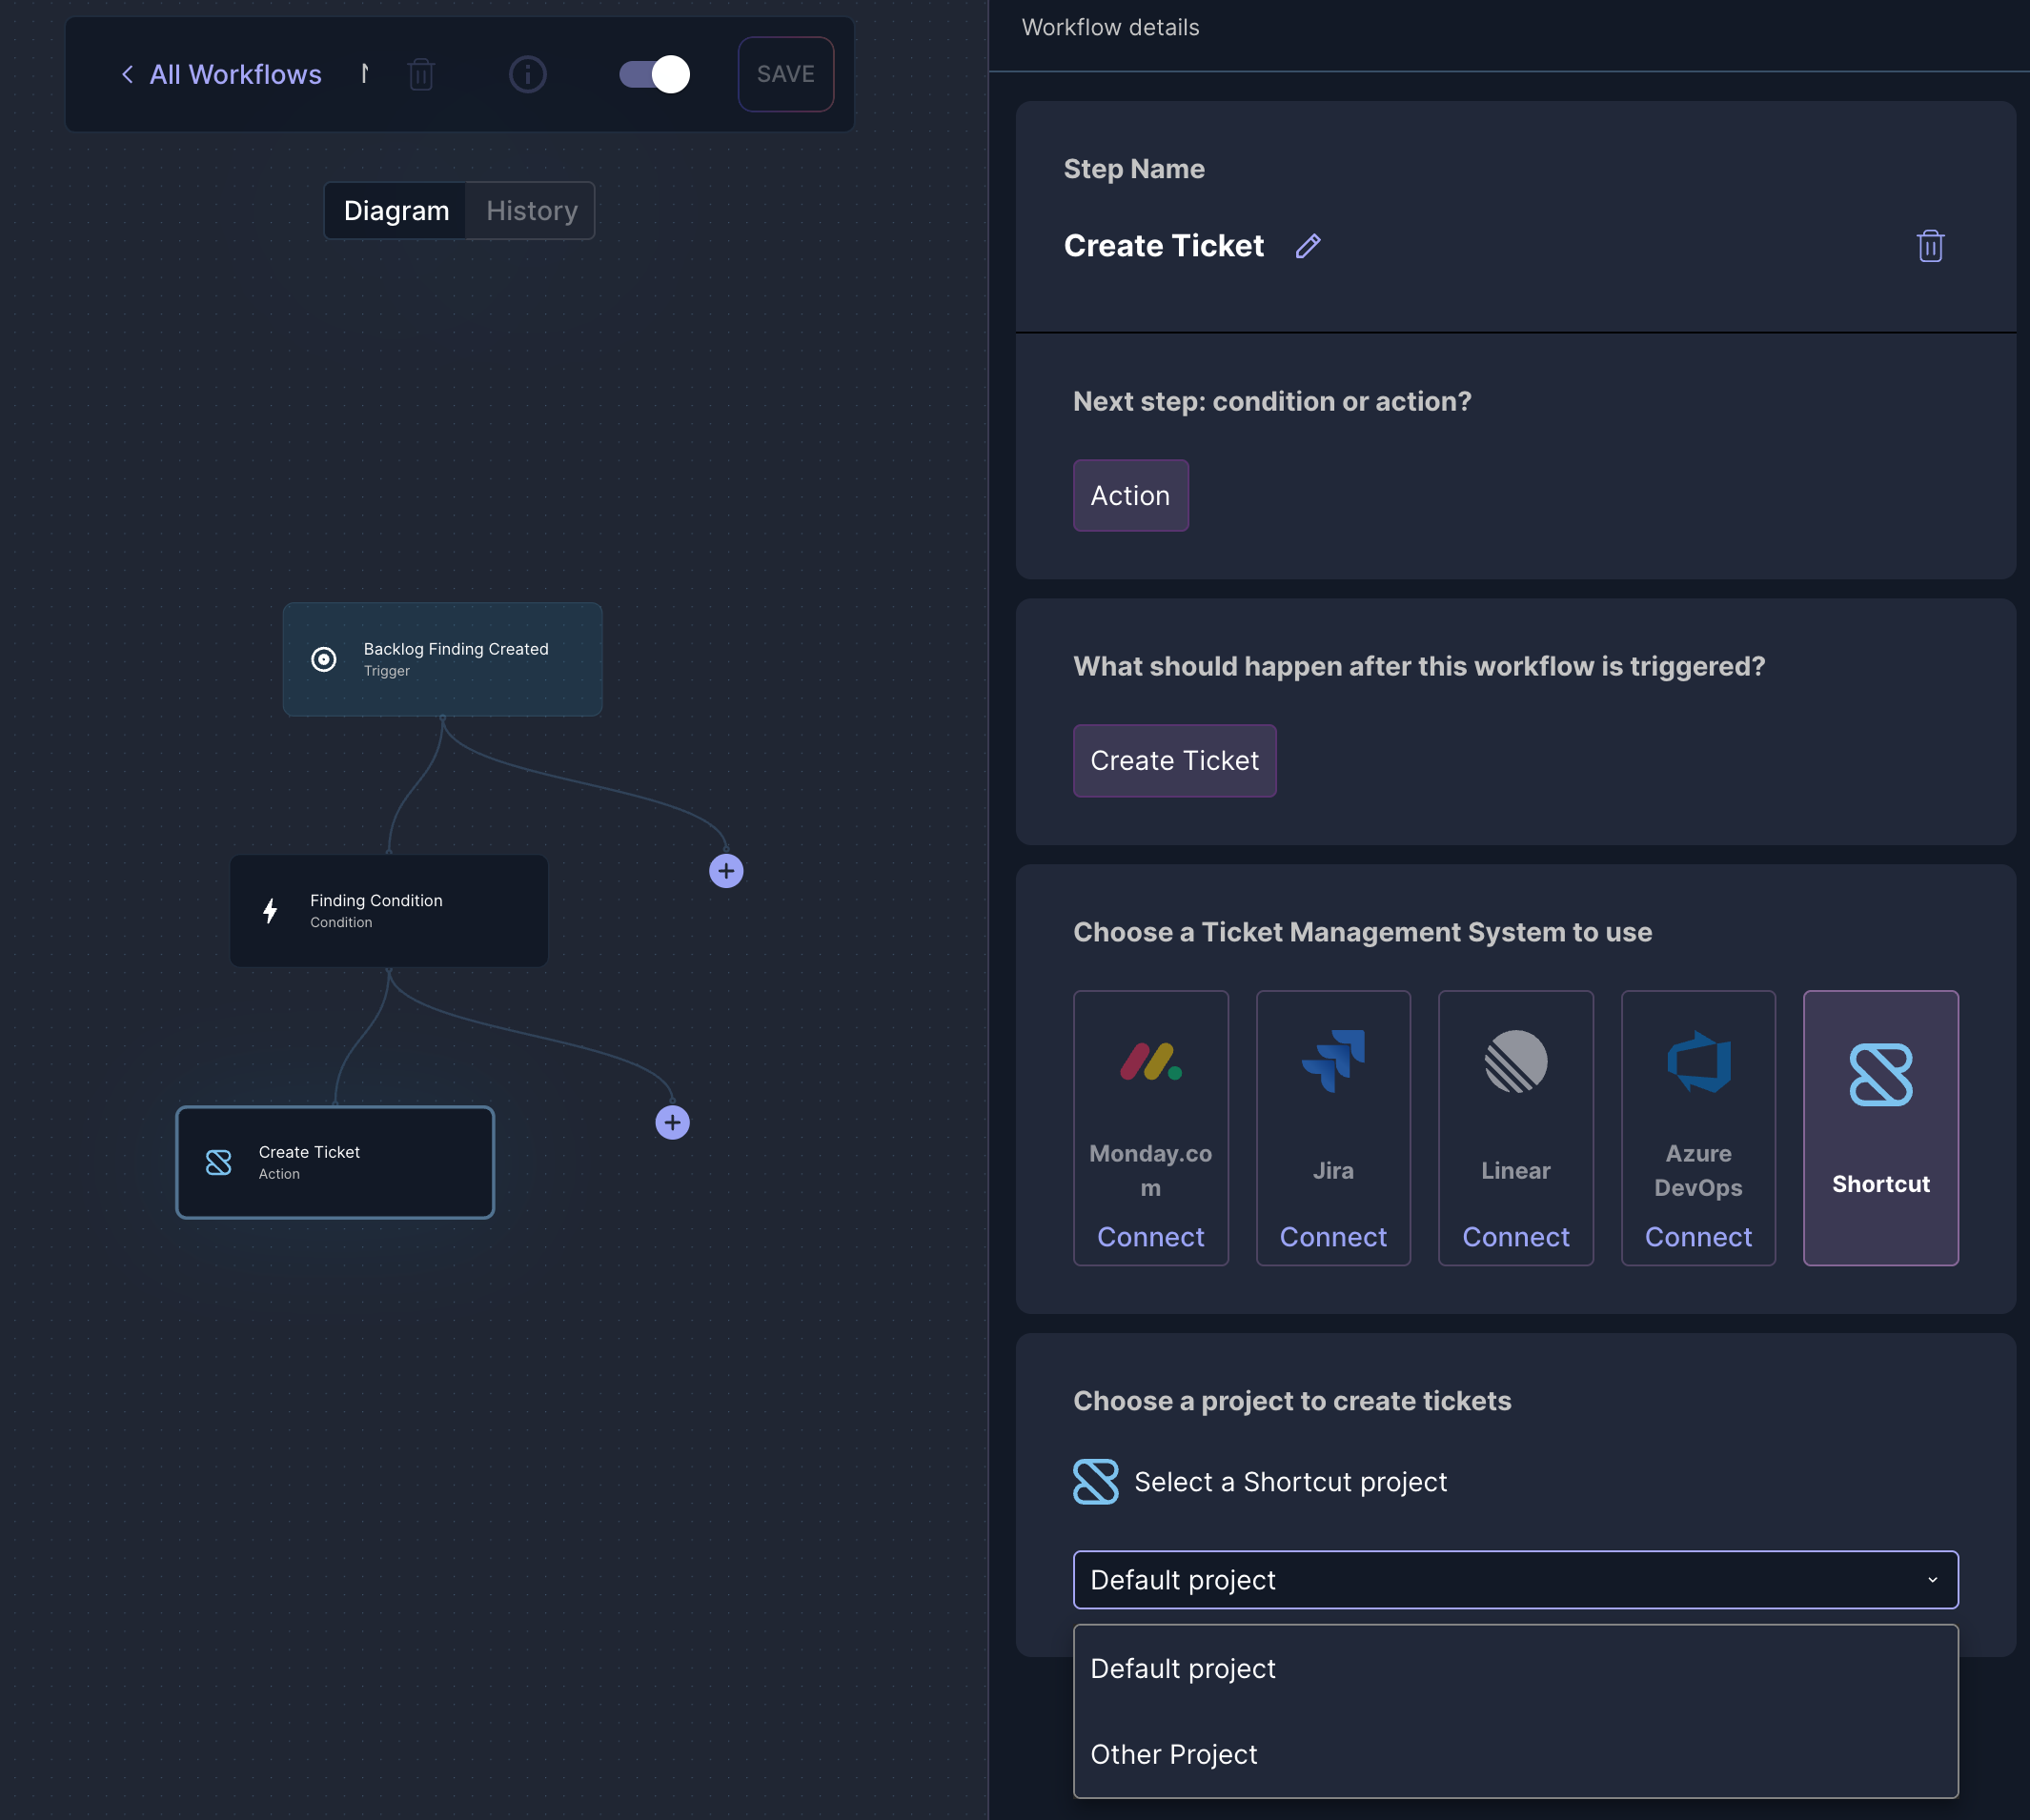
Sample Story
When a story is created from a finding, it will look like this:
Notes
- A label
Opened-by-jitwill be added to every created story to help Jit track tickets in your workspace. - All stories created by Jit are prefixed with
[Jit]in the name for easy identification. - Stories are created as
bugtype by default. - The workflow name matching is case-insensitive - you can enter "Engineering" or "engineering" and it will work.
- Project and Epic names are also matched case-insensitively.
- If a workflow, project, or epic name is not found, you'll receive an error message
- The webhook for status syncing is automatically managed - no manual configuration required.
- Only stories with workflow state changes are synced back to Jit to avoid unnecessary API calls.
Updated 29 days ago
