AWS Integration
Integrating with AWS
Overview
Implementing Jit's AWS integration will enable two core benefits:
- Enable contextual prioritization for security issues, which assigns a risk score to every issue based on their runtime and business context
- Detect security risks in your AWS environment
Though it does not require the integration steps below, Jit recommends that you also activate the Scan IaC for Misconfigurations security requirement for complete infrastructure protection.
Steps for integrating with AWS
Integrating with AWS accounts
To integrate Jit with an AWS account—
-
Sign in to your AWS account.
-
From the Integrations Page, locate the AWS tile and select Connect.
-
Select the AWS account tile and select Next.
-
Select the region(s) containing the resources you wish to monitor from the dropdown and select Click here to integrate. The AWS Management Console opens.
-
You are prompted to create a stack from Jit's template using CloudFormation. Permissions information. Configure parameters as indicated below:
- AccountName— (optional) Provide a name for identifying this account from within the Jit platform. If none is provided, the name of the account displayed in the Jit platform will be the account ID.
- ExternalID— Do not change this value.
- ResourceNamePrefix— If desired, you can alter the name of the prefix that is automatically given to resources created by this template.
Check the box to acknowledge that AWS CloudFormation might create IAM resources with custom names.
-
Select Create stack. The stack creation process may take a few moments.
-
Confirm successful integration by navigating back to the integrations page and selecting the Configure button on the AWS tile. Successful integration is indicated by a list item for the account. In the event of integration failure, see Troubleshooting AWS Integration.
Integrating with AWS organizations
To integrate Jit with an AWS organization—
-
Sign in to the root account of your AWS organization.
-
From the Integrations Page, locate the AWS tile and select Connect.
-
Select the AWS organization tile and select Next.
-
Select the region(s) containing the resources you wish to monitor from the dropdown and open the Click here to enable stack sets link in a new window or tab. The AWS Management Console opens. Select Enabled trusted access and navigate back to the Jit platform tab.
-
Select Click here to integrate.
-
You are prompted to create a stack from Jit's template using CloudFormation. Permissions information. Configure parameters as indicated below:
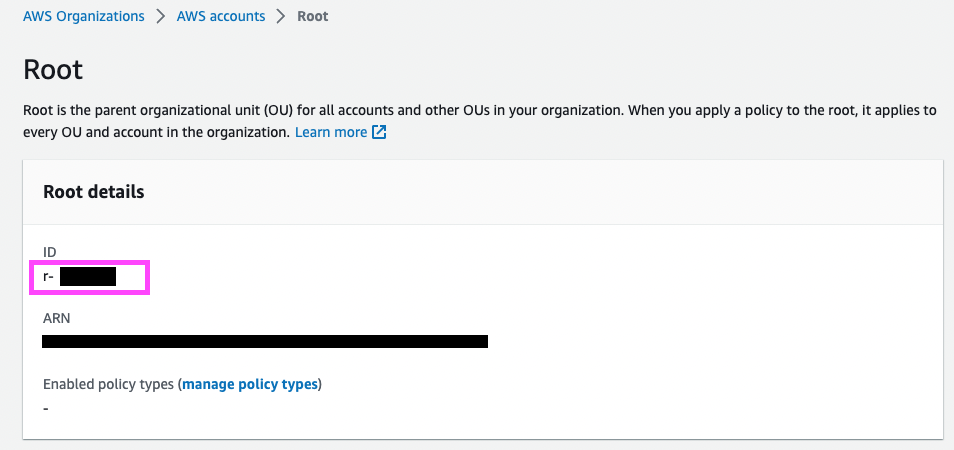
- OrganizationRootId— Enter the root ID of your organization here. You can find this information by navigating to AWS Organizations > AWS Accounts > Root in the AWS Management Console. Note that the root ID always begins with "r-."
- ExternalID— Do not change this value.
- ResourceNamePrefix— If desired, you can alter the name of the prefix that is automatically given to resources created by this template.
Check the box to acknowledge that AWS CloudFormation might create IAM resources with custom names.
- OrganizationRootId— Enter the root ID of your organization here. You can find this information by navigating to AWS Organizations > AWS Accounts > Root in the AWS Management Console. Note that the root ID always begins with "r-."
-
Select Create stack. The stack creation process may take a few moments.
-
Confirm successful integration by navigating back to the integrations page and selecting the Configure button on the AWS tile. Successful integration is indicated by a list item for your management account. In the event of integration failure, see Troubleshooting AWS Integration.
New accounts in monitored organizations
New accounts created within an organization that is integrated with Jit are automatically monitored.
Automate using terraform
To automate the process using terraform - you can follow this repo.
Permissions
As a necessary part of the integration process, Jit creates a new CloudFormation stack in your AWS account/organization from the following template: https://jit-aws-prod.s3.amazonaws.com/jit_aws_integration_stack_template_v2.json.
This template implements the following AWS managed policies to enable read-only permissions required by Jit to run security scans via Prowler.
AWS managed policies—
arn:aws:iam::aws:policy/job-function/ViewOnlyAccessarn:aws:iam::aws:policy/SecurityAudit
For additional information on AWS managed policies, see AWS documentation.
Read-only permission is granted to the following AWS actions—
| Reference | Actions | Resources |
|---|---|---|
| s3 | GetAccountPublicAccessBlock, GetLifecycleConfiguration, GetBucketPolicy | * |
| ds | List* | * |
| ec2 | GetEbsEncryptionByDefault | * |
| ecr | Describe* | * |
| elasticfilesystem | DescribeBackupPolicy | * |
| glue | GetConnections, GetSecurityConfiguration, SearchTables | * |
| lambda | GetFunction* | * |
| shield | DescribeProtection, GetSubscriptionState | * |
| ssm | GetDocument | * |
| support | Describe* | * |
| tag | GetTagKeys | * |
| iam | ListRoles, ListUsers, GetAccountSummary, ListVirtualMfaDevices ListMfaDevices, GenerateCredentialReport, GetPolicy, GetAccountAuthorizationDetails, GetCredentialReport, GenerateServiceLastAccessedDetails, GetServiceLastAccessedDetails, GetLoginProfile | * |
| organizations | DescribeOrganization, ListPolicies*, DescribePolicy | * |
| cloudtrail | DescribeTrails, GetTrail, GetTrailStatus | * |
| access-analyzer | Get, List, ValidatePolicy | * |
| account | Get* | * |
| appstream | Describe, List | * |
| codeartifact | List* | * |
| codebuild | BatchGet* | * |
| macie | GetMacieSession | * |
| apigateway | GET | arn:aws:apigateway:::/restapis/ |
Disabling AWS accounts/organizations
To disable monitoring of an AWS account—
- From the Integrations Page, locate the AWS tile and select Configure to open the Resource management dialog.
- Uncheck the account you wish to disable.
- Select Update.
To disable monitoring of an AWS organization—
- From the Integrations Page, locate the AWS tile and select Configure to open the Resource management dialog.
- Uncheck the management account of the organization you wish to disable.
- Select Update.
Removing AWS integration
To remove an AWS account from Jit—
From the AWS console, navigate to the Stacks tab in CloudFormation and delete JitControlsStack.
To remove an AWS organization from Jit—
- From the AWS console, navigate to the StackSets tab in CloudFormation and select JitOrganizationsStacksSet.
- Using the Actions menu, select delete stacks from stack set. This process may take a few minutes.
- Navigate to the Stacks tab, and delete JitOrganizationsStacksSet.
Adding regions
Jit supports adding regions in addition to those specified in your initial integration.
To add regions, navigate to your .jit repo and add the region(s) to your .jit/jit-integration.yml file as shown in the examples below.
aws:
- account_id: '123456789012'
  account_name: my account
  regions:
  - us-east-1
  - us-west-2
  - # add regions to this list
  type: account
aws:
- account_id: '123456789012'
  account_name: My organization
  regions:
  - us-east-1
  - # add regions to this list
  type: org
Updated about 1 year ago